Track Historical NPS with Salesforce
Learn how to track historical NPS scores in Salesforce.
Table of Contents
Appcues + Salesforce
Salesforce is a robust CRM that provide teams from sales, support, and customer success with a single source of truth for customer data. Use this integration to target and personalize in-app experiences, like monitoring NPS and following up via email, depending on the score submitted.
This build guide will show you how to use Salesforce to:
- understand Flow performance and measure impact
- improve the targeting of your Appcues content
- encourage healthy user behavior
Note: This build guide assumes that the integration between Appcues and Salesforce has been setup. If you need support, this guide will help you get the data flowing!
What data flows? What metrics does this impact?
- The Appcues<>Salesforce integration is bi-directional and updates in real time.
- Appcues data ➡ Salesforce Triggers when an end user interacts with Appcues content (e.g. submits an NPS survey to update a Lead or Contact), sends Appcues events (and Click-to-Track events with Events Broadcaster) to Salesforce, appearing as events on the object’s Activity view.
- Salesforce ➡ Appcues Triggers automatically when the specified object (Lead or Contact) are created or updated, send specified attributes to Appcues as profile attributes to be updated, create new users/attributes upon sync
What metric will this impact?
Historical NPS tracking allows your team to see trends in submission data over time. By sharing NPS scores with your sales and customer success teams, you can improve trial conversion, reduce churn, and improve renewal rate. How? By connecting with unhappy customers and continuing to nurture happy product champions!
How does this work?
There are 3 fields in Salesforce that you can map Appcues data to:
- NPS score
- NPS date
- NPS feedback
This is great, but each new submission overrides any previous entry. If you’re looking to track NPS, here’s a way to do it!
1. Create a custom object
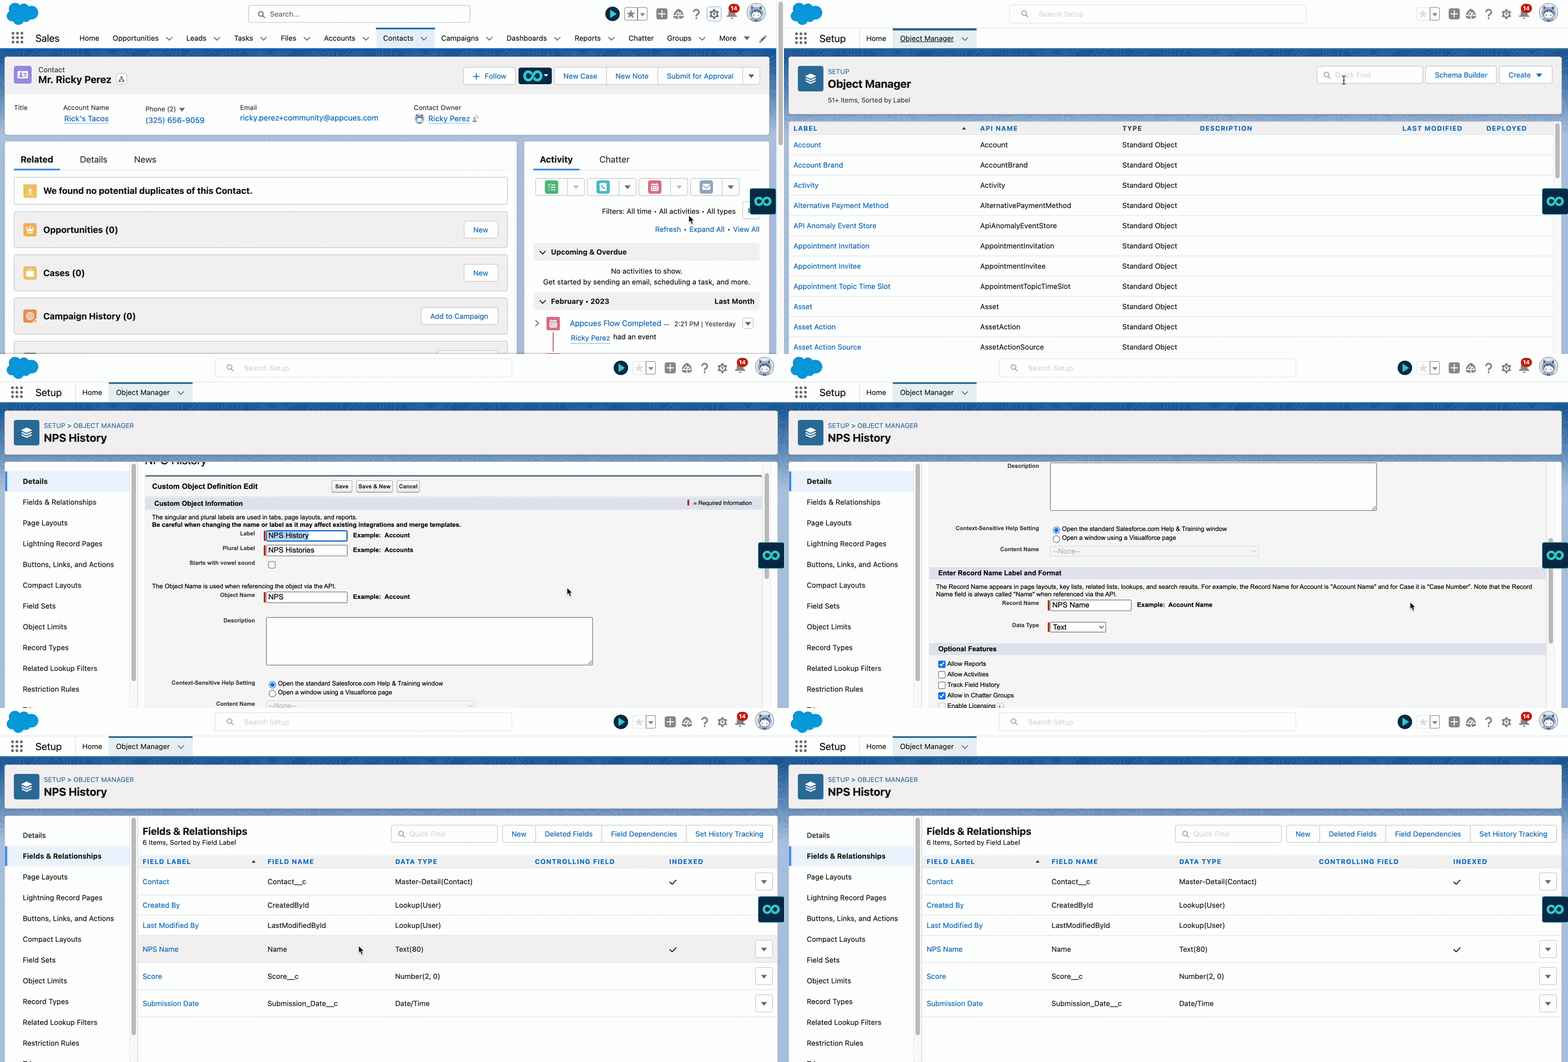
Our custom object, called NPS history, will allow us to store all NPS submissions. Start by heading to the setup icon within Salesforce, and select Object Manager. Create a new custom object, a master detail object relating directly to the contact (or lead, if you prefer).
2. Create NPS score fields
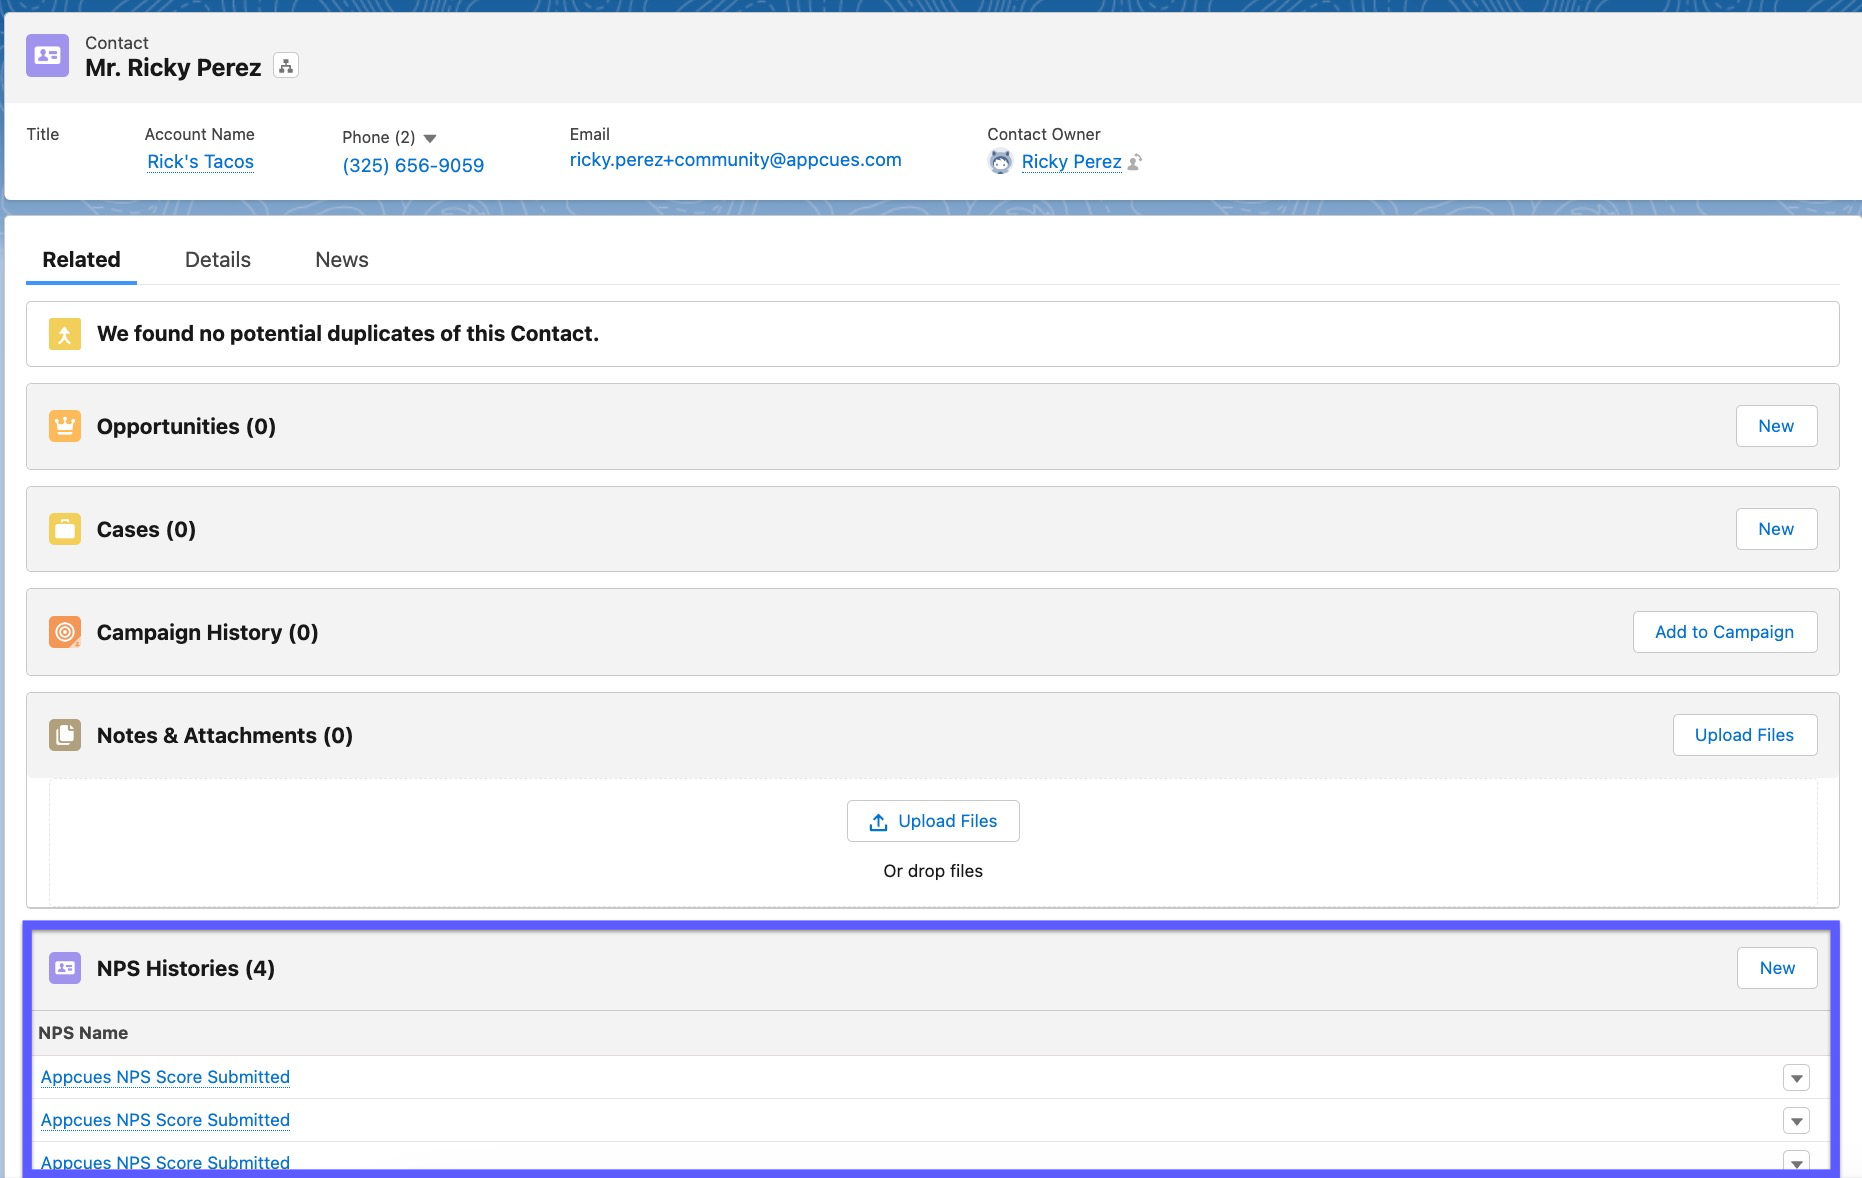
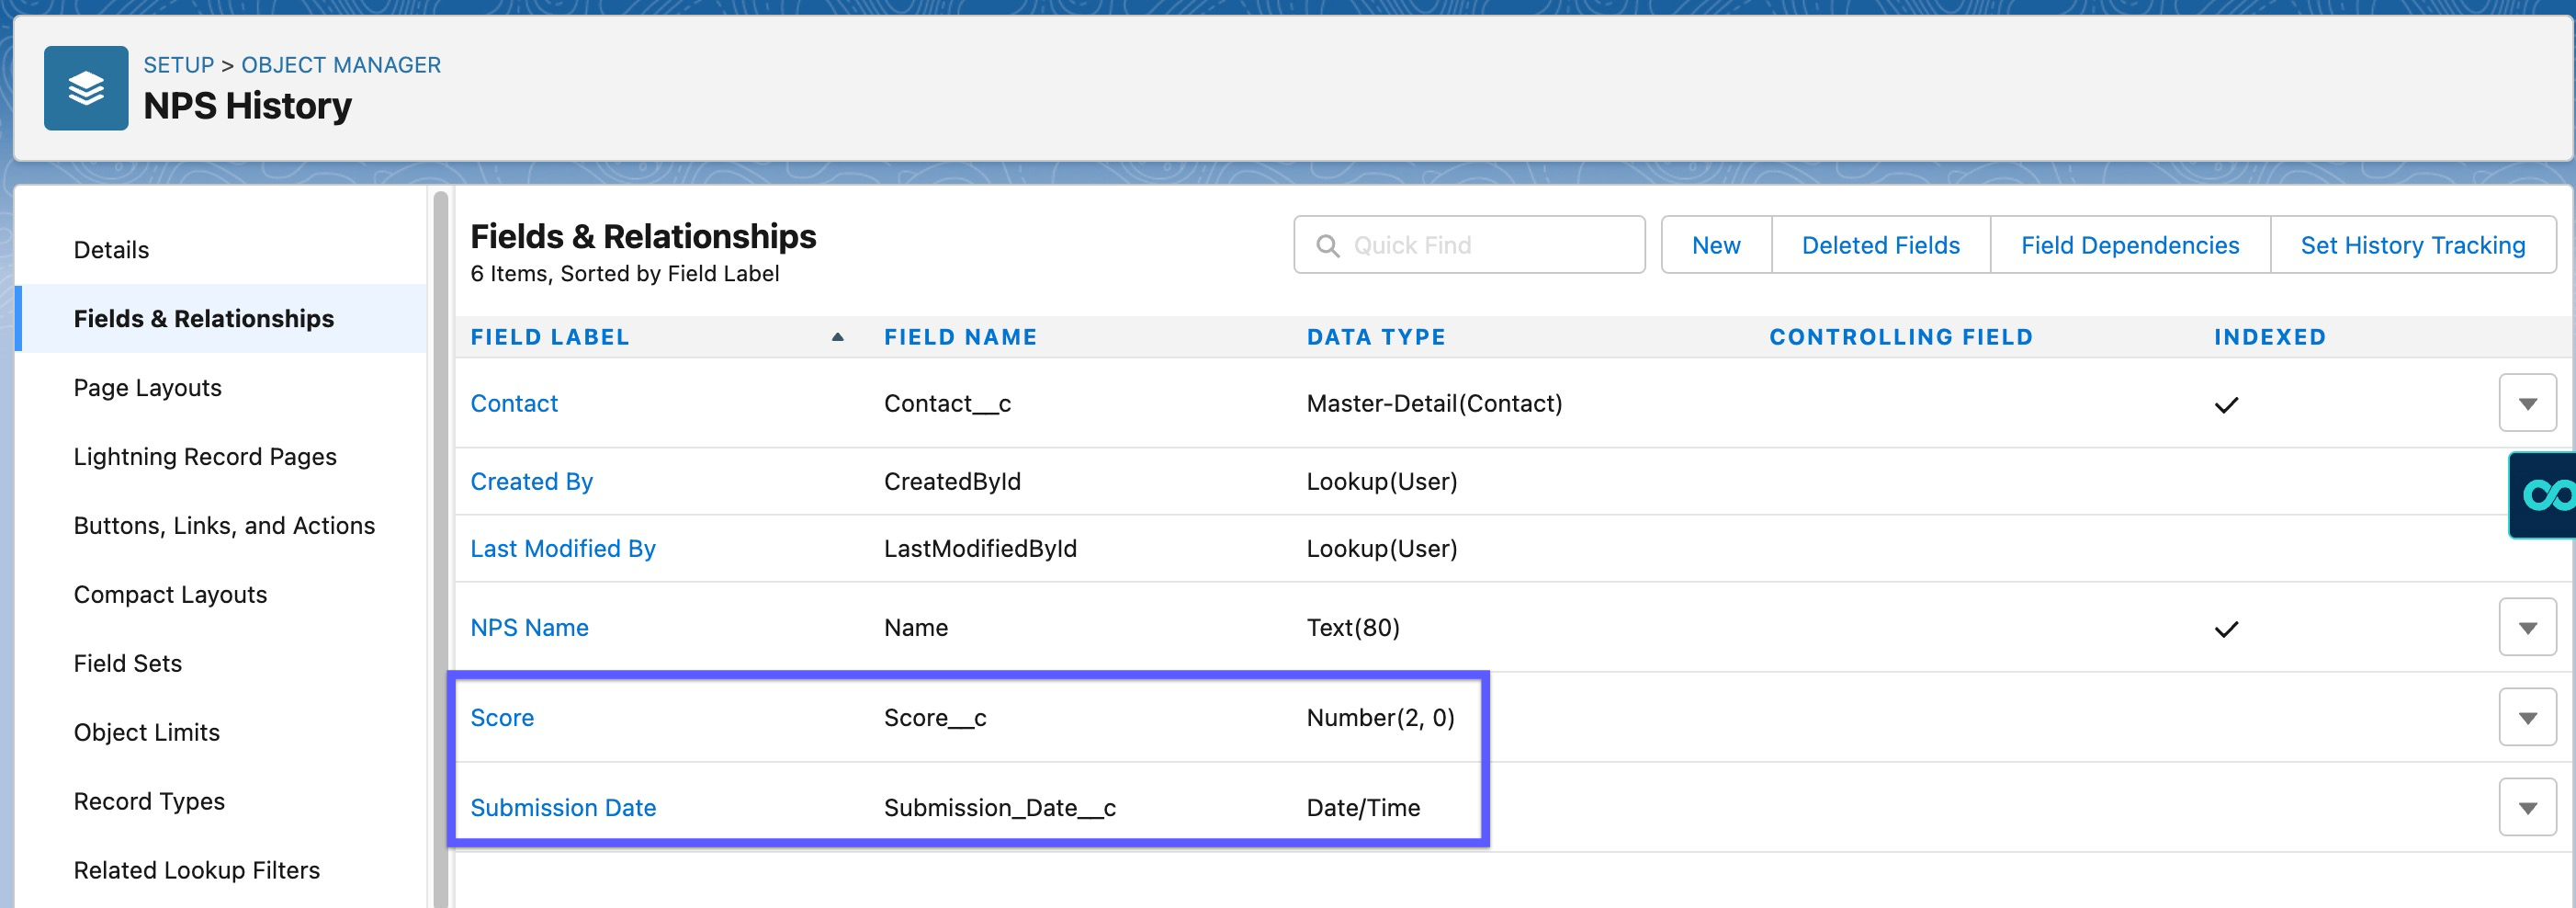
We'll create fields for the NPS score, and the submission timestamp to store this data. There will now be an area on the contact that will display NPS submissions. (Note: You can also store the qualitative feedback by adding a separate field)
3. Build an NPS histories report
The NPS Histories report allows you to see the total score for a contact. Here we've included: submission date, account name, first name, last name, and score number.
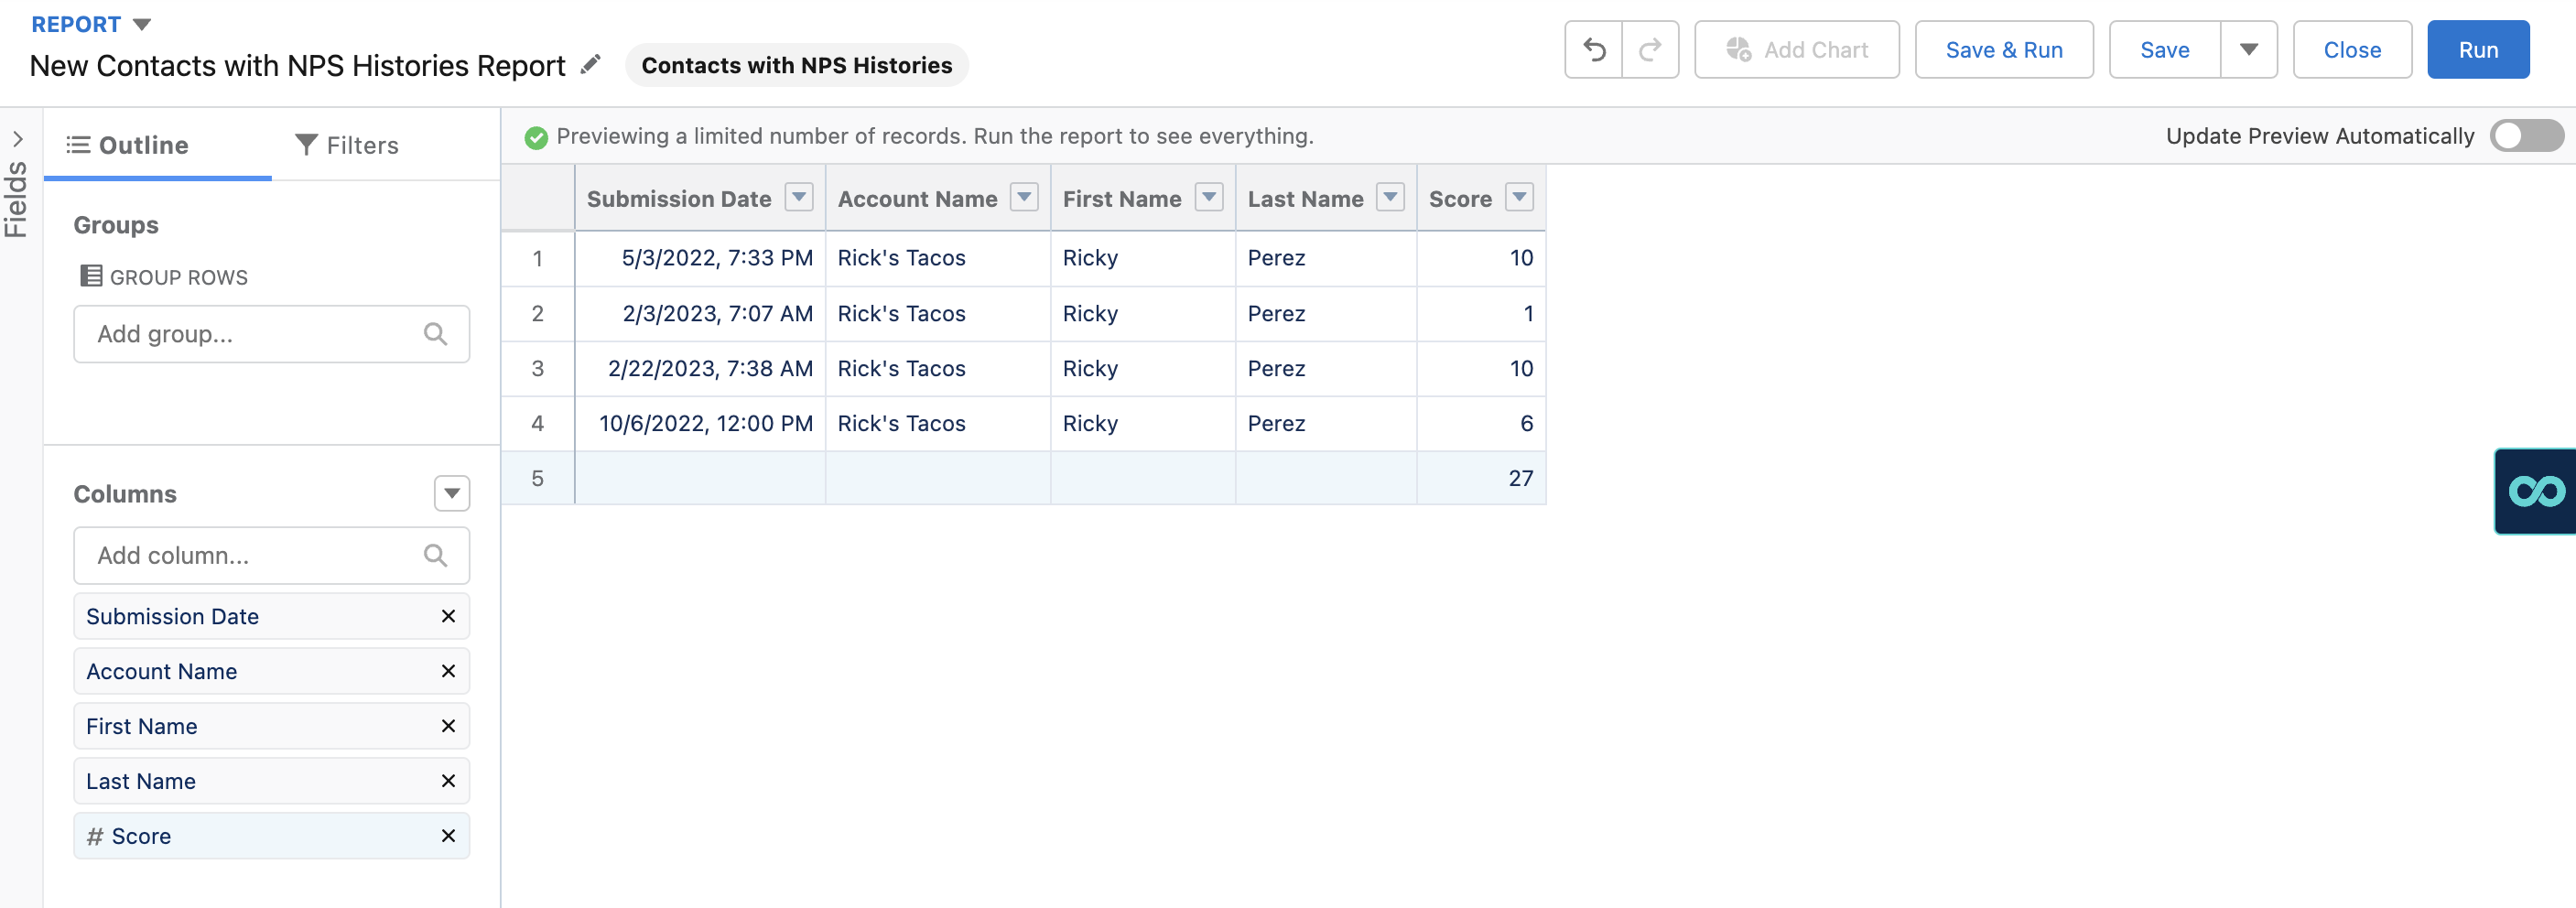
Use Case Tip: This report can be adjusted to view all users within an account’s NPS submissions, or all the accounts within a person’s book of business. Adjust this based on what works best for your team and your users!
4. Create a Salesforce flow
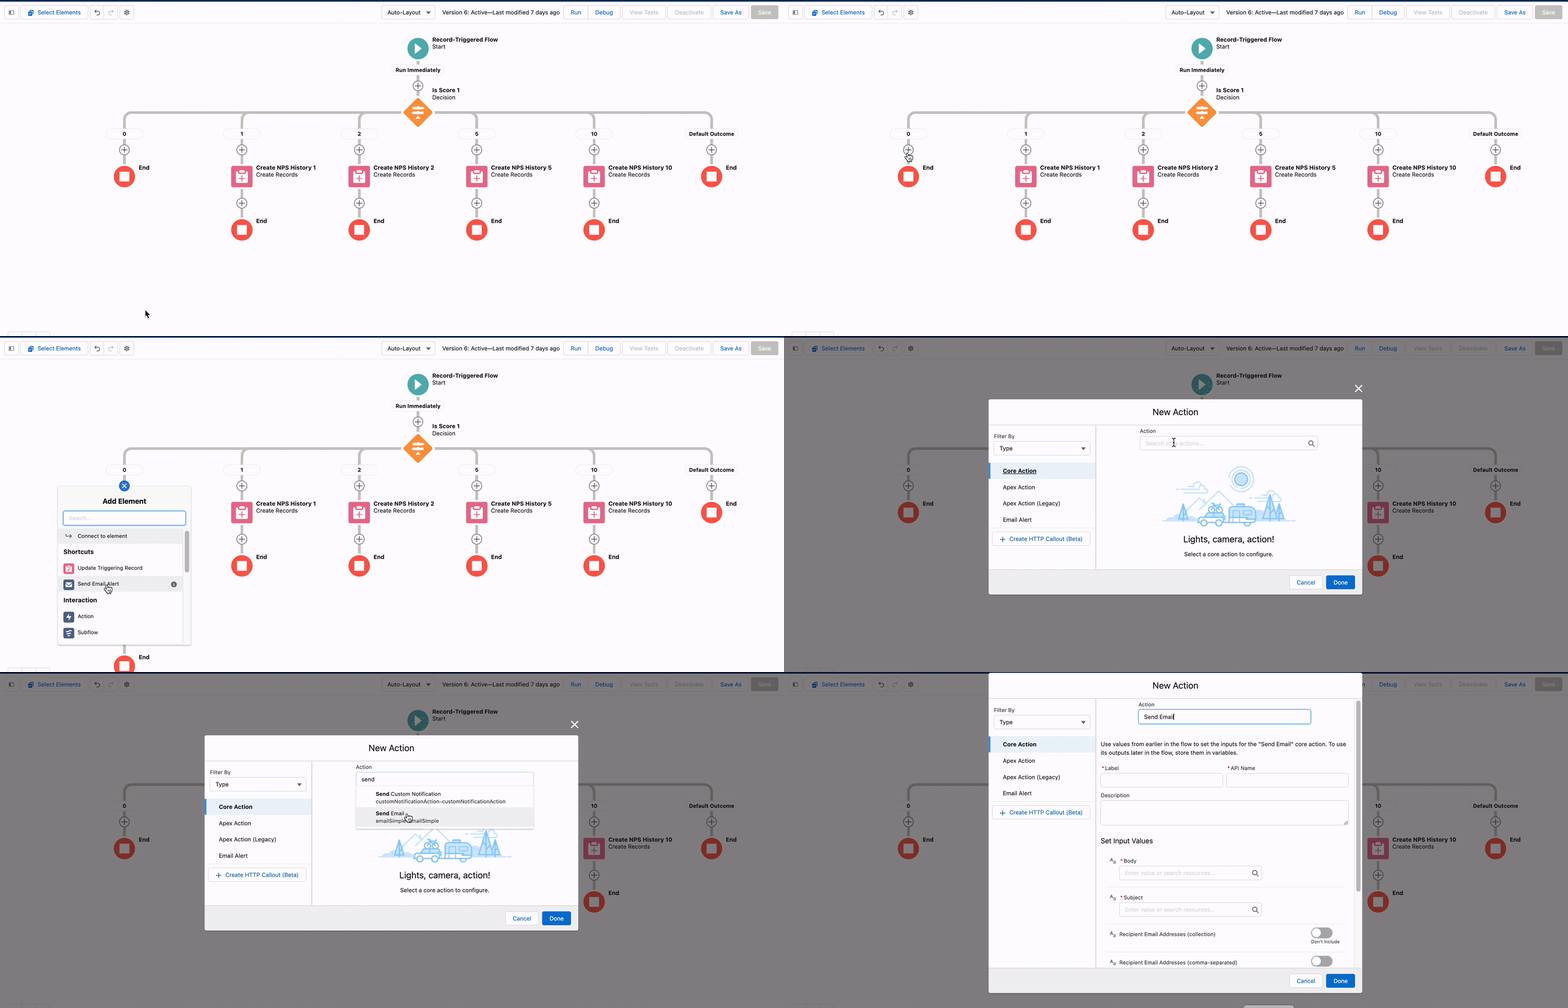
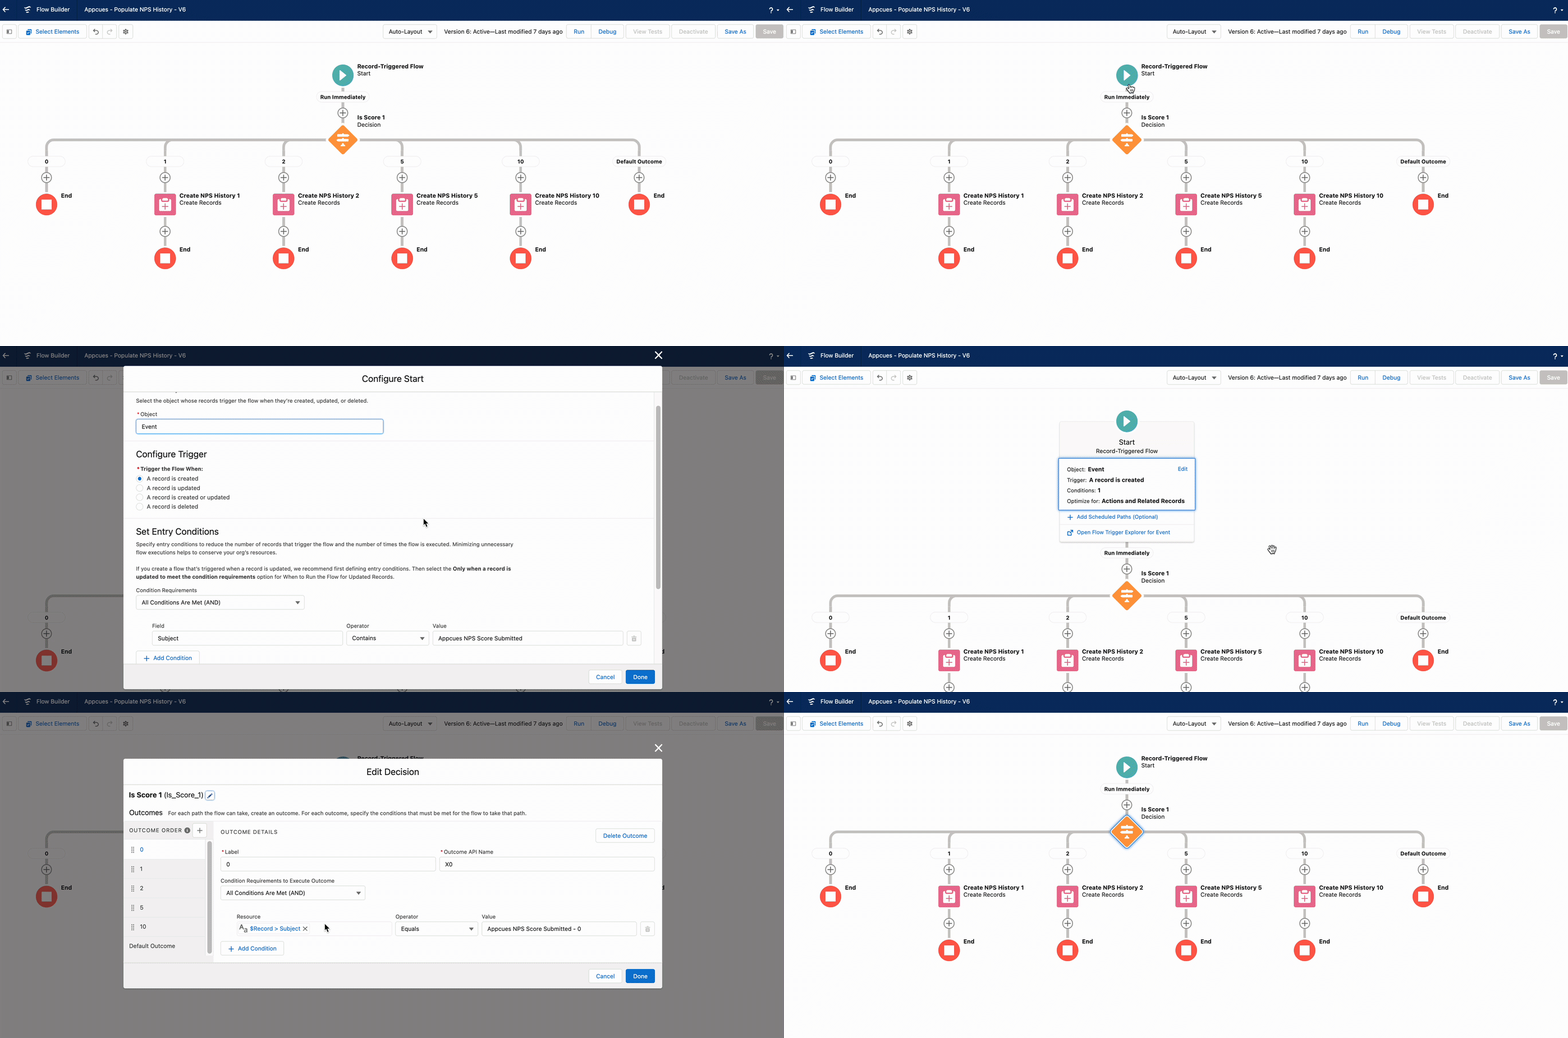
By building a Salesforce flow and decision tree, any new NPS submissions will automatically be added to the NPS history custom object. In Setup, navigate to the Flow Builder within Salesforce. From here, create your trigger, when NPS scores are submitted. By adding a decision tree for each score, 0-10, each score will be added to the NPS History object. The name, score, and submission date will associate to the contact from the event.
5. Take it a step further and trigger emails
Automatically fire messages related to NPS score by adding them to your decision tree's workflow. Below are some ideas!
- Detractors 0-6: book time to connect and work through any issues
- Passives 7-8: book time to review current usage and future plans, offer proactive support
- Promoters 9-10: outreach for beta testing opportunities, pro tips for power users, and send customer swag
