Explore your Accounts
Learn how to find an Account in Appcues and explore the data and activity associated to them.
Table of Contents
What is the Account's list?
To find a specific Account (group), or to browse through a list of all the Accounts (groups) that have used your product, you can use the Account List.
The Account List is exactly what it sounds like - a list of all the Accounts that have used your product. This list lets you explore the different Accounts (aka groups) that are using your product, including any attributes you’re capturing for your Accounts. Here, you get a better understanding of what types of Accounts are using your product. You’ll also be able to use the Account List to search for a specific Account and drill down into that Account to understand its users and their activity.
Access the Accounts list
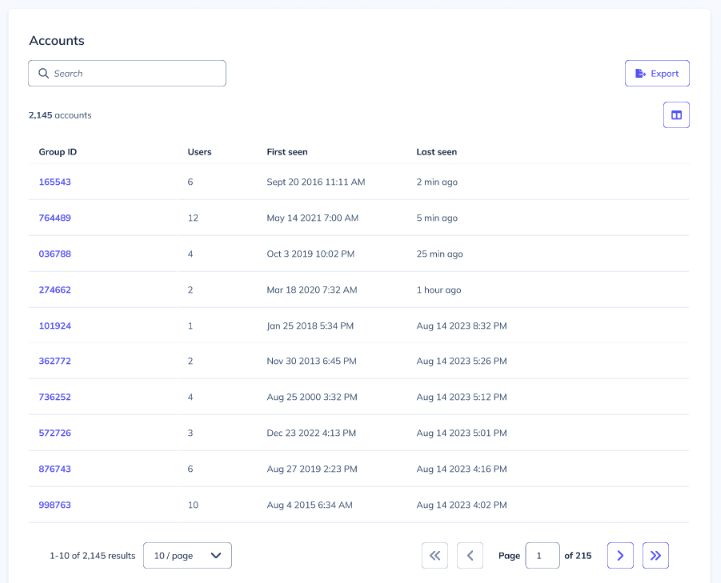
You can access the Accounts List by clicking the Audiences link from the navigation menu on the left of your screen. From there, click the Accounts tab to access the Account List.

By default, you’ll see four columns on the Account List:
- Group ID: The unique identification number for an Account (used to identify a group of users who are associated with this Group ID)
- User count: The number of users who are associated with this account, whether they have been active in your product, or simply have a profile attribute and are associated with this Group ID
- First seen at: The very first time a user within this Account was seen in your product (where “seen” = identified by the Appcues SDK)
- Last seen at: The most recent time any user within this Account was seen in your product (where “seen” = identified by the Appcues SDK). By default, the Account List table is sorted by most recently seen Accounts.
Note: For existing Accounts, this list will be updated near real-time. Any new Accounts will appear in the Account List within 10 minutes of being identified by the Appcues SDK.

Each Account corresponds to a specific Group ID. To explore the different accounts that are using your product, you must be using the mobile or web SDK’s group calls. Learn more about group data here.
Customize the view
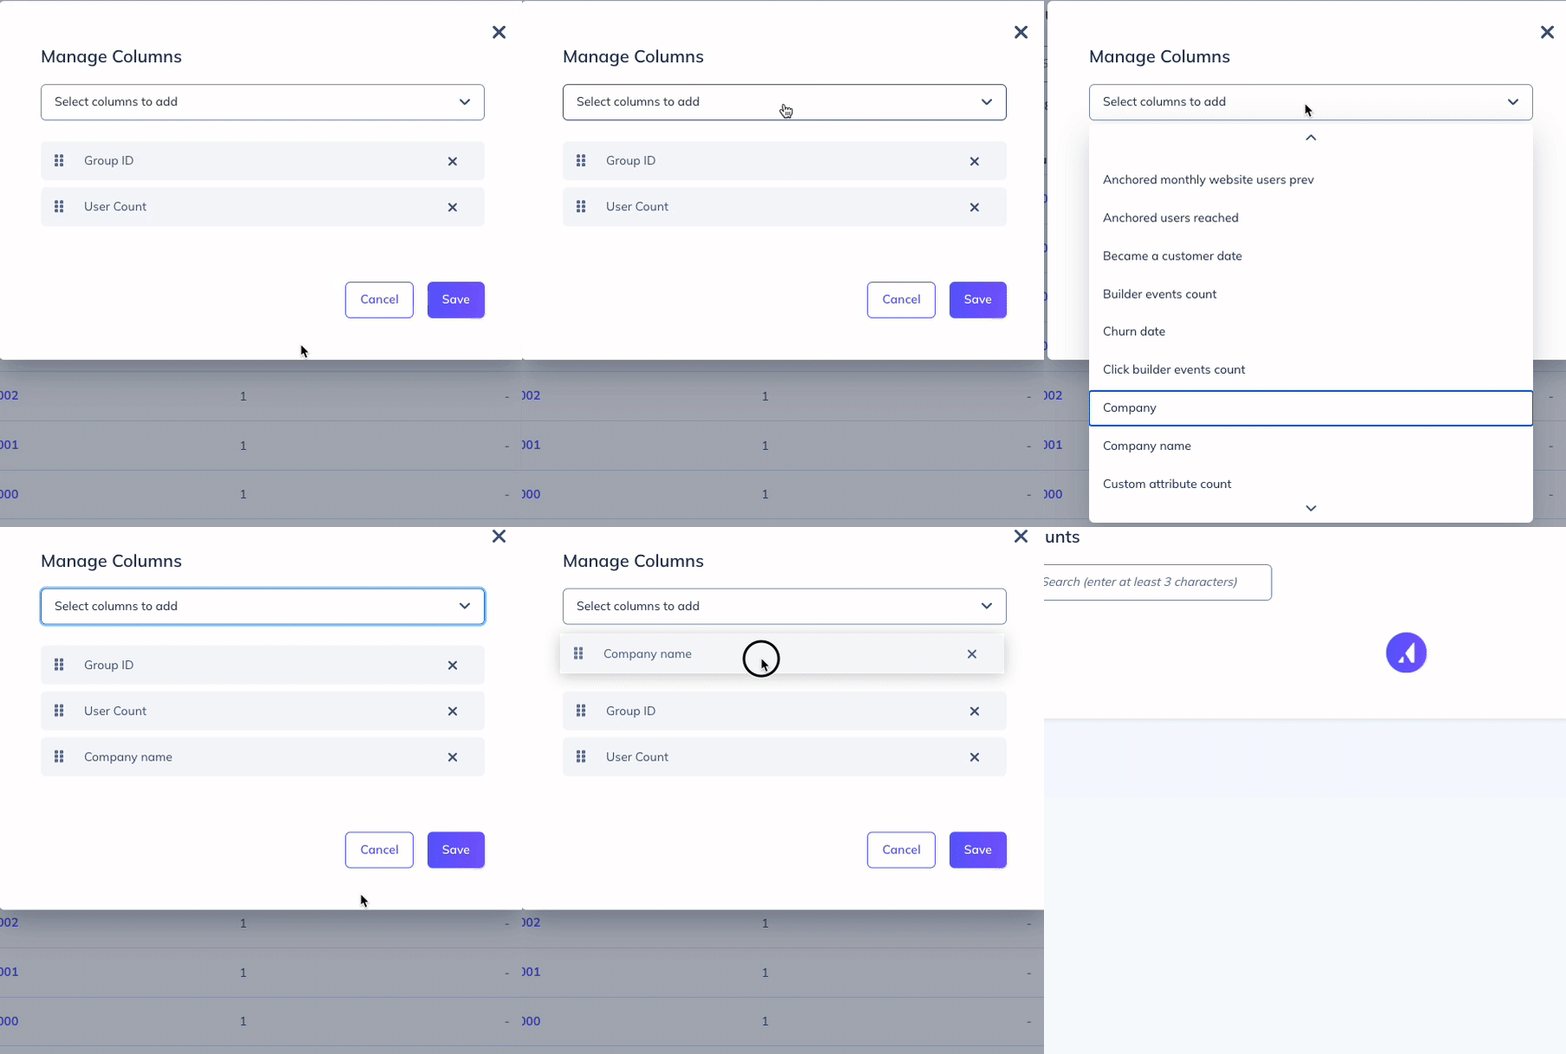
You can customize the columns that you want to display on the Account List, except the “Last seen” column. This column will always be displayed as the last column in the table. By clicking on the Manage columns icon, you can select up to 9 additional columns to display, with each column represented by a group property.

By default, the first column will be Group ID. The Group ID values in each row, representing the Group IDs for each Account, is a clickable link. Clicking this link will take you to the Account Profile for that particular Account, where you’ll have access to insights specific to that Account (such as the group property values for that Account, the list of users for that Account, and metrics to help you understand the engagement and activity for users within that Account).
If you want to use a different group property, other than Group ID, to identify your Accounts, all you need to do is add a column to the table with your preferred group property and move that group property to the first position. We suggest using a group property such as Account_Name or Company_Name for the best experience.

Note: Whichever group property is displayed as the first column of this table will also be displayed as the header/title of each Account Profile. Using a property like Company_Name will make it much easier to identify which Account’s details you are viewing.
Search for an Account
Once you’ve selected which columns you want to display, you can search for an Account (or multiple Accounts) using the search bar. You must enter at least three characters to search for an Account.

You can sort the list by any of the columns on the page by clicking the header of the column. Once you’ve found the Account you’re looking for, click on their Group ID link to access their profile.
