Recruit Users for User Interviews
Use this guide to learn how to use Appcues to conduct user interviews about your product.
Table of Contents
With Appcues you’re able to recruit users in your application to conduct user interviews. These user interviews can be to gather feedback on an existing feature, or new feature, or understand the overall experience the user is having at that particular point in time.
Build Guide
Step 1: Add a Slideout
The Slideout pattern is perfect for non-intrusive announcements, like surveys, that let your users decide whether they want to commit further or not. Is a great way to nudge your users and allow them to decide if they want to participate and answer your survey questions.
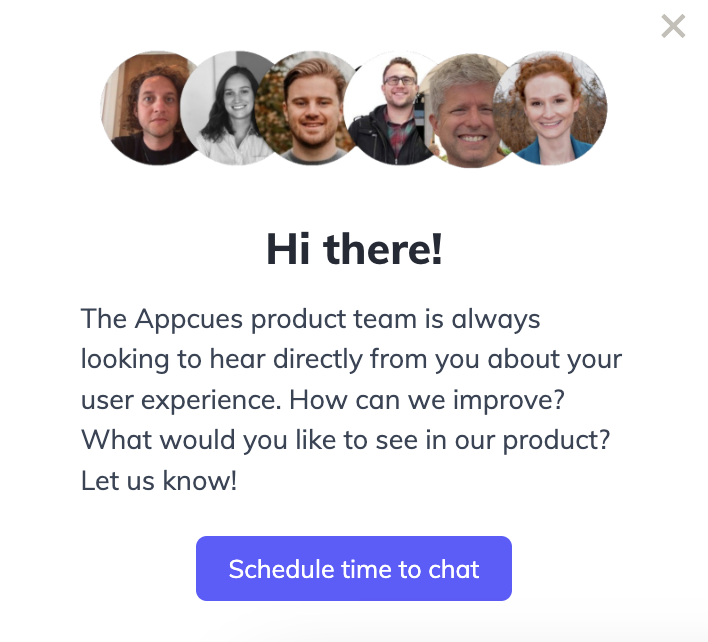
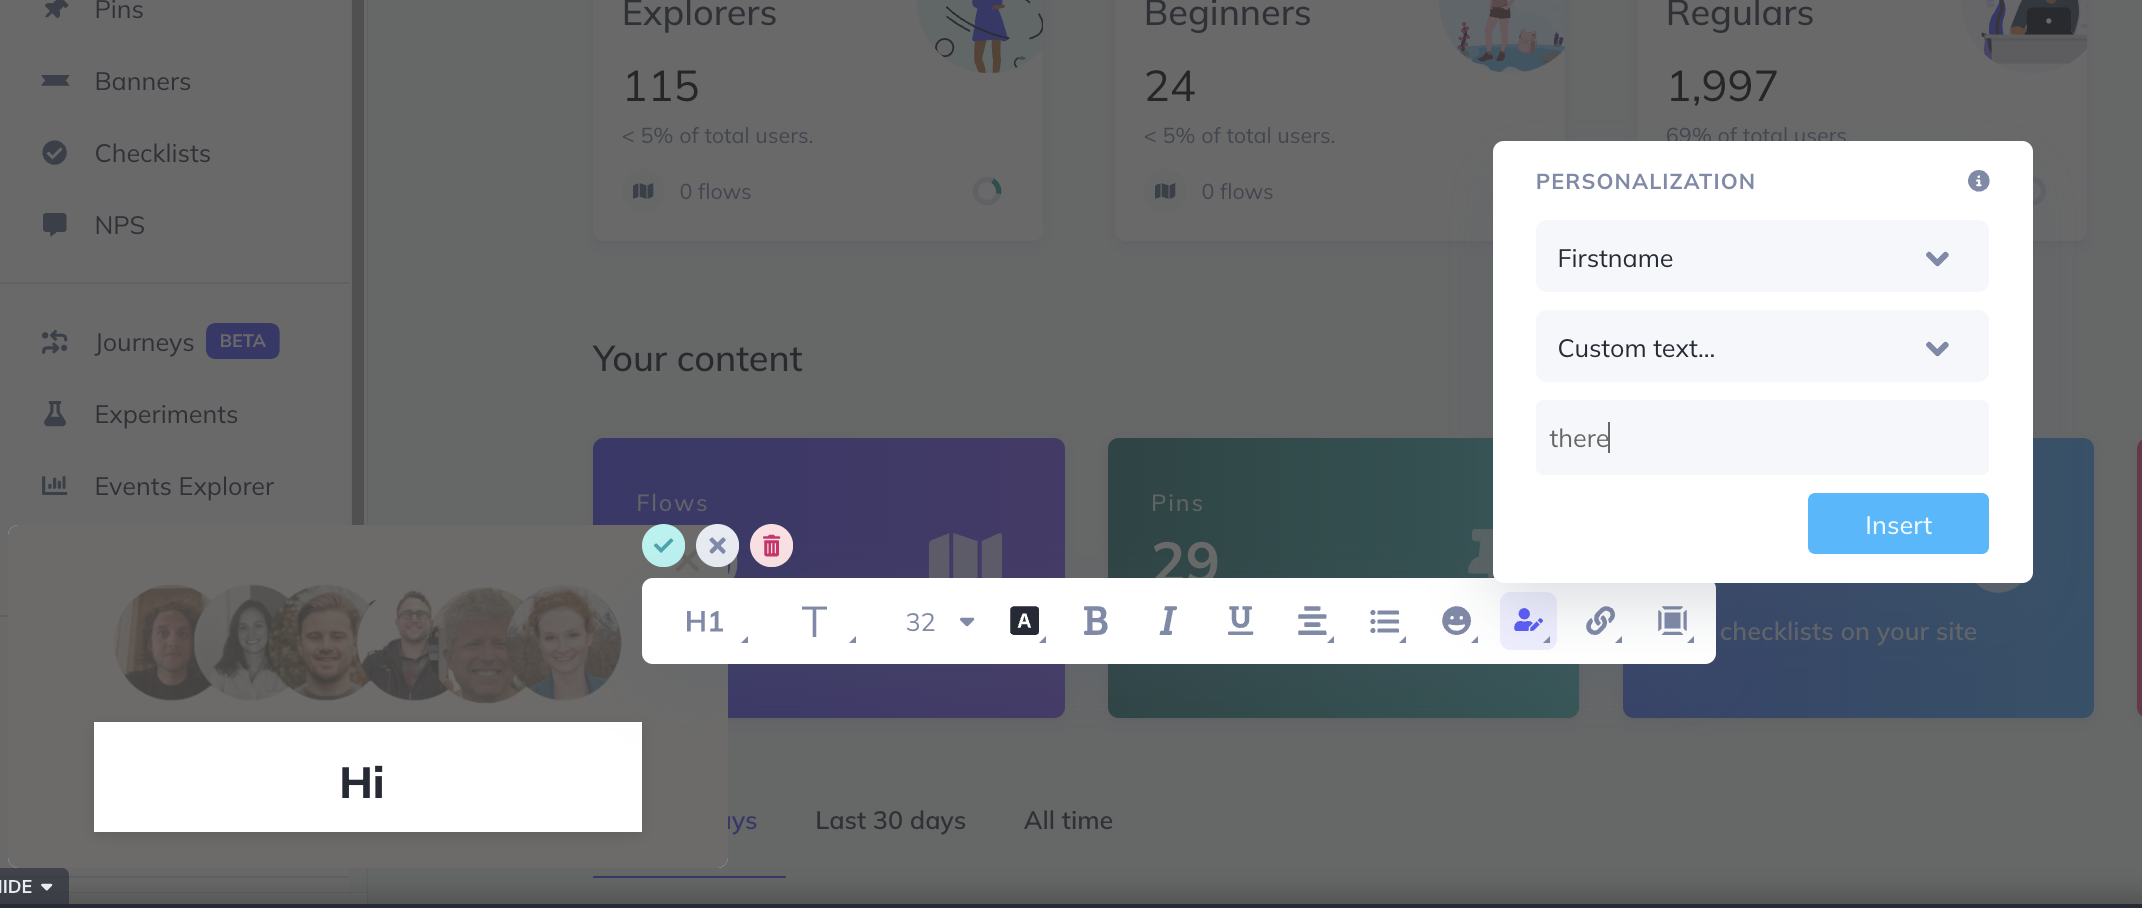
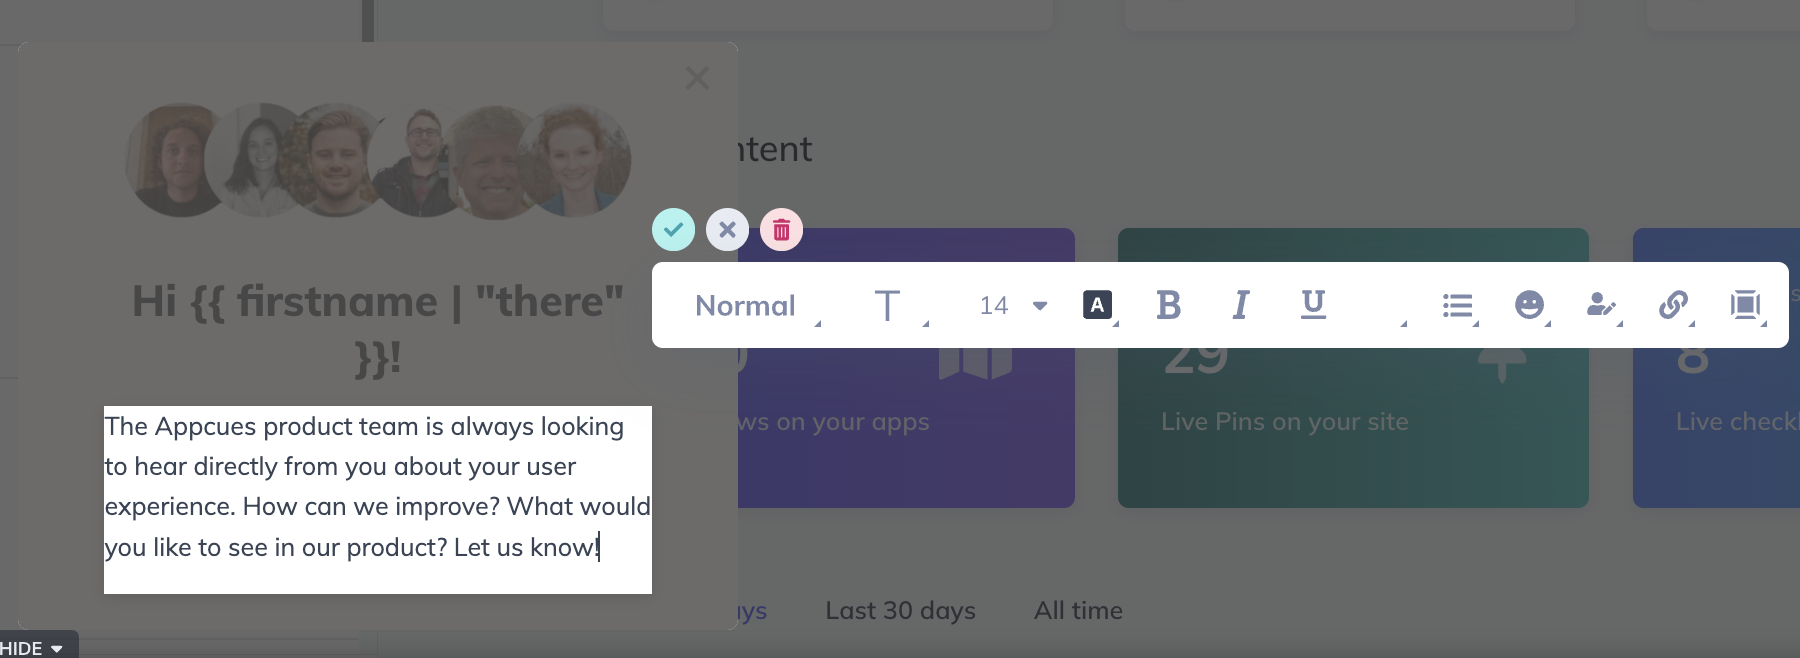
Let's start by adding an image at the top. In this case, we're using an image with our product team. We'll also use a user property to personalize our flow and use the name of the customer. As a fallback, we'll use ‘there’. This fallback will show in case the user doesn't have a value for the first name.
Below this, we'll add a bit of text explaining what we're looking for.
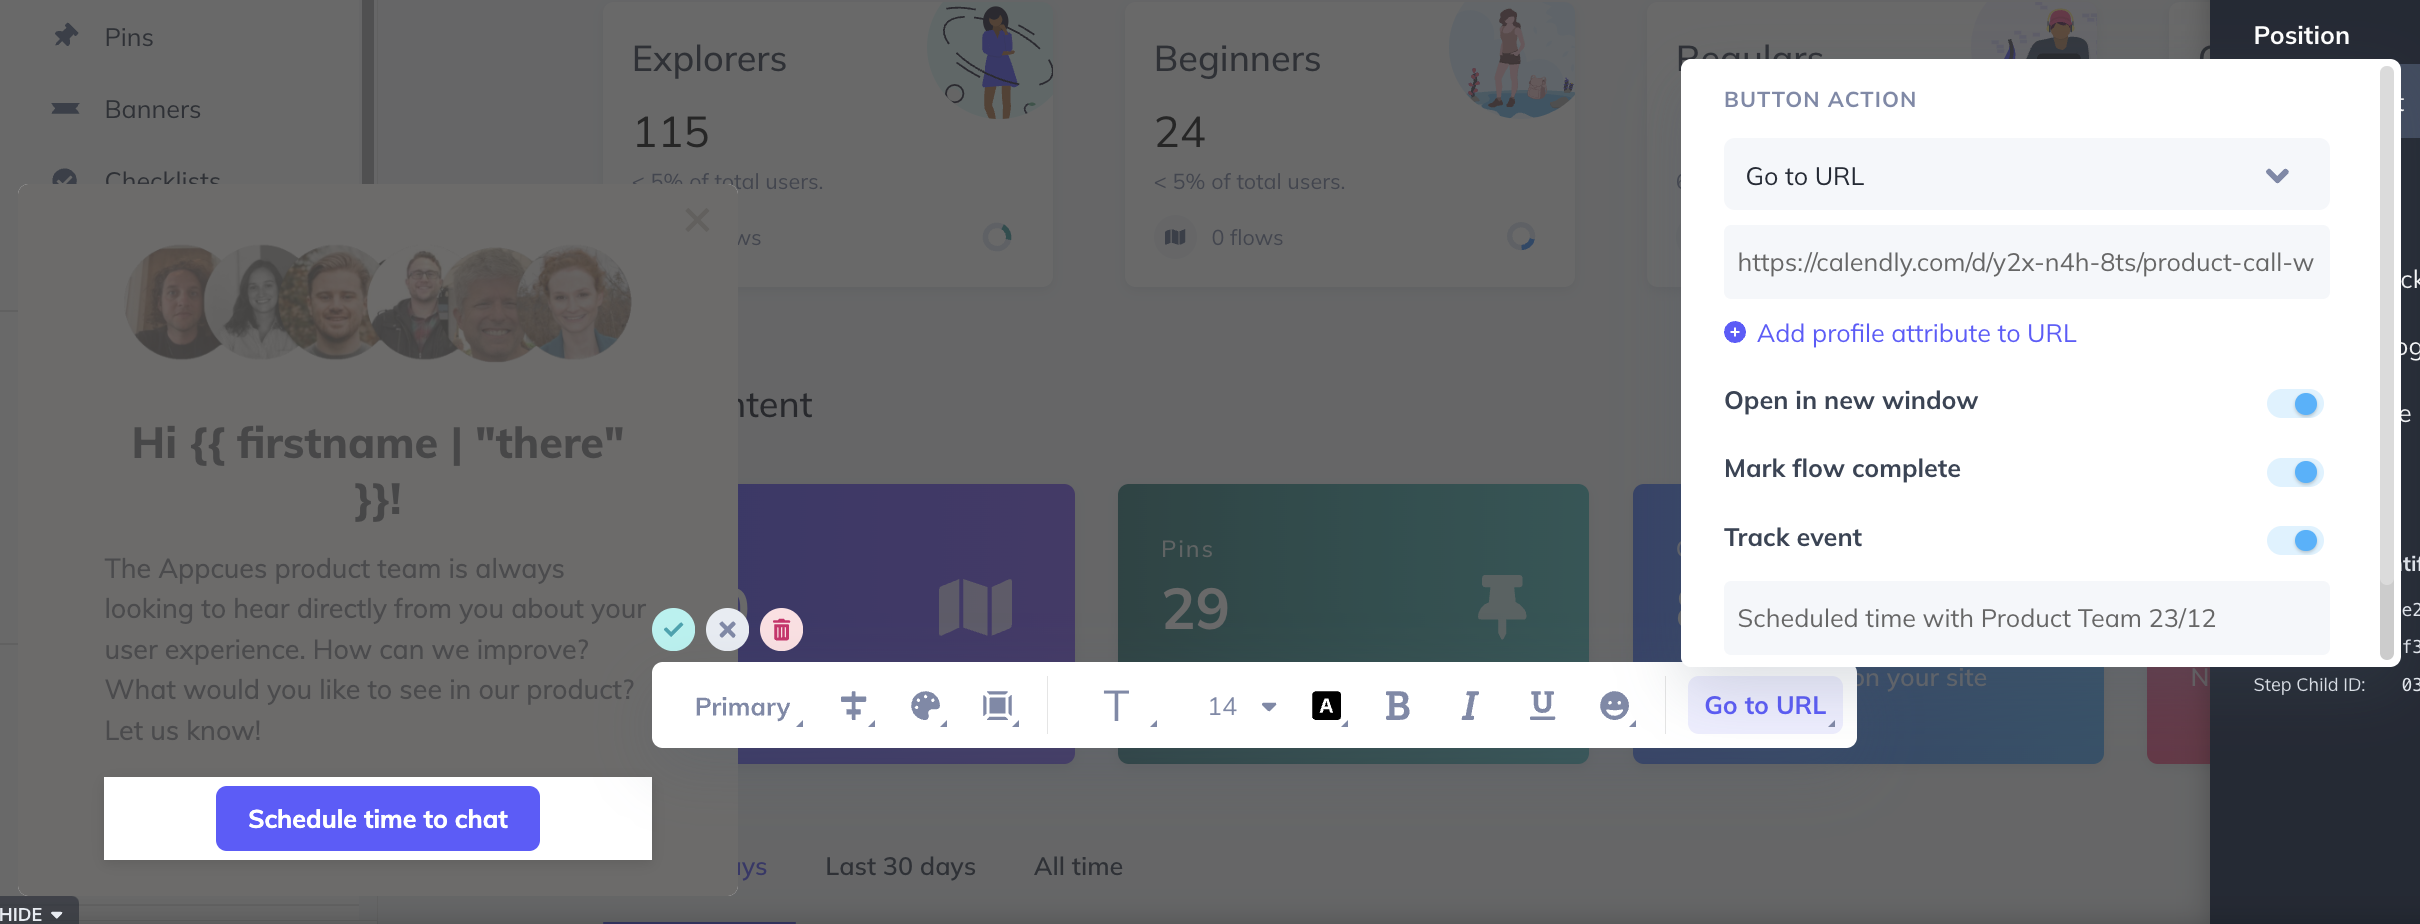
Finally, add a button. This button will be set to go to a URL, in this case, to our booking tool Calendly. We've created a shared calendar for this purpose beforehand and now we only need to link it here. We're setting the URL to open in a new window and optionally, we can also track an event so we know which users clicked on it.
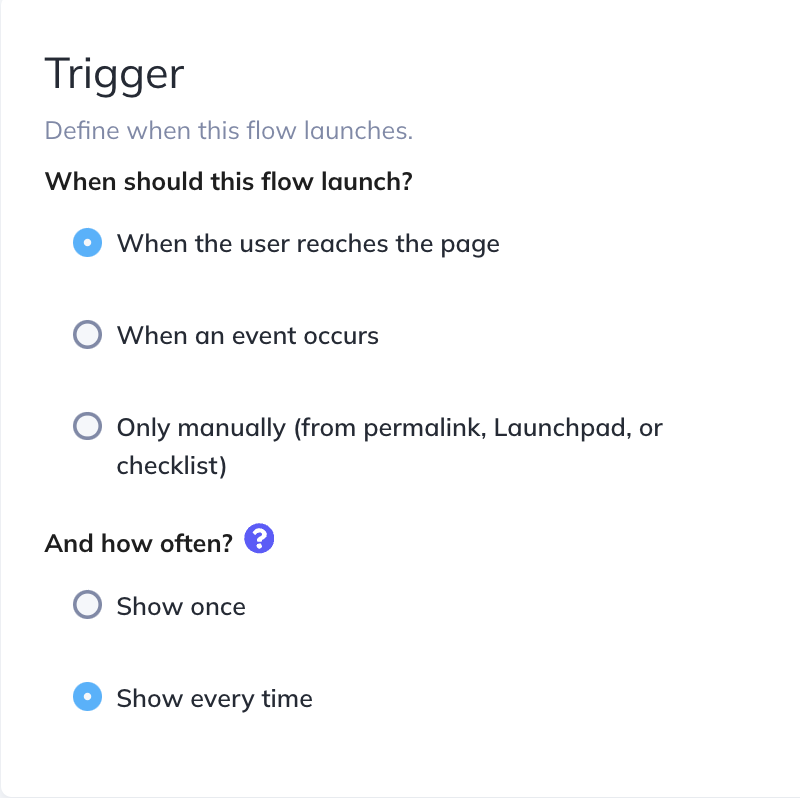
Step 2: Target your Flow
Once all the content is created, click on Target & Publish in the Builder and that will take you to your settings page. On the trigger section, we'll say the flow should launch when the user reaches the page and we'll set it to show every time. Further below, we'll define exactly how often the flow will show.
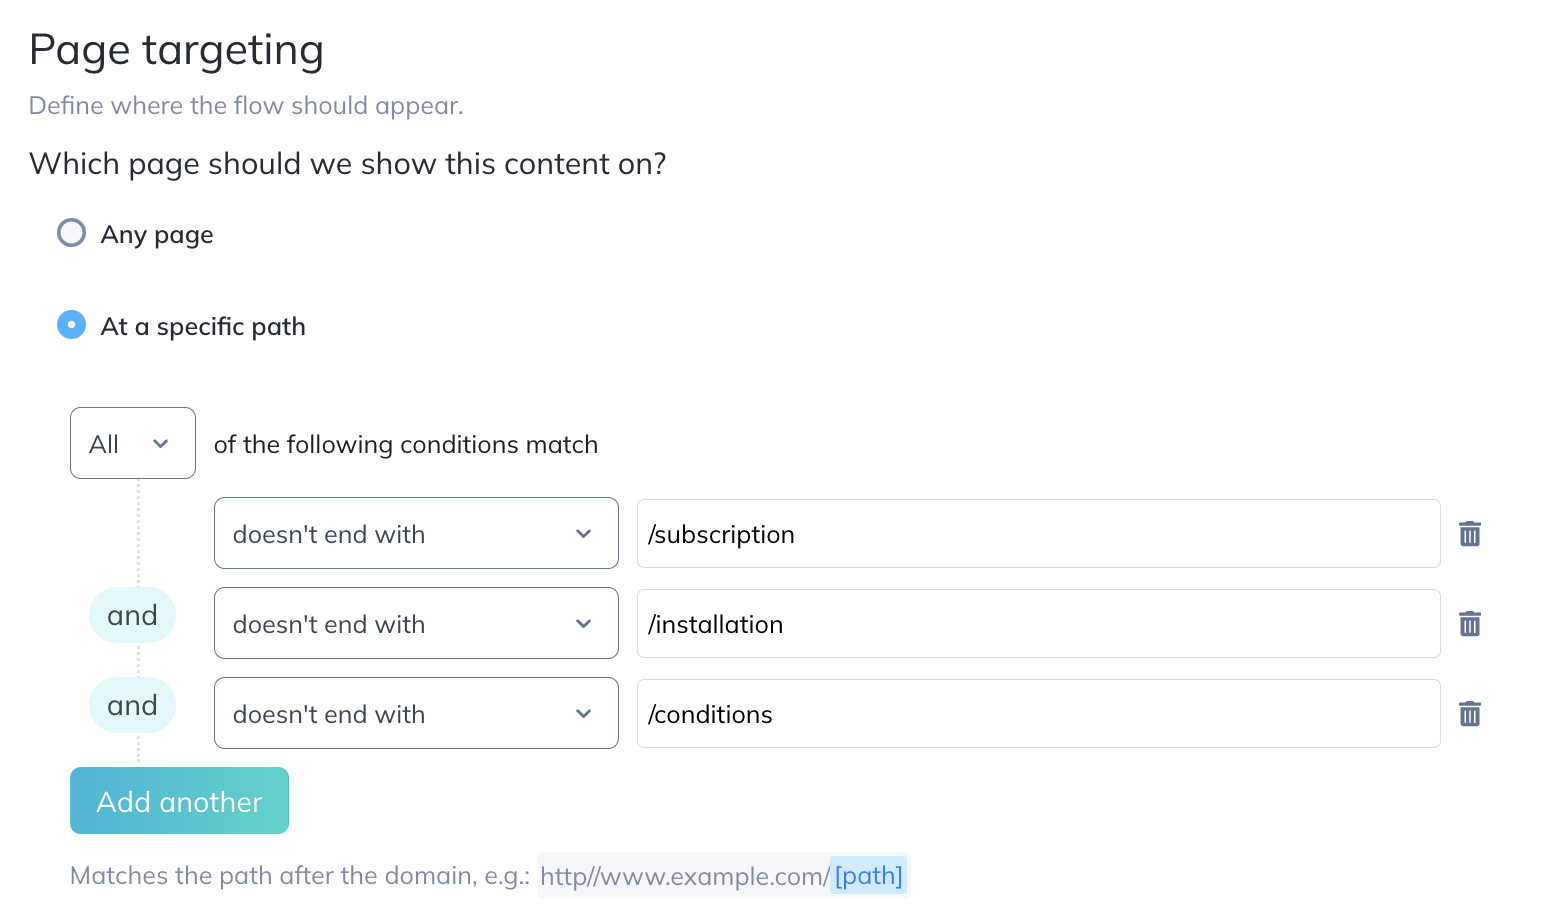
In the page targeting, we're going to target all pages except a few ones that are instrumental like the subscription page or the installation page.
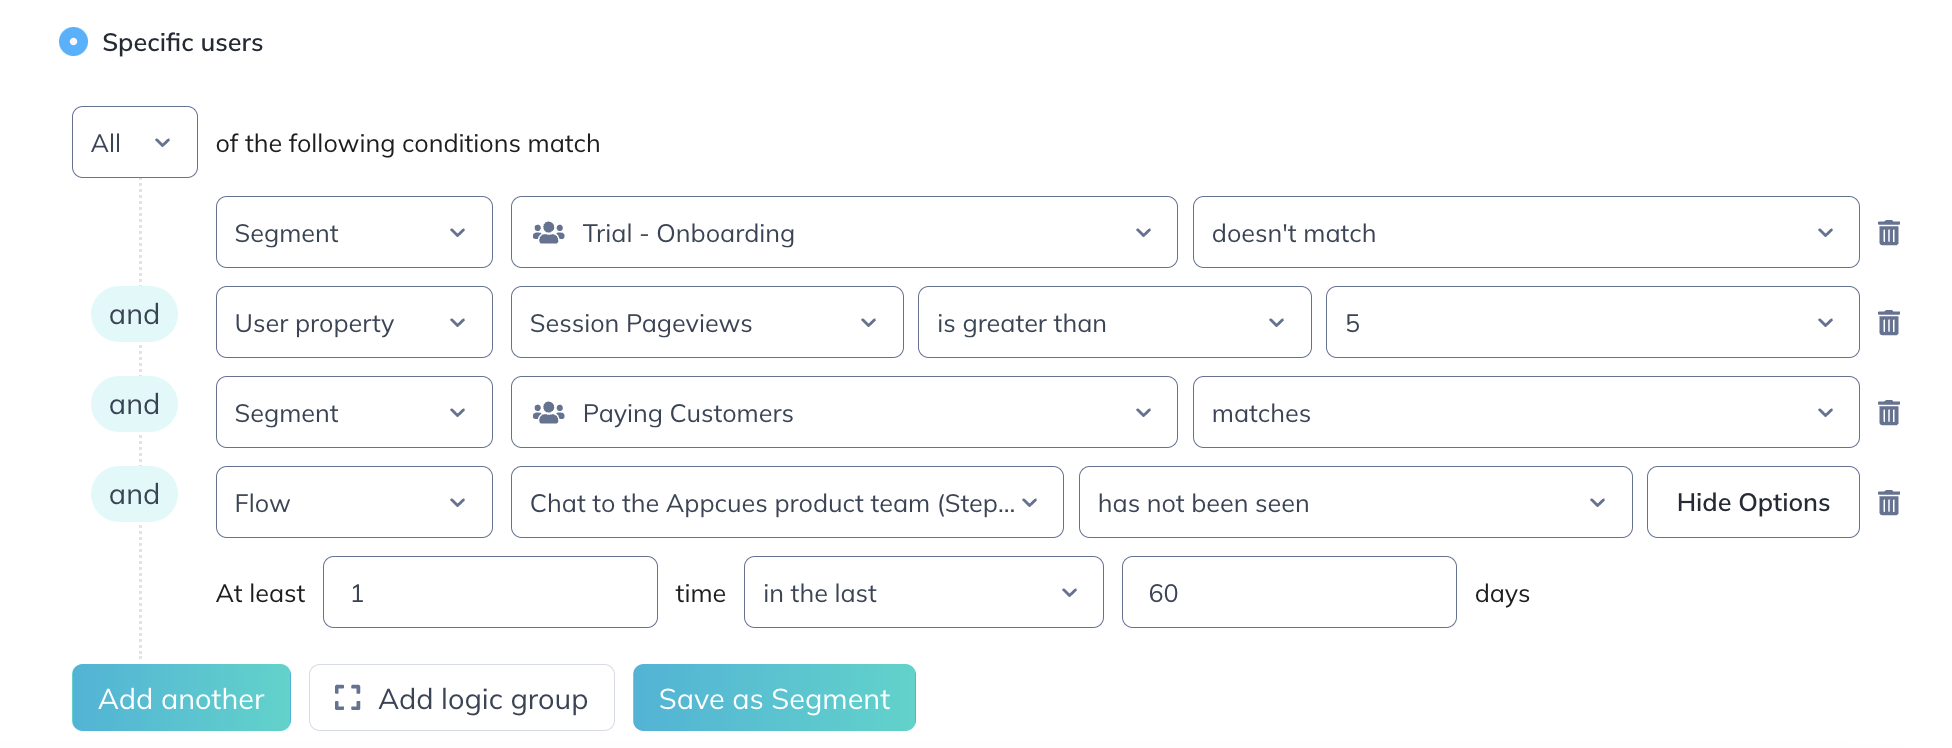
In the audience targeting, we're going to not only define which users should see this flow, but also how often it will show. To create a cadence in which a flow should show more than just once, we always need to set it to show every time in the trigger section and then define it further in the audience section.
This is done by filtering the current flow we're editing and saying that the flow should show every 60 days, as we can see in the last condition below. For more information on this, read this article Setting up Flow Frequency.
We're also targeting this flow to two segments. One is a segment of trial users that we don't want to match and the other is a segment of paying customers that we want to match. We're also adding a condition to this flow so that it only shows after 5 pages have been visited in that session.
Finally, we're also adding this flow to the Launchpad. This way, anytime the user is on a page that is included in the targeting above, and matches the audience rules, the flow will be displayed in the Launchpad.
