Buttons
Learn more about buttons, how to customize them, set an action, track an event and update a user property.
Table of Contents
What are Buttons?
Buttons are one of the components you can add to your experiences. Buttons are highly customizable and can be added to all kinds of patterns: Modals, Slideouts, Tooltips, and Hotspots. With buttons, you can dictate the type of action it will take, you can track an event and you can update a user property.
Add a Button
Open your flow in the Appcues Builder and, on the step you want to add a button, click on the '+' green icon and select 'Button'.

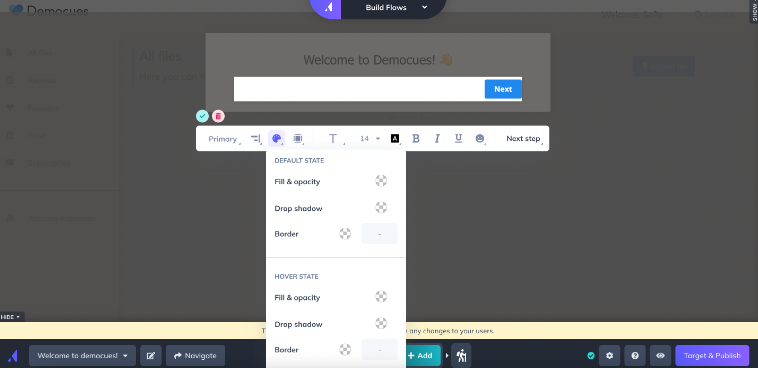
Customize Buttons
You can customize your buttons directly in the Builder.
- You can change the font and text options
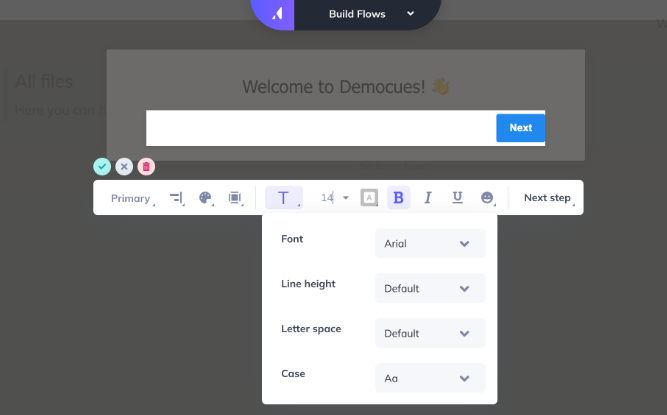
- You can adjust padding, margin, and corner radius.

- You can adjust the fill color, border color, and drop shadow for the default state and the hover state of the button.

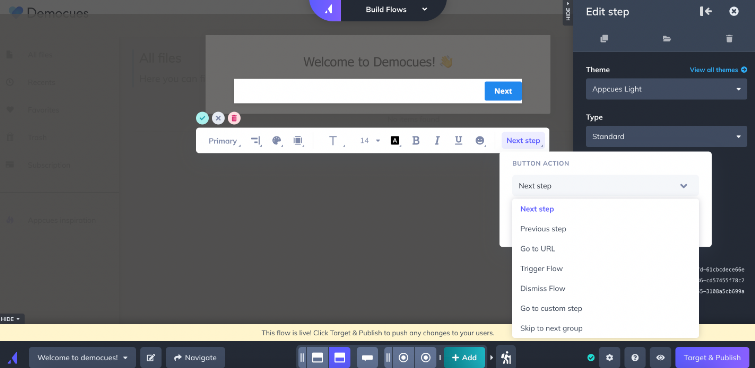
Button Actions
Buttons can have a set of actions: 'Next step', 'Previous step', 'Go to URL', 'Trigger Flow', 'Dismiss flow', 'Go to custom step', 'Skip to next group'.
Some notes about these actions:
'Previous step': This option only works for steps within the same group (to learn more about groups, read our documentation Groups and Step-Groups).
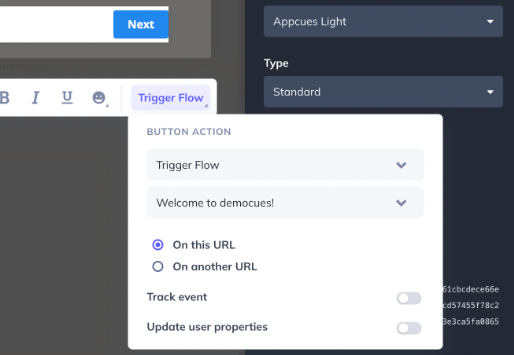
'Trigger flow': You can choose to trigger the flow on the same URL or on another URL. If choosing 'on another URL', it must be within the same domain of the present flow. It's important to note that this option cannot be used to relaunch the same flow. If you'd like to have a button restart a flow, you can create two copies of the same flow where the trigger flow button in each launches the other version of the flow.
NOTE: Whenever a user interacts with a button that has a Trigger Flow action the flow will be Marked As Complete automatically.
'Go to custom step': This option only works to go to a step within the same group (to learn more about groups, read our documentation Groups and Step-Groups).
'Next step': When moving from a step to a 'Navigate' step, this should be the button action to use. This button action is also what should be used when dealing with steps that are forms, even if on the final step of a flow. This option doesn't exist in Hotspots because Hotspots will show simultaneously when grouped. The option 'Skip to next group' can be used to move from a Hotspot to the next step group.
'Dismiss Flow': This button action dismisses the flow. If a step has a button with this button action in the middle of the flow, it will end the flow right away and will not progress to succeeding steps. This should not be used when a step has forms as Appcues will not be able to submit your user's submission correctly. Use ‘next’ to ensure all responses are captured. More on this here.
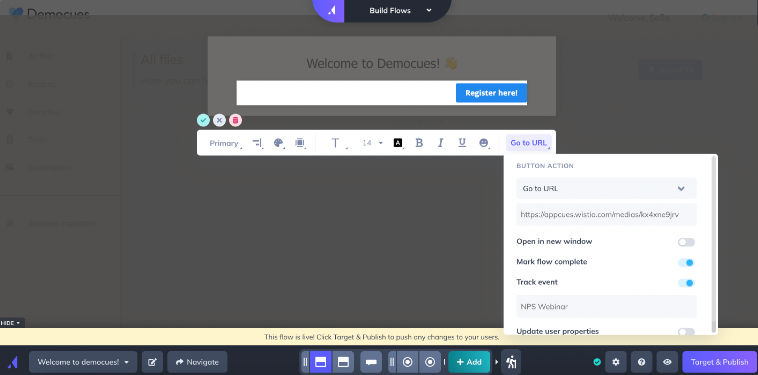
Track Event
You can select the option to 'Track an Event' on any button that you create. With this option, you can monitor the clicks on that button and also use it to target other experiences. In the example below, the button is asking users to register for a webinar and the event tracked is 'NPS Webinar'. This way, you can for instance check how many users clicked the button vs how many registered. These events are considered Application Events will show under Application Events in Events Explorer.
For a deeper dive into Events tracked with buttons, check our documentation: Track an Event with a Button
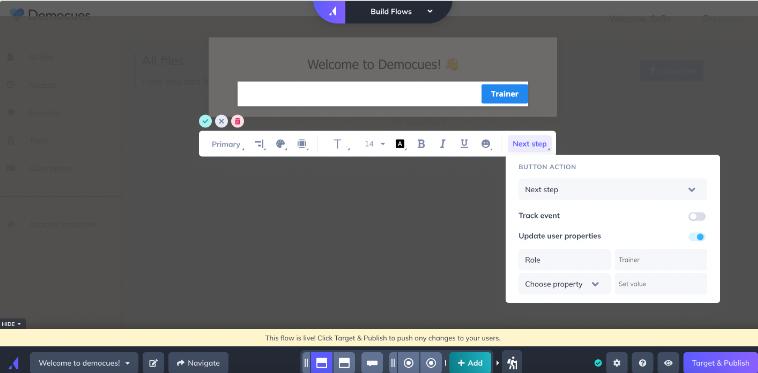
Update User Properties
When using buttons, you can also select the option to 'Update User Properties'. To use this option, the property needs to already exist in Appcues in order to update (it cannot be created by the button).
For instance, if you're already sending a 'Role' property, you can select it and set a value that will update it when the user clicks the button. In the example below, the user that clicks on the button called 'Trainer' will have this value as a Role in their profile. Once this is done, this property update can be used for targeting other experiences.
If you're using a property from another tool such as Hubspot, the update won't automatically travel back to the source, it will only stay in Appcues. In order to send it back to Hubspot (or another destination), you'll need to use Zapier. In the video below you can find a walkthrough to send the update to another destination.