Single Sign-On (SSO)
Learn how to configure SSO with your Appcues account.
Table of Contents
This feature is available on select plans and may be offered as an add-on. Please check your account details page for more information or contact our team for assistance.
Single sign-on (SSO) is an authentication scheme that allows a user to sign in with a single ID and password managed by a centralized identity provider (IdP) to any of several related, yet independent, software systems. SSO is available for any Enterprise plan that requests it, and it is available as an add-on for our Growth plan.
Appcues SSO supports SAML-compatible IdPs including Okta, OneLogin, Azure Active Directory, and many others. If your IdP is configured to require multi-factor authentication (MFA), your team will also be prompted for MFA according to your provider's settings. If you require SSO support for non-SAML-based IdPs, such as OpenID Connect, please contact us and let us know what specific IdP you need as we plan to certify and support additional IdPs in the future.
To enable your account for SSO, see Getting started with SSO lower on this page.
Using Appcues SSO
When SSO is enabled for your company's domain, Appcues authenticates team members using your company's identity provider (IdP), which is the system managing your organization's user credentials. Regardless of which IdP you use, when your Appcues SSO configuration is complete, you and your team will sign in with your SSO email address. After that, password validation or other steps are performed by your organization's IdP, not Appcues. For example, your organization's IdP may be configured to enforce a special password policy or multi-factor authentication steps such as sending SMS codes or using one-time passwords like those provided by Google Authenticator. Refer to your organization's IT administrator for details.
Adding team members with SSO
If your account has been enabled for SSO, from your User Profile > Settings, Team Page you can access the SSO configuration button.

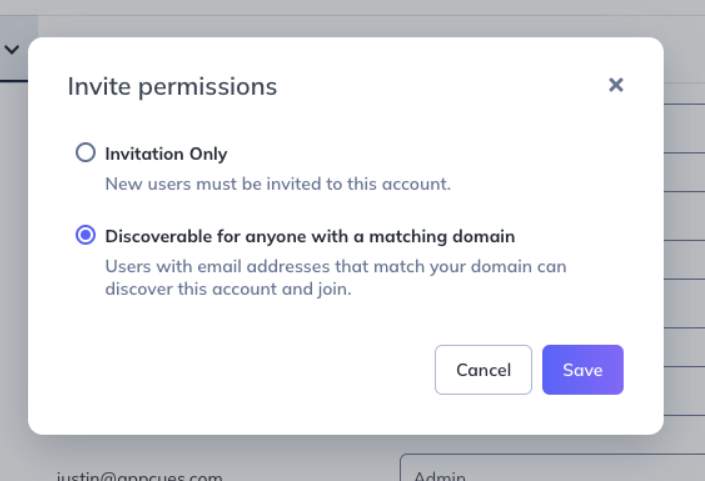
After selecting SSO Configuration, you can determine how members of your organization will be able to sign in to your Appcues account.
- Invitation Only - The only people that can sign in to your Appcues account, are those that are invited via the Invite teammate button on the Team page.
-
Discoverable for anyone with a matching domain - Anyone that has a user account registered with your IdP will be able to sign in to the Appcues account, without needing an invite first. All new users will join the Appcues account with the Publisher permission level. Note, you can still manually invite users to your account and Appcues will email those users a link to the sign in page.

Adding team members with SSO that don't belong to your organization
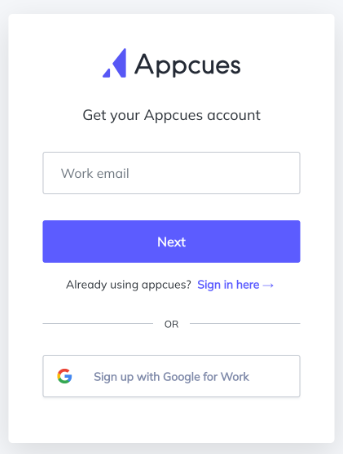
If you want to add someone to your Appcues account, but they are not a member of your identity provider, that is OK. You can still send them an invite from the Team Page and they will need to follow the link sent in the invitation email. This will be the case regardless if your account is set to Invitation Only, or Discoverable for anyone with a matching domain. If someone is registering and they are not a member of your identity provider, they will need to provide their invited email and a password or click Sign up with Google for Work to create an account and redeem the invitation.

Users that belong to multiple Appcues accounts
Once a user is enabled for SSO, that will be their only method of signing in. However, if those users need access to multiple Appcues accounts they can use Appcues Account Switcher.
Users will be able to use the Account Switcher to access any accounts that use the same identity provider as the user and have also been set to Discoverable in addition to any accounts they are actively invited to.
Removing team members
There are a few methods of removing a team member so they can't access Appcues when you have SSO enabled.
- If your account is set to Invitation Only, you can remove them directly from the team page, OR you can block them at the Identity Provider level. However, if you do not block them at the identity provider level, then the team member could be re-invited.
- If your account is set to Discoverable for anyone with a matching domain, you will want to block the user at the Identity Provider level, because if you only remove them via the team page, they could just sign in again.
Getting started with SSO
Before your account can be enabled for SSO, there are some preliminary setup actions that need to occur within your Identity Provider, and with Appcues. If you want to take advantage of using SSO for your Appcues account, please reference your Identity Provider below, and provide the associated information to Appcues via support@appcues.com.
If you do not see your Identity Provider below, message us with the name of your provider, and the team will be able to work with you to figure out what setup actions need to occur.
Okta (SAML)
You will need to provide Appcues with your:
- Sign In URL
- X.509 Signing Certificate
In order to provide these items to Appcues, you will first have to set up your Okta account with a new Appcues Application using the following:
- Single Sign-On URL
https://login.appcues.com/login/callback?connection=APPCUES_ACCOUNT_ID- Your account ID can be found on the account page in settings
- Audience URI
urn:auth0:appcues:APPCUES_ACCOUNT_ID- Your account ID can be found on the account page in settings
- Attribute Statements
- Name: email
- Name Format: Basic
- Value: user.email
Once you enter those items into your Okta account, you will get a Sign In URL & X.509 Signing Certificate from the Setup Instructions section within Okta that you can share with support@appcues.com. Once sent to us, we'll get your account setup with SSO as soon as possible, typically within five business days.
If you run into questions, don't hesitate to reach out to the Appcues Team and we'll be happy to work with you throughout your SSO setup.
Microsoft Azure Active Directory SAML
You will need to provide Appcues with your:
- Login URL
- X.509 Signing Certificate (Base64)
In order to provide these items to Appcues, you will first have to set up your Azure AD SAML account with a new Appcues Application using the following:
- Single Sign-On URL & Reply URL
https://login.appcues.com/login/callback?connection=APPCUES_ACCOUNT_ID- Your account ID can be found on the account page in settings
- Audience URI/Identifier
urn:auth0:appcues:APPCUES_ACCOUNT_ID- Your account ID can be found on the account page in settings
- Attribute Statements
- Name: em
- ail
- Name Format: Basic
- Value: user.email
Once you enter those items into your Azure AD SAML account, you will get a Login URL from the Setup Instructions section and a X.509 Signing Certificate from the SAML Certificates section within Azure AD SAML that you can share with support@appcues.com. Once sent to us, we'll get your account setup with SSO as soon as possible, typically within five business days.
If you run into questions, don't hesitate to reach out to the Appcues Team and we'll be happy to work with you throughout your SSO setup.
OneLogin or other SAML providers
You will need to provide Appcues with your:
- Sign In URL
- X.509 Signing Certificate
In order to provide these items to Appcues, you will first have to set up your OneLogin or other SAML IdP with a new Appcues Application.
Once you set up your new app and are have your Sign In URL & X509 Signing Certificate, share those with support@appcues.com. Once sent to us, we'll get your account set up with SSO as soon as possible, typically within five business days.
If you run into questions, don't hesitate to reach out to support@appcues.com and we'll be happy to work with you throughout your SSO setup.
FAQs
Does Appcues SAML SSO support OAuth?
Yes, Appcues SAML SSO supports OAuth.
Is SCIM supported?
SCIM is not currently supported.
What is the session timeout duration?
Access tokens expire after one hour but are automatically refreshed for up to 30 days of continuous activity.
Can session timeout be managed in Appcues Studio?
No, session timeout management is not currently available in Appcues Studio.