Custom Fonts
Learn how to further customize your Appcues experiences by leveraging custom fonts.
Table of Contents
Further customization of Appcues experiences can be accomplished by leveraging custom fonts. These can be implemented by adding them via the Styles page within the Appcues Studio using one of the following:
Google Fonts
Step 1
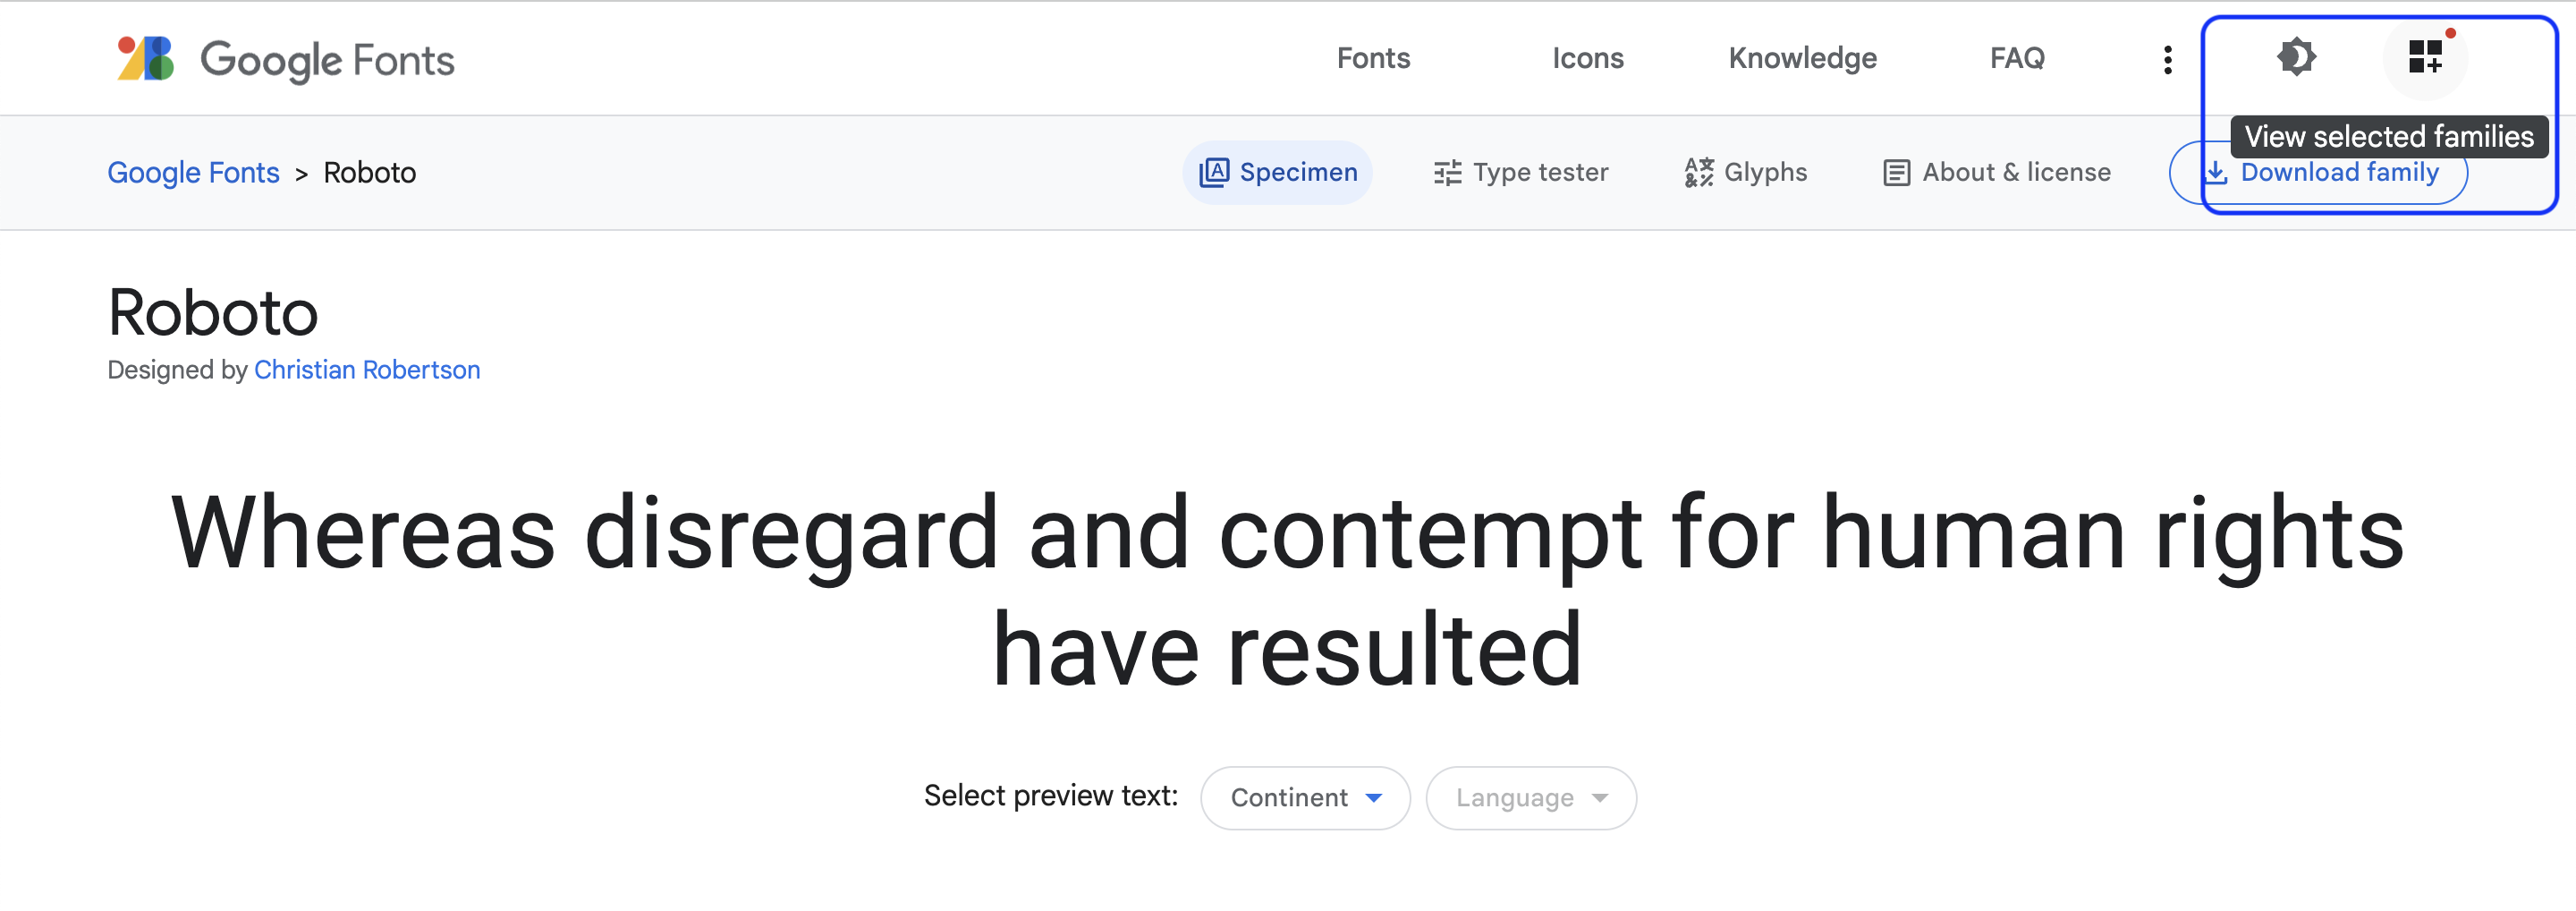
Navigate to the Google Fonts page and select the fonts you wish to include in your Appcues theme. First, you'll navigate to the page for the font. Then, click on ‘View Selected Families’ in the top right-hand corner of the screen.
Step 2
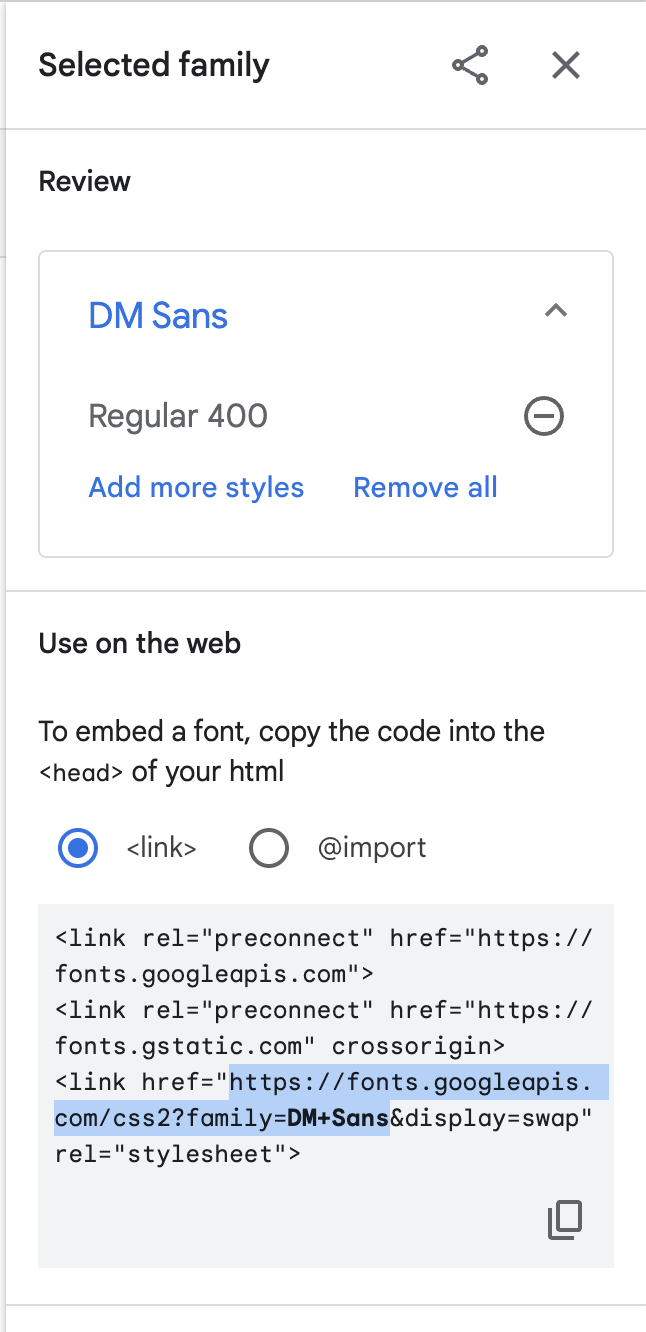
Open up the 'Selected families' and copy the URL provided. (&display=swap does not need to be included)
Step 3
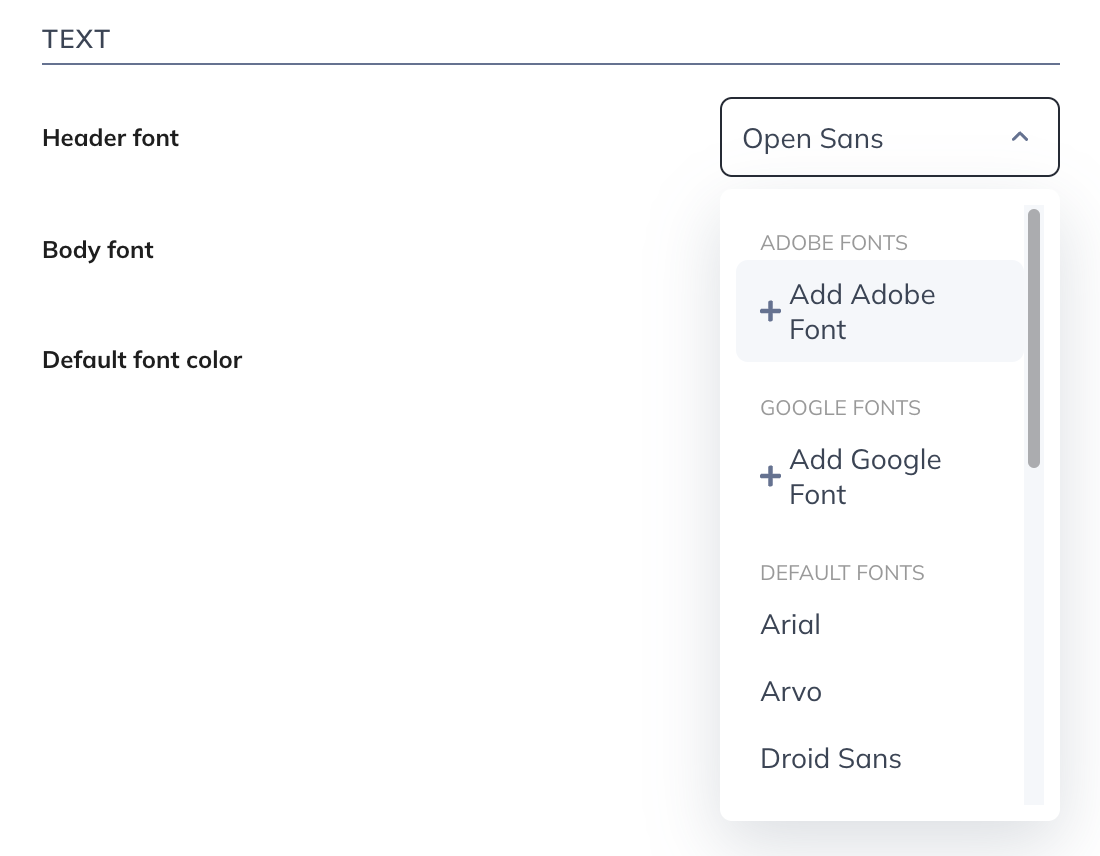
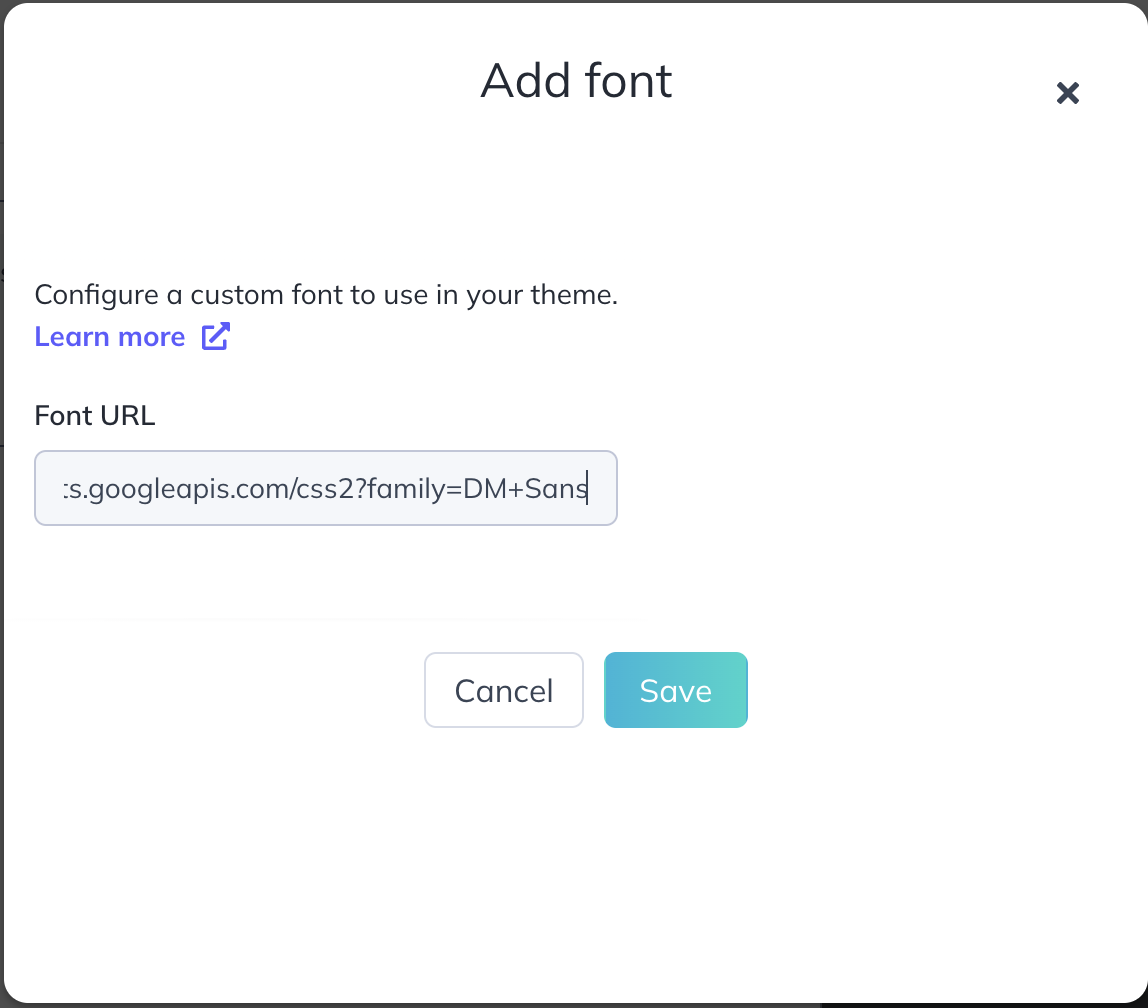
Open up the Font Manager window in your Appcues theme by clicking 'Header font' or 'Body font' and then select 'Add Google Font'. Underneath the label 'Font URL' you will see an input field. Paste your copied URL here and press the 'Save' button.
Step 4
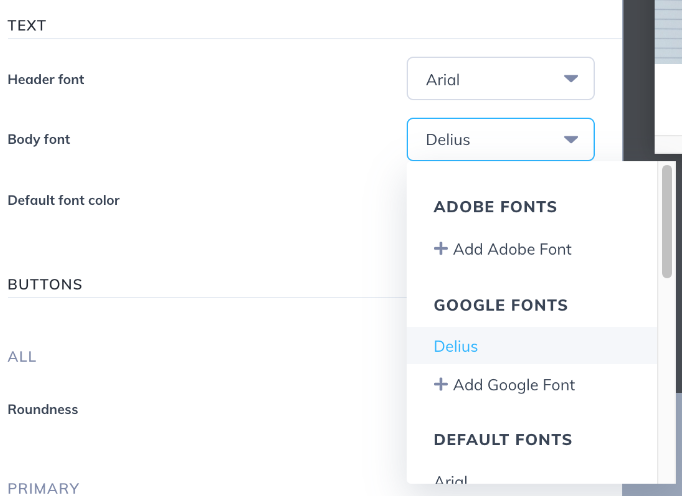
In the 'Header font' and 'Body font' drop-down menus, you will now be able to select the fonts you have added via Google Fonts. Be sure to click the 'save' button in the upper right hand corner, and your Theme settings are set with your custom fonts! (Note: If you save a theme without selecting one of the google fonts from either drop-down menu, the google font will be removed from your styles altogether to improve performance and load time).
Adobe Fonts
Step 1
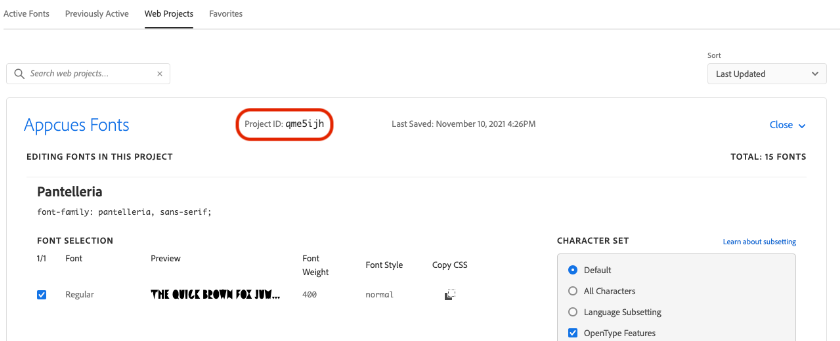
In your Adobe fonts account, under the Web Projects tab, copy the project ID of the fonts project you would like to use.
Step 2
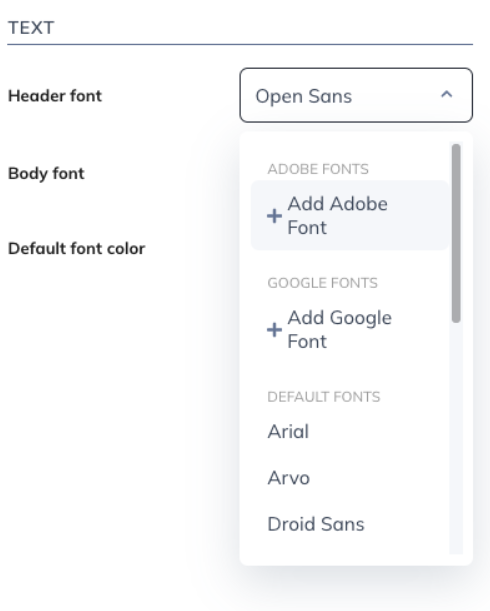
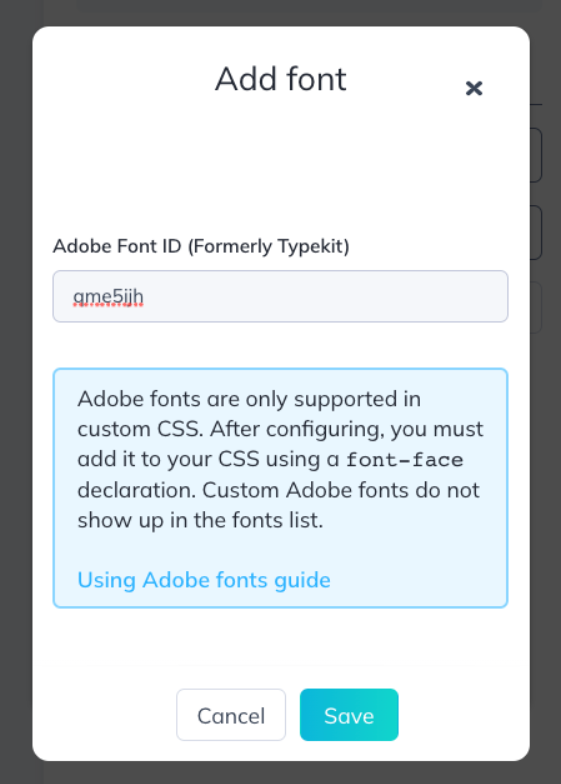
Open up the Font Manager window in your Appcues theme by clicking 'Header font' or 'Body font' and selecting 'Add Adobe Font'. In the modal that appears, there will be a field for pasting in your project ID. Paste your copied project ID here and press the 'Save' button.
Step 3
Once you've done that, follow the instructions in this Adobe doc to embed your web project into the custom CSS section of your Appcues theme.
- First copy the @import link from your project, leaving off the style tags on either end.
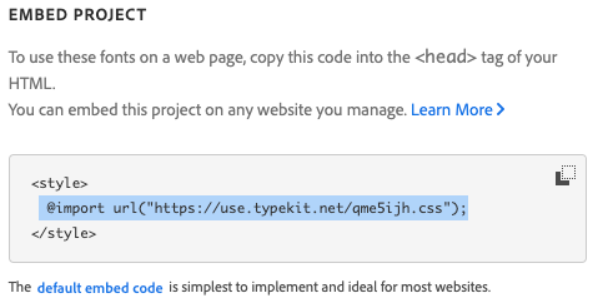
- Paste this into the top of your theme's custom CSS section.
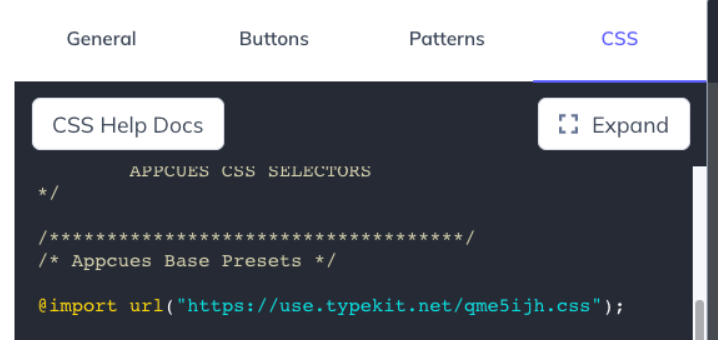
- Now you can assign the web project's included font-families to Appcues content using our CSS editor.

Because simply providing the web project ID will make the theme try to use the ID as the font family, be sure to start with the following selectors to make sure you're providing a specific fall back font for all Appcues content:
body h1, body h2, body h3, body h4, body h5, appcues cue h1, appcues cue h2, appcues cue h3, appcues cue h4, appcues cue h5, .tooltip .content h1, .tooltip .content h2, .tooltip .content h3, .tooltip .content h4, .tooltip .content h5, * {
   font-family: filicudi-color-wasp, sans-serif;
}
Custom CSS
The CSS editor is a valuable resource to import fonts from self-hosted or third-party sources or apply fonts to particular items in your Appcues flows. This section will guide you through the process of importing and applying a custom font.
Step 1
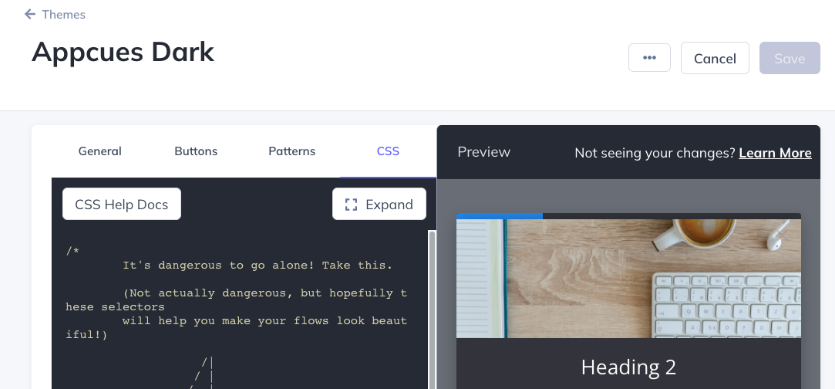
Select the CSS tab after selecting a theme to edit on the themes page.
Step 2
Create an `import` declaration in your custom CSS linking to the font of your choice. For instance, if you wanted to import a font from a self-hosted S3 bucket you could do so like this.
@import url(https://s3-us-west-2.amazonaws.com/appcues-custom-fonts/raleway.css);Alternatively, you could import a font file directly by using @font-face.
@font-face { font-family: 'Raleway'; font-style: normal; font-weight: 800; src: local('Raleway Black'), local('Raleway-Black'), url(https://s3-us-west-2.amazonaws.com/appcues-custom-fonts/Raleway-Black.ttf) format('ttf'); }Step 3
Specify the elements you want to apply your new font-face to by specifying the name you gave the font-face ('Raleway' above) as the font-family for the elements in your custom CSS. You can apply the font to only the header fonts like so. You should be able to see your font being used in the 'Interactive Preview' section. You may need to include an !important declaration to make sure this font rule takes precedence.
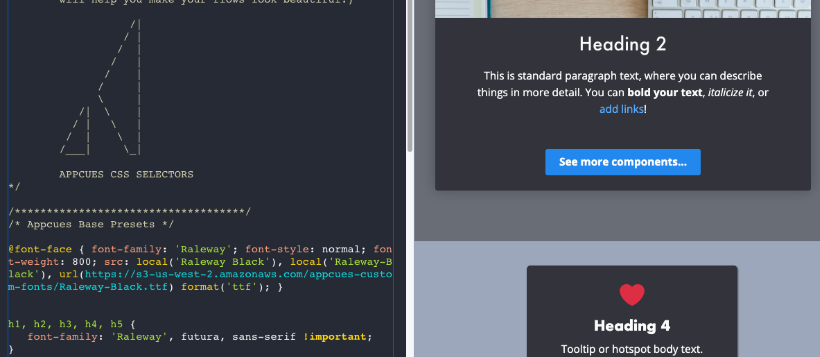
If we wanted to apply the font to all elements (both heading and body fonts) in your Appcues flows, you could do so using the * selector.
@import url(https://s3-us-west-2.amazonaws.com/appcues-custom-fonts/raleway.css);
* { font-family: 'Raleway', futura, sans-serif; }
Custom fonts in the Builder
Custom fonts will appear as a blank value in the Builder – that is expected. In order to change a text's font back into the custom font, add a new text block and the font will be applied by default.

Loading Custom Fonts for Checklists
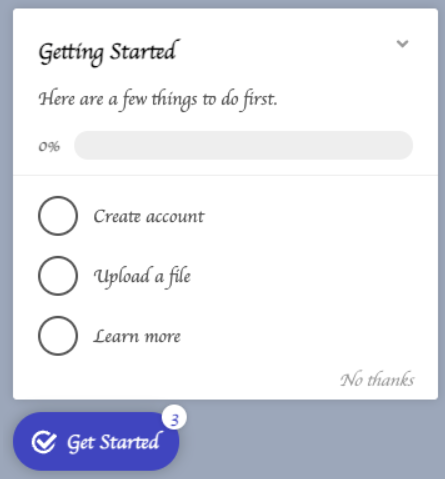
Custom fonts can be loaded into checklists by setting the Font Family to Custom when editing the checklist. The following video shows how it is possible to use a custom font within an Appcues Checklist to help match your application's styling perfectly!
Step 1
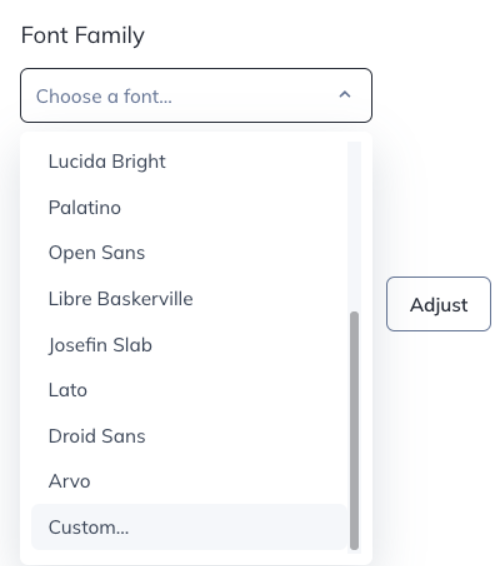
Set the Font Family to Custom when editing the checklist:
Step 2
Enter in the Custom Font URL and adding the Custom Font CSS:
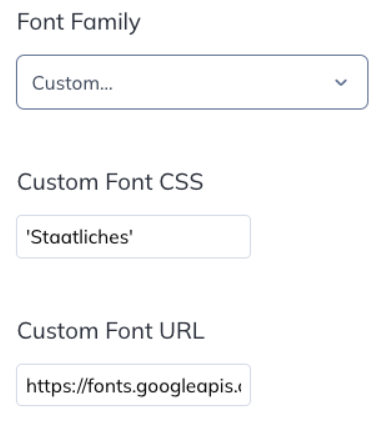
These new fields will be for adding in the CSS that the checklist will use to display your new font ("Custom Font CSS") and the URL where your custom font is hosted ("Custom Font URL").
Start by adding in the CSS that the checklist will use to display your font. In this field you'll simply add in the value that would normally come after the font-family property in your web app's CSS. For example in this case, we're trying to add in the Homemade Apple font from Google Fonts for our sister website Napcues, where family members can posts notices to others telling them when to wake them up from their nap.
The CSS to use this font in our application would normally look like this:
font-family: 'Homemade Apple', cursive;
Don't be intimidated by this! The first part is just the portion of our CSS rule that tells the browser we want to change the font-family we're using for the checklist and the part after the colon tells the browser what font families to actually use.
Note that for this example, we have our awesome "Homemade Apple" font and then "cursive" specified. The "cursive" is a back up font in case our Google Font doesn't load. You don't have to include a backup font, but it is usually a good way to make sure that all your users have a good experience.
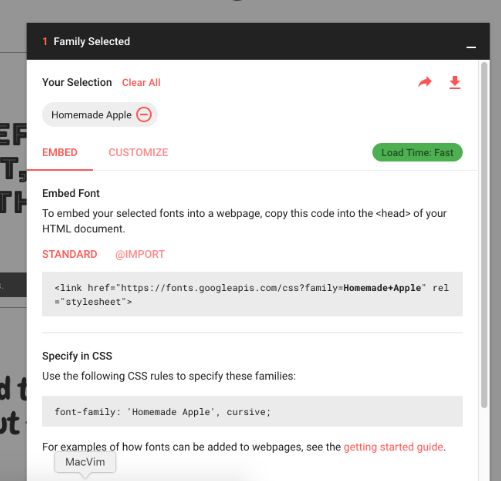
If you are using Google Fonts, the site is super helpful and will tell you what to write for this CSS! Just add a font on the site, click on the little box that says "Family Selected" and it will give you a slide-out with lots of helpful information that looks a something like this:
Once you've figured out what CSS to use, you can type it into the "Custom Font CSS". Your editor should now look something like this:
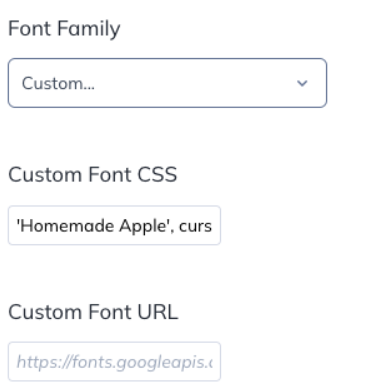
When you add in the CSS rule you can leave the semicolon at the end or take it out. Either one will work.
Don't be afraid that your checklist still doesn't show your custom font. It still needs to know where to get your custom font from on the world wide web. This is the url that your font is hosted at. If you're not sure what this URL is, it will usually be in your web application somewhere as a <link> tag.
If you're using Google Fonts, this is another place where the aforementioned helpful slide-out has your back. You can look at the href that is in the <link> tag and copy paste that URL into the "Custom Font URL" box.
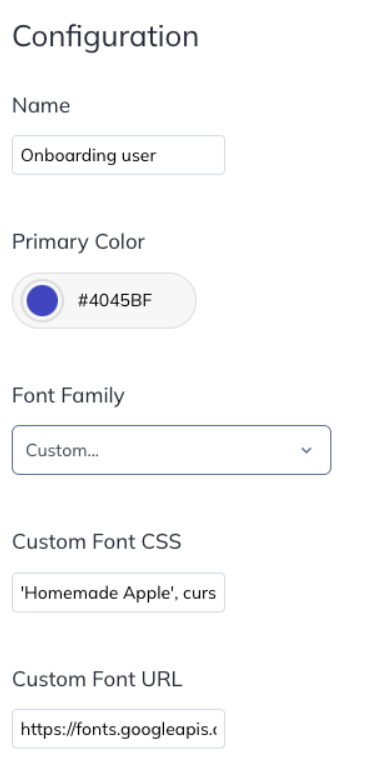
At this point, your checklist should be showing your custom font!
Common Issues
If your font still isn't showing up the right way there are a couple of things to think about.
- Make sure that the URL is actually serving up your font
- The URL that you are putting in the "Custom Font URL" field actually needs to send your font over. It should be sending something that looks like code. If you paste the URL into your browser and you get something that looks like a regular website, chances are you don't have the right link to the place where the font itself is hosted.
- Make sure that your Custom Font CSS doesn't have the font-family part of the rule
- We take care of the font-family part for you! The checklist only needs the name of your font and a backup font if you're using one to display things the right way. You're not writing the full CSS rule, just giving us the part that goes after font-family.
- You have a typo in the CSS or URL
- If things still aren't displaying, go back and make sure that you don't have a typo in the CSS or the URL that you gave us. Don't worry, it happens to the best of us!
Need help importing your desired fonts? Shoot us an email at support@appcues.com and we'll be happy to help.