Events and Properties Page Overview
Find all the events and properties that you're sending Appcues.
Table of Contents
Overview
Events and properties help unlock the power of Appcues. They represent all of the data that Appcues collects and can use about your users and application.
You can use events and properties for targeting content to just the right users at the right time (e.g. to show content only to activated users), and for marking checklist items as completed (e.g. an item will be marked as completed on an Appcues checklist once a user takes a specific action in your application).
The Events and Properties page in Appcues will help you use and understand all of your events and properties. The page is split into three different tabs:
Events
Events correspond to actions users perform in your application, which are tracked via Appcues. For example, a user clicking a certain button could be tracked as an event in Appcues. For more information about tracking events in Appcues, check out the Event Targeting article.

- Event: This corresponds to the name of the event that appears elsewhere in Appcues.
- Type: Information on the source of the event. Events can be Track Events or Application Events.
- Description: You can add a description of what the event is referring to in order to provide additional context to your teammates.
- Last Seen: This shows the last time Appcues received data for the given event.
- Show in Menus: You can hide an event from being seen in the targeting menus. If you no longer wish to use it. If you choose to toggle off an event that is already being used (e.g. for targeting a flow to users), don't worry, the targeting will still work -- it just won't show up in Appcues menus. An example of a targeting menu, where events are displayed, is shown below:

Custom Properties
Custom properties are traits and information about your users that you can use for targeting Appcues content that you set up in your Appcues installation. For example, a user's email address could be a custom property. For more information about custom properties, check out the Targeting by User Property article.
To see more information about properties, click the arrow beside the display name to expand the row.

- Display Name (editable): This is the name that appears elsewhere in Appcues (e.g. in targeting menus). You can edit this name so that it's as simple for you and your team to understand as possible.
- Property Name: This is the name chosen by developers for the property in your Appcues installation.
- Last Seen: This is the last time that Appcues received data for the given property.
- Show in Menus: This allows you to decide whether or not the property shows up elsewhere in Appcues (e.g. in targeting menus). If you choose to toggle off a property that is already being used (e.g. for targeting a flow to users), don't worry, the targeting will still work -- it just won't show up in Appcues menus from that point forward.
- Description (editable): To edit the description, first expand the property row. A description can help you and your team by providing additional context for what the property means. The description will show up in targeting menus and other places where the property is used in Appcues.
- Data Type: See what type of data (i.e. Text, Number, True/False, Date) Appcues recognizes for the values of the custom property.
- Example Values: To better understand the property, Appcues will provide an example of values that have been collected for that property. For example, if the property is "Email," example values may be “Emily@appcues.com”, “John@appcues.com”.
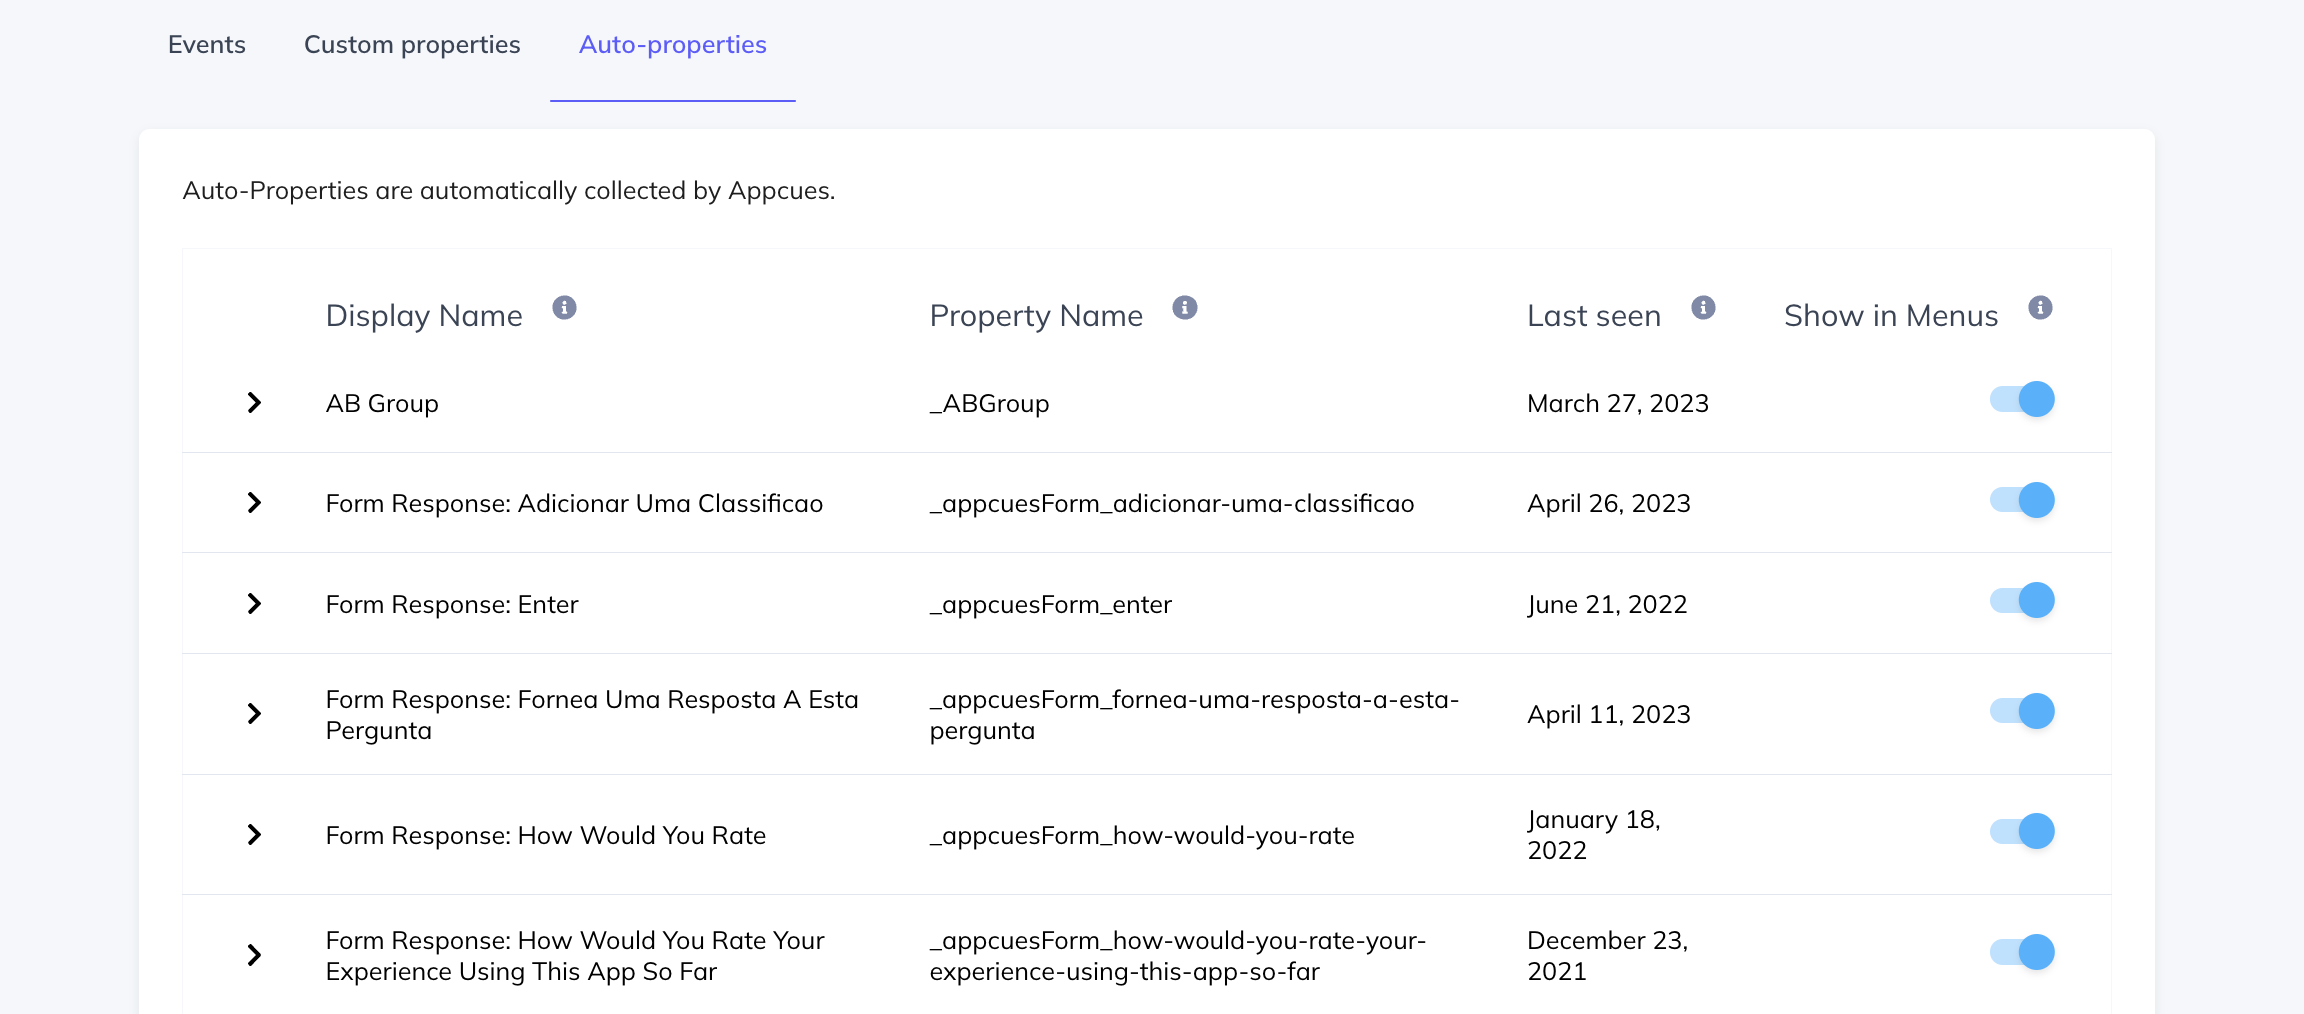
Auto-Properties
Auto-properties are traits and information about your users, just like custom properties.
The difference between auto-properties and custom properties is that auto-properties are automatically collected by Appcues. As long as Appcues is installed, we will collect auto-properties for you! Auto-properties provide you targeting and segmentation opportunities right away, without having to spend time adding customer properties to your Appcues installation. You can use:
- The First Seen At timestamp to target your welcome flow to users who have signed up for your app within the last 7 days.
- The Browser property to only target certain users if you offer a Chrome extension product.
- The Audience Randomizer property to limit exposure of a new Flow to only a certain percentage of eligible users.
Another key difference between custom properties and auto-properties is that auto-properties are not editable. You can decide whether or not you would like them to appear in menus (by using the "show in menu" toggle in the right-most column) but the name and description are set by Appcues. For a list of the common auto-properties we have, check out this section here: Auto-properties.

Check out the related articles for more information about events and properties in Appcues!