Use a Checklist to Onboard Users
Learn how to use a checklist to onboard new users and keep them motivated with each task.
Table of Contents
This guide will show you how to effectively leverage an Appcues Checklist to enhance your new user Onboarding experience.
To follow this guide, it is best to already have:
- A basic understanding of using the Appcues Builder
- A basic understanding of navigating the Appcues Studio
- A basic understanding of how to create Click-to-Track events
Build Guide
Step 1: Define the events you’re going to influence with each Checklist item
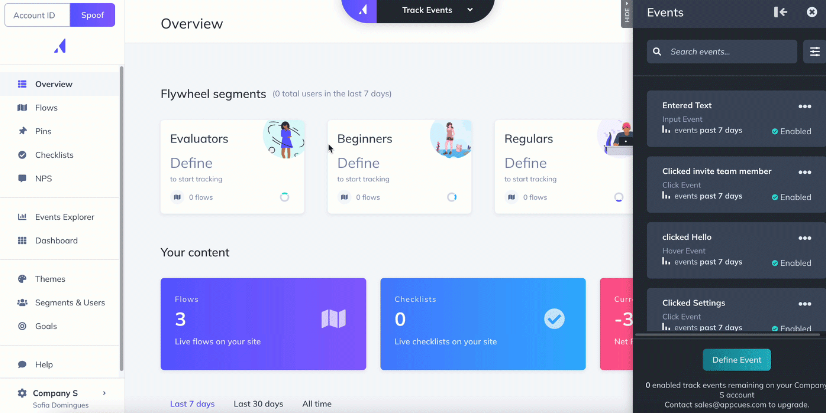
Events are the “actions” your users take in your application, which can be anything from clicking a certain button to landing on a specific page. Make sure you identify and define the right event for each Checklist item you’ll be including as part of the new user onboarding Checklist.
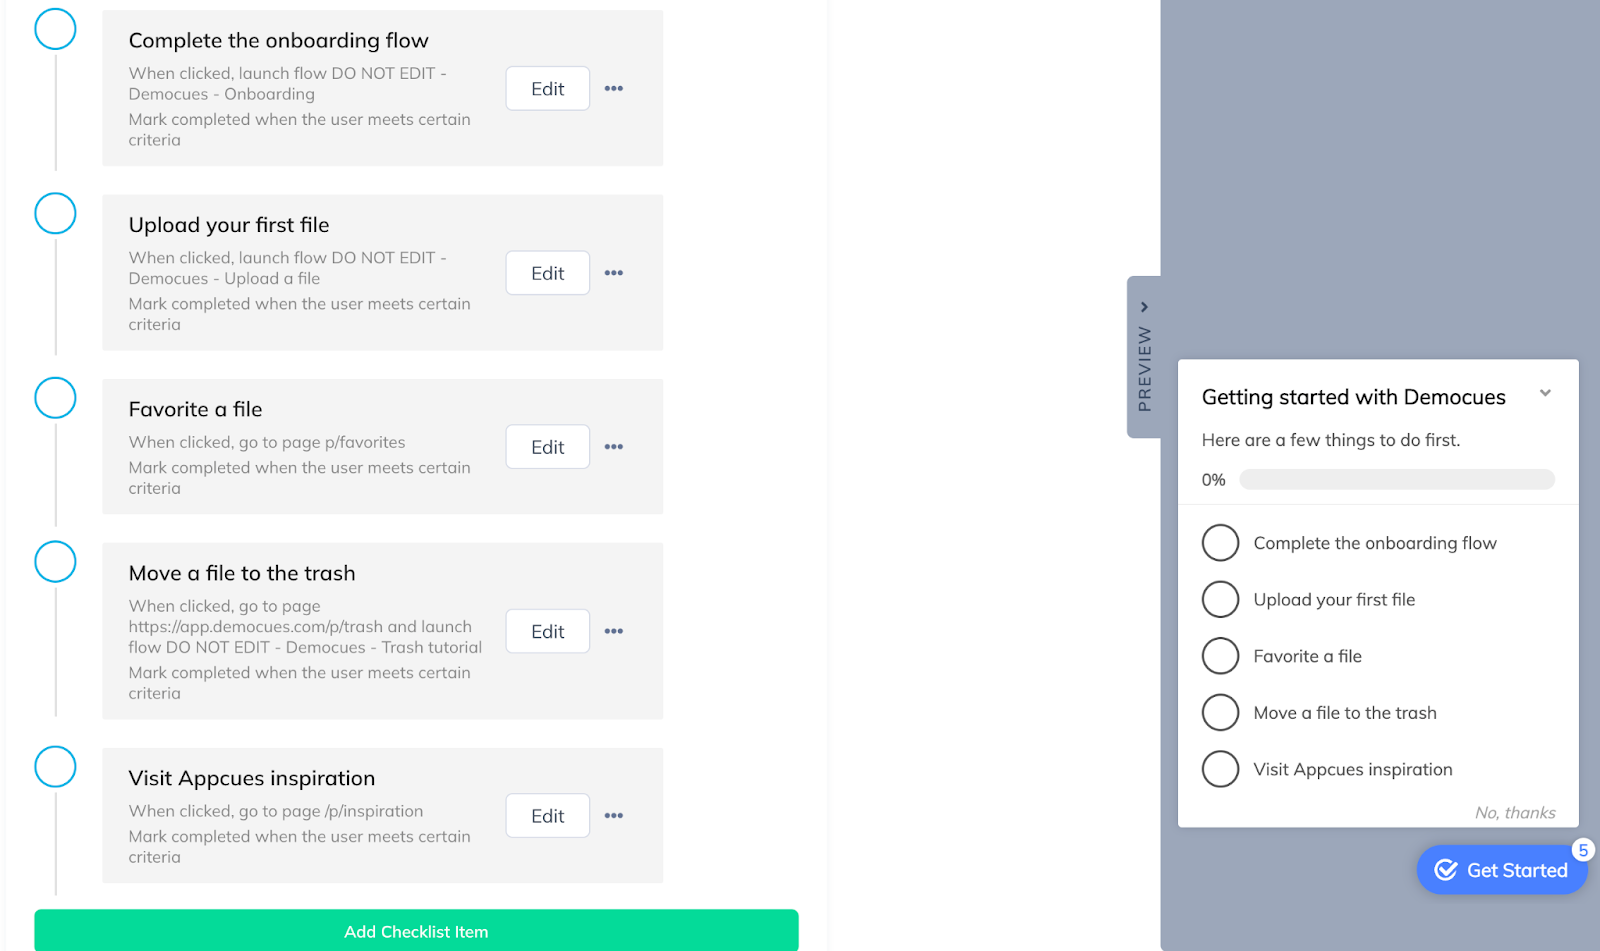
Step 2: Create the Flows and add them to the Checklist
At this stage, you can decide how these Flows will be triggered. Would they only be set manually? This means the only way a user will be able to see them is if they launch the Flows directly from the Checklist. Would you go with a hybrid approach? For example, you can set up the Flows to trigger when the user reaches a specific page and also include them in the Checklist. This is a great way to present a Flow as the user navigates through the platform and if they end up dismissing it, they will still be able to relaunch it from the Checklist.
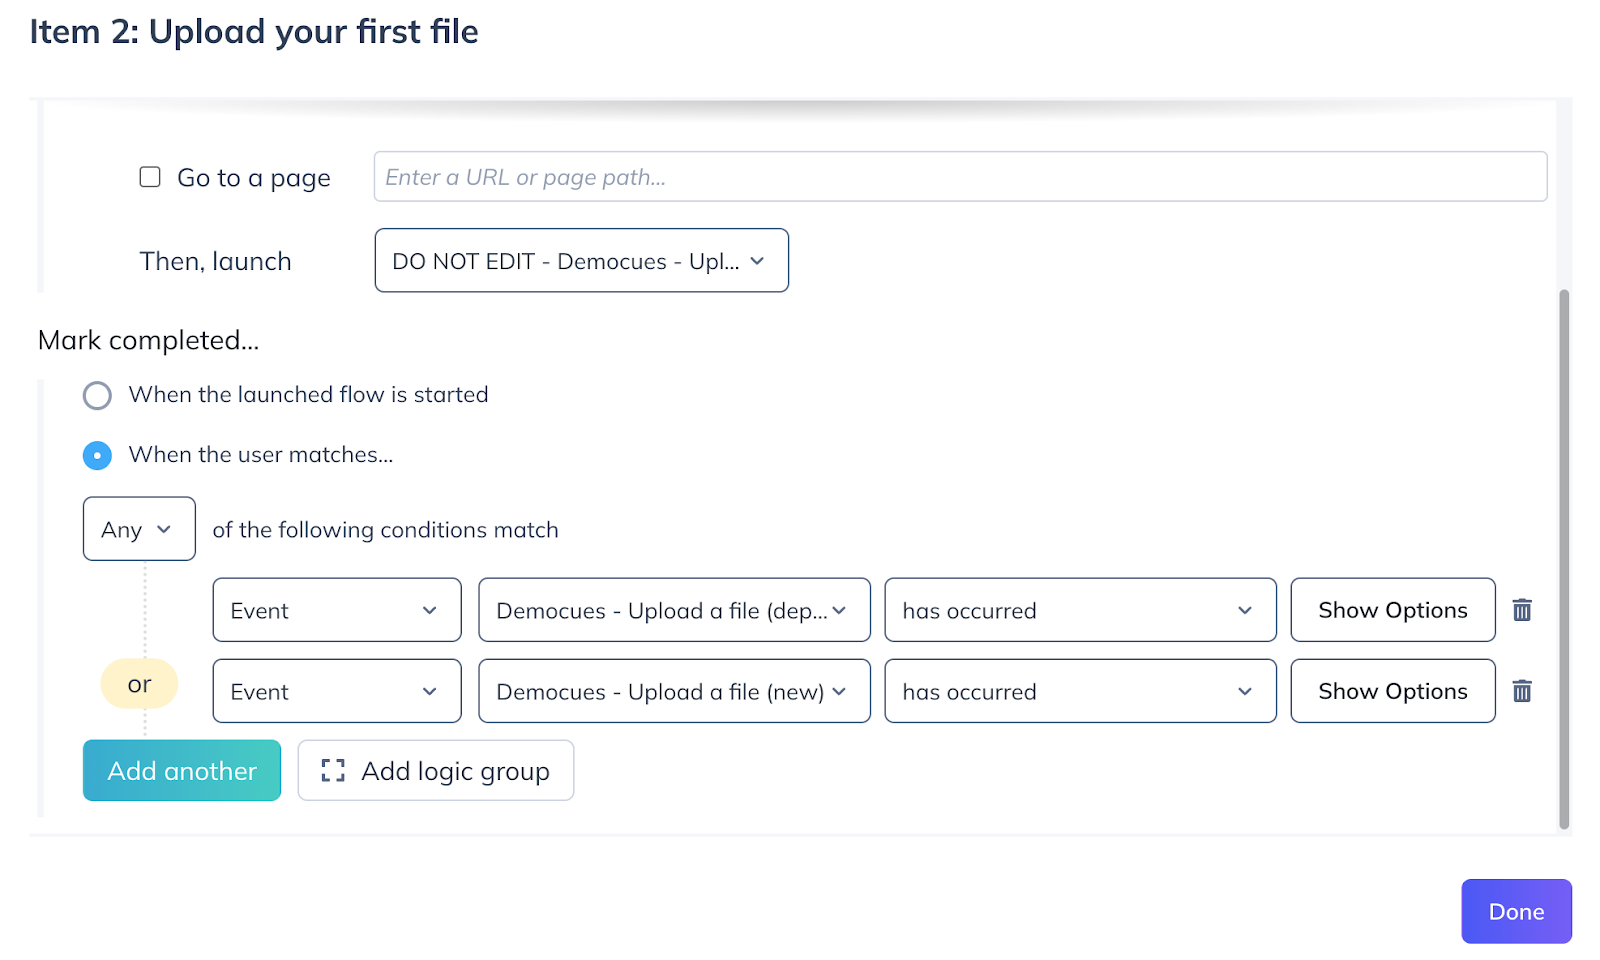
Step 3: Set event-based completion criteria for each Checklist item
Remember the exercise in Step 1? This is where it pays dividends! Utilizing the defined events you identified for each Checklist item you’ll set the completion criteria. Configuring each Checklist item to complete when an event has occurred guarantees you that the user has performed the action you’re looking to influence with the Flow. In some instances, the user might not even see the Flow, but since they executed the event they will be rewarded for it and the Checklist item will get crossed off as completed.
Step 4: Publish Checklist and monitor engagement
Once the Checklist is live and users start to see it, interact with it, and complete Checklist items, you’ll be able to monitor engagement and conversions from the analytics dashboard of the Checklist.

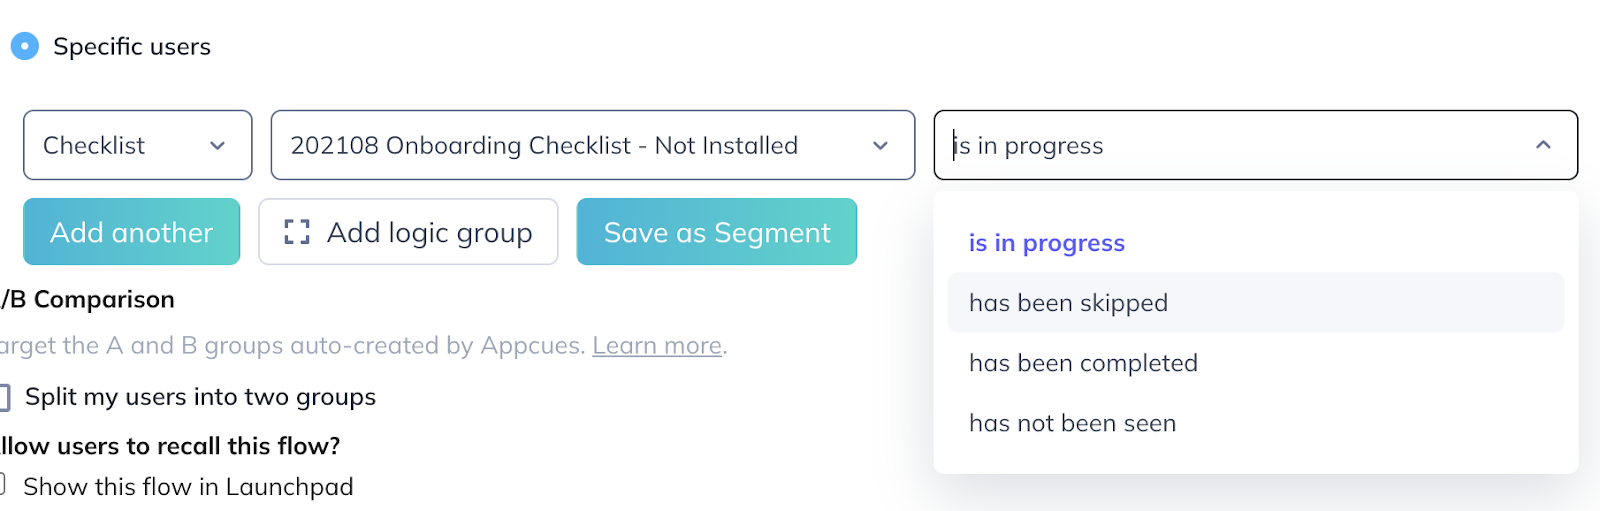
Step 5: Follow up with new users based on the status of their Checklist
You can use Checklists Events in the conditions editor to target based on Checklist status. You can target users whose Checklist is: in progress, has been skipped, has been completed, and has not been seen.
A perfect use case for this would be if you wanted to show a reminder Flow to users whose Checklist is still in progress to entice them to complete it.
Happy Building!