Salesforce Integration
Learn more about the two-way integration with Salesforce to help better target and personalize in-app experiences.
Table of Contents
This integration is available on select plans and may be offered as an add-on. Please check your account details page for more information or contact our team for assistance.
Why integrate Salesforce with Appcues?
The Appcues and Salesforce integration is a bi-directional connection. You can use this integration to help better target and personalize in-app experiences. It can also help your sales and go-to-market teams identify directly in Salesforce how individual contacts interact with Appcues experiences.
 Use case examples
- Add a User Who Completes an Appcues Flow to a Salesforce Report
- Calculate NPS by Account with Salesforce
- Track Historical NPS with Salesforce
- Drive Event Registration with Salesforce
- Offer Role-Specific Onboarding with Salesforce
What you'll need to get started
- Access to the integration according to your Appcues plan level.
- A Salesforce Plan with API Access. Enterprise Edition, Unlimited Edition, Developer Edition, Performance Edition check out the plans here.
- UUID Match. This integration requires identical UUIDs:
For user-level event and profile syncing:
- The Appcues installation: window.Appcues.identify("USER_ID")
- The Salesforce record: typically as a User ID or Salesforce ID field which must have type Text. If your user IDs are numeric, you can create a formula field with the string representation of your user ID. For example, if your user ID is stored in a numeric custom field called "Product User Id," you would create a formula field with the formula TEXT(Product_User_Id__c).
For account-level profile syncing:
- The Appcues installation: window.Appcues.group("ACCOUNT_ID")
- The Salesforce record: typically as an Account ID or Salesforce ID field which must have type Text. If your account IDs are numeric, you can create a formula field with the string representation of your account ID. For example, if your account ID is stored in a numeric custom field called "Product Account Id," you would create a formula field with the formula TEXT(Product_Account_Id__c).
- Record Mapping: This integration currently supports mapping only one record type at the user level (Lead or Contact) and one record type at the account level (any object in your Salesforce account, including custom objects).
- Appcues Events Broadcaster (Optional): Enable this add-on service if you want to send Click-to-track events to Salesforce.
What information will be passed with this integration?
-
From Salesforce to Appcues (data is synced every 5 minutes):
- Triggers when the specified user object (Lead or Contact) or account object are created or updated. This will occur automatically as long as the property has been updated. If nothing has been updated in Salesforce, nothing will be pushed to Appcues.
- Sends specified attributes to Appcues as profile attributes to be updated.
- If the user, account, or attribute does not yet exist in Appcues, it will be created upon sync.
-
From Appcues to Salesforce (data is synced as soon as an event occurs) :
- Triggers (via webhook) when an end user interacts with Appcues content (e.g. submits an NPS survey)
- Optional: Sends "NPS Score" and "NPS Feedback" to Salesforce that update the specified object (e.g. Lead or Contact)
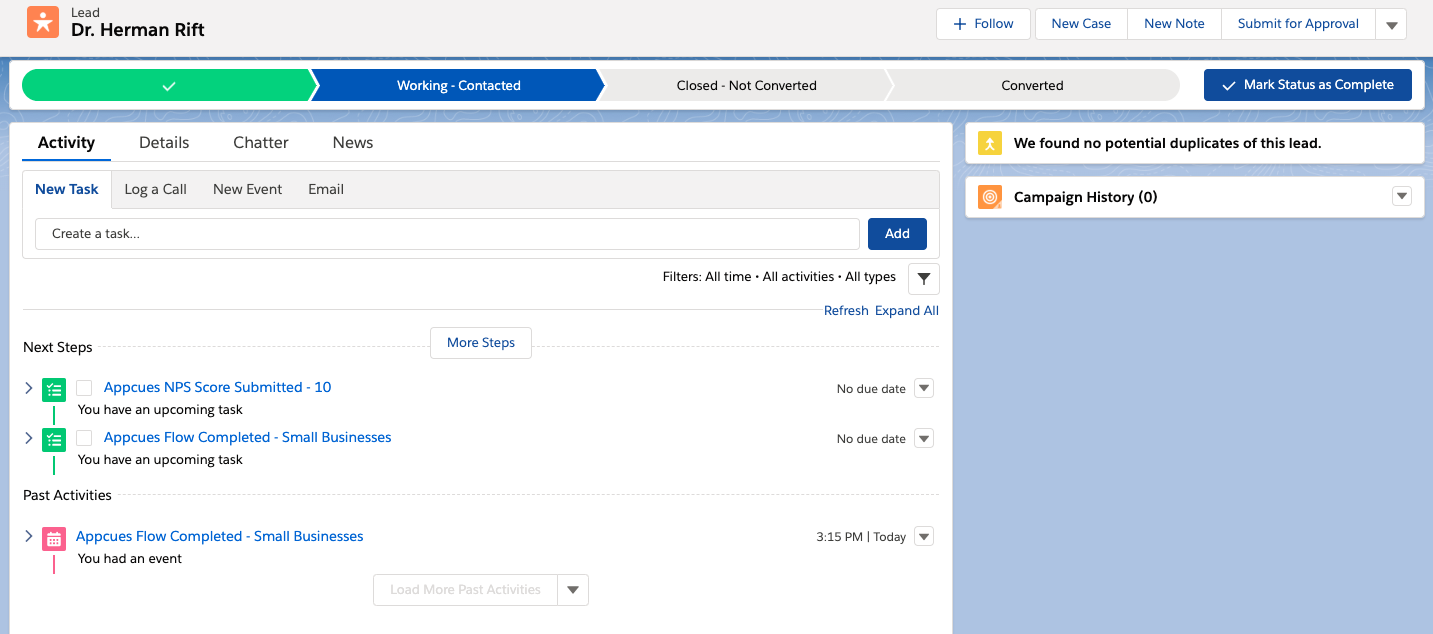
- Optional: Sends Appcues events to Salesforce as Events that appear on the objects Activity view
- Optional: Sends Click-to-track events to Salesforce as Events that appears on the objects Activity view. (Requires that your account is signed up for Appcues Events Broadcaster)
- Appcues will not create new Leads or Contacts if one does not exist for the events it is trying to sync
Syncing data between Appcues and Salesforce depends on having "USERID" and “ACCOUNTID” attributes that are shared in both systems. This value is commonly stored as a custom field in Salesforce. You'll need to consult your Salesforce Admin for assistance.
Setting up the integration
To set up the integration, you first need to select the Salesforce Integration card on our integrations page:

Note: The Salesforce (V2) integration was introduced in January 2026. If you connected to the Salesforce integration before this time, you will see an additional card called Salesforce. To connect to Salesforce (V2), which allows for more Appcues event types to be sent to Salesforce and has improved reliability, first disconnect from the legacy integration.
Once you click the integration card you'll be presented with a workflow to complete the integration.

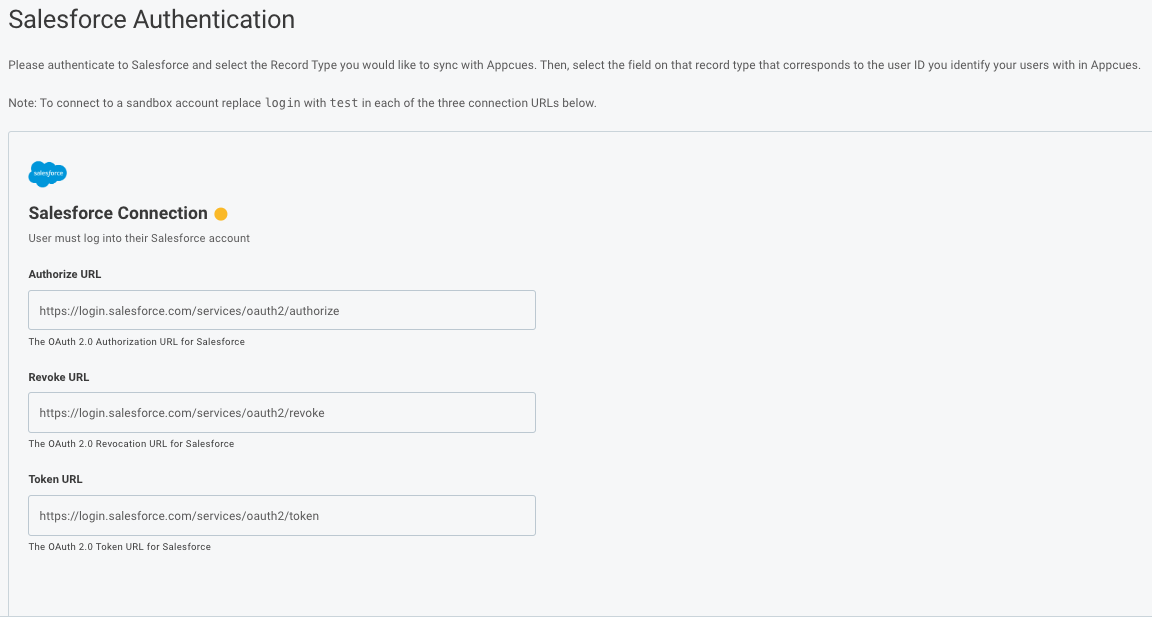
Step 1 - Will ask you to authenticate your Salesforce account.
If connecting to a Sandbox environment, follow the on-screen prompt to replace login with test in each of the three connection URLs (Authorize, Revoke, and Token URLs).
When ready to disconnect from your Sandbox and connect to a live environment, return to this screen and replace test with login in the URLs and proceed through the remaining steps.
Step 2 - Will ask you which data syncs to enable: events from Appcues to Salesforce, user profiles (Contact or Lead) from Salesforce to Appcues, and account profiles (any object) from Salesforce to Appcues.
If you select “Sync Appcues Events to Salesforce”, you will also be able to choose if you want to send Appcues Click-to-Track events, and if you want to add NPS results directly to the object's profile.
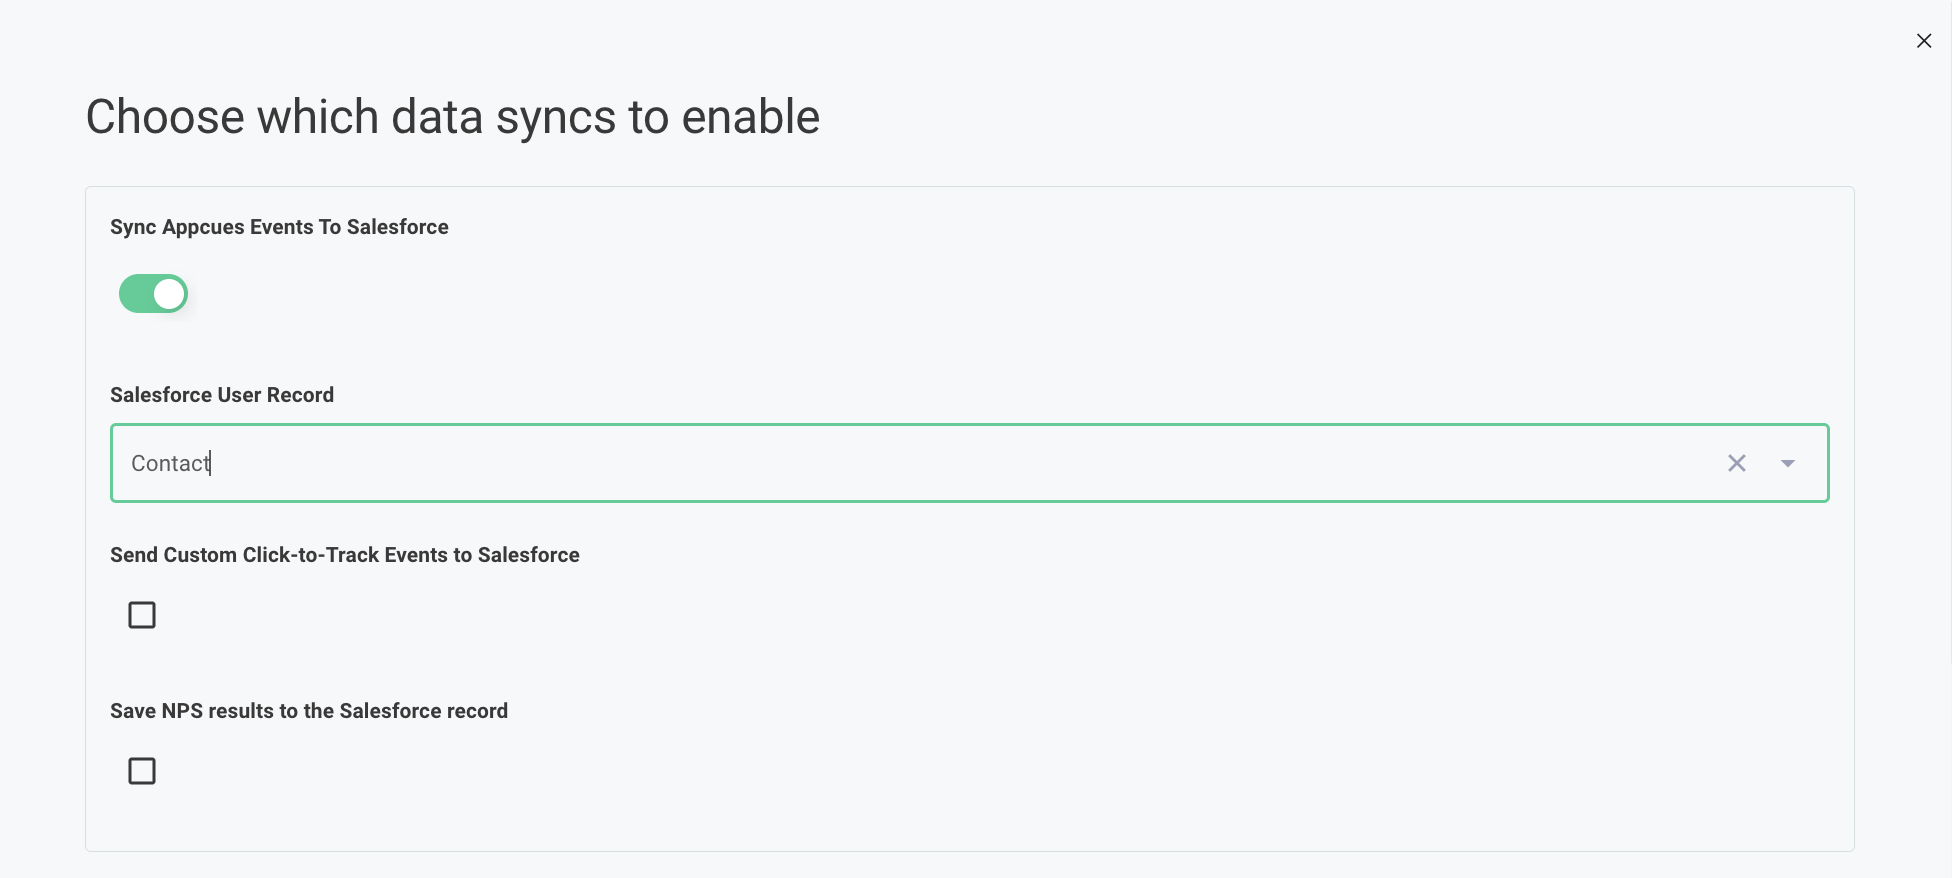
NOTE: Click-to-track events will only sync to Salesforce if you are signed up for Appcues Events Broadcaster
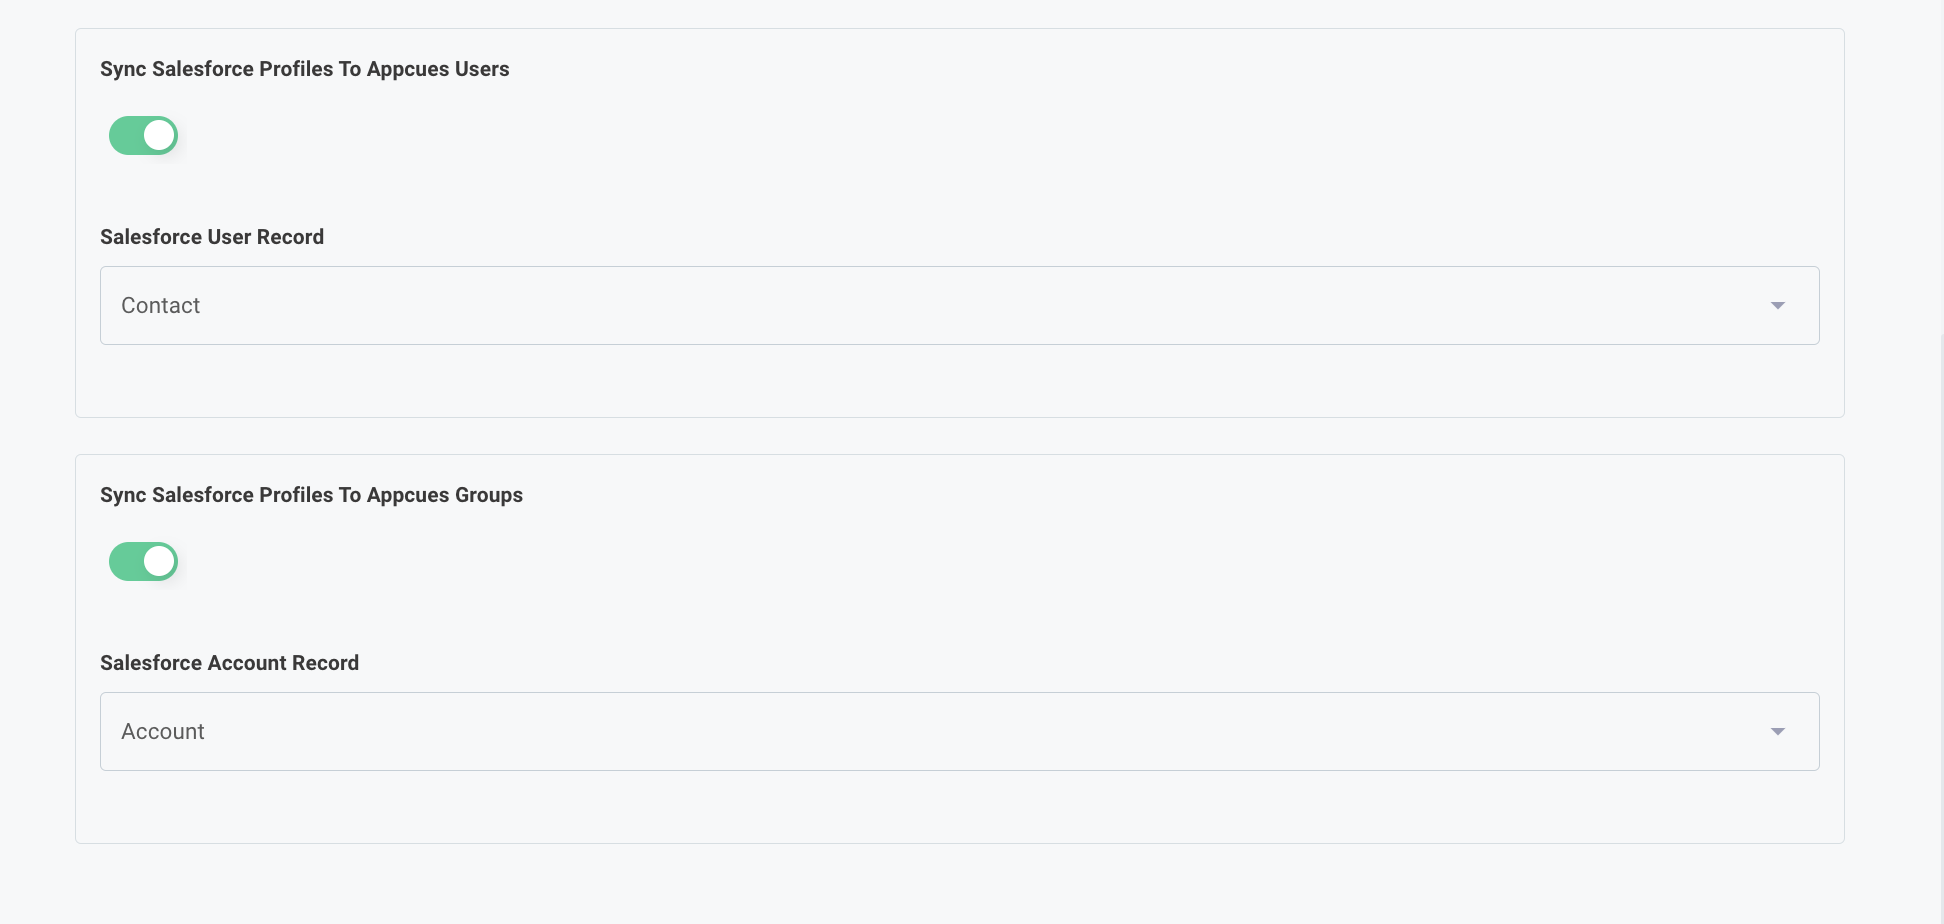
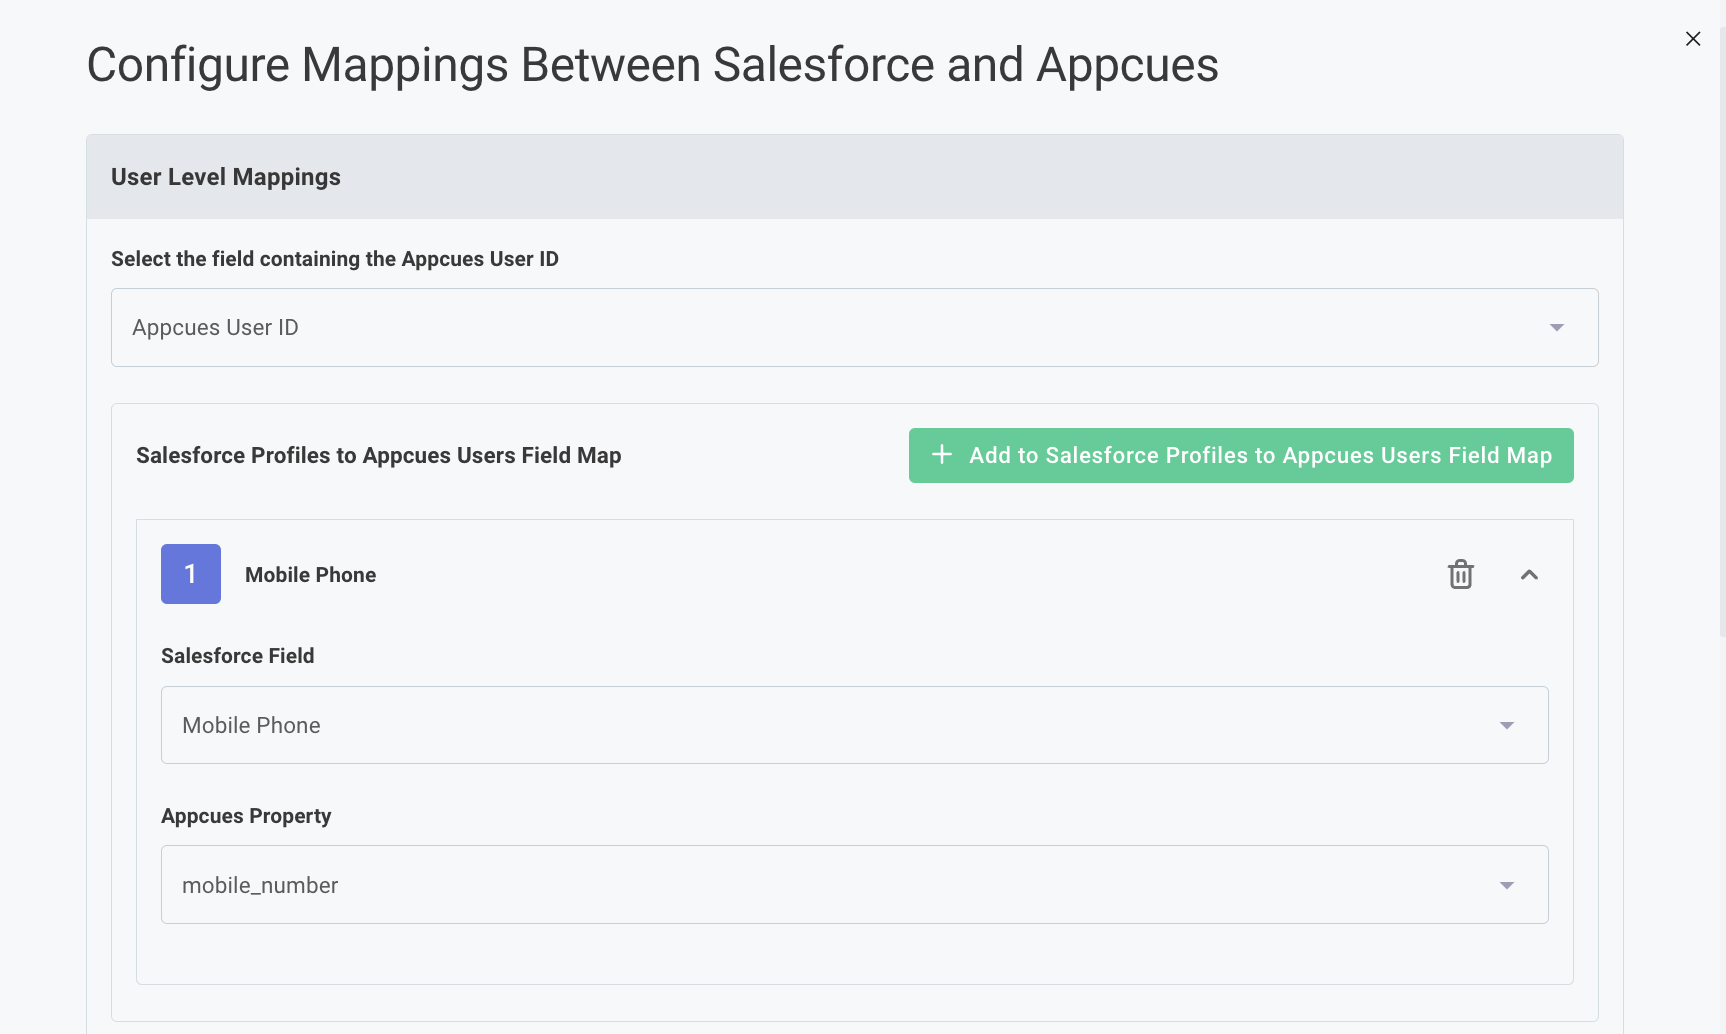
Step 3 - Depending on your sync selection on the previous screen, you'll next be asked to provide more mapping data:
- Which property on the Contact/Lead in Salesforce will be used to associate with the user profile within Appcues.
NOTE: This NEEDS to be whatever value is being used in the Appcues 'identify' call
- Which properties on the Salesforce Contact/Lead you want to send to Appcues user profiles for targeting and segmenting.
NOTE: It is highly recommended that the user manually enter new property fields on the Appcues side for this step.
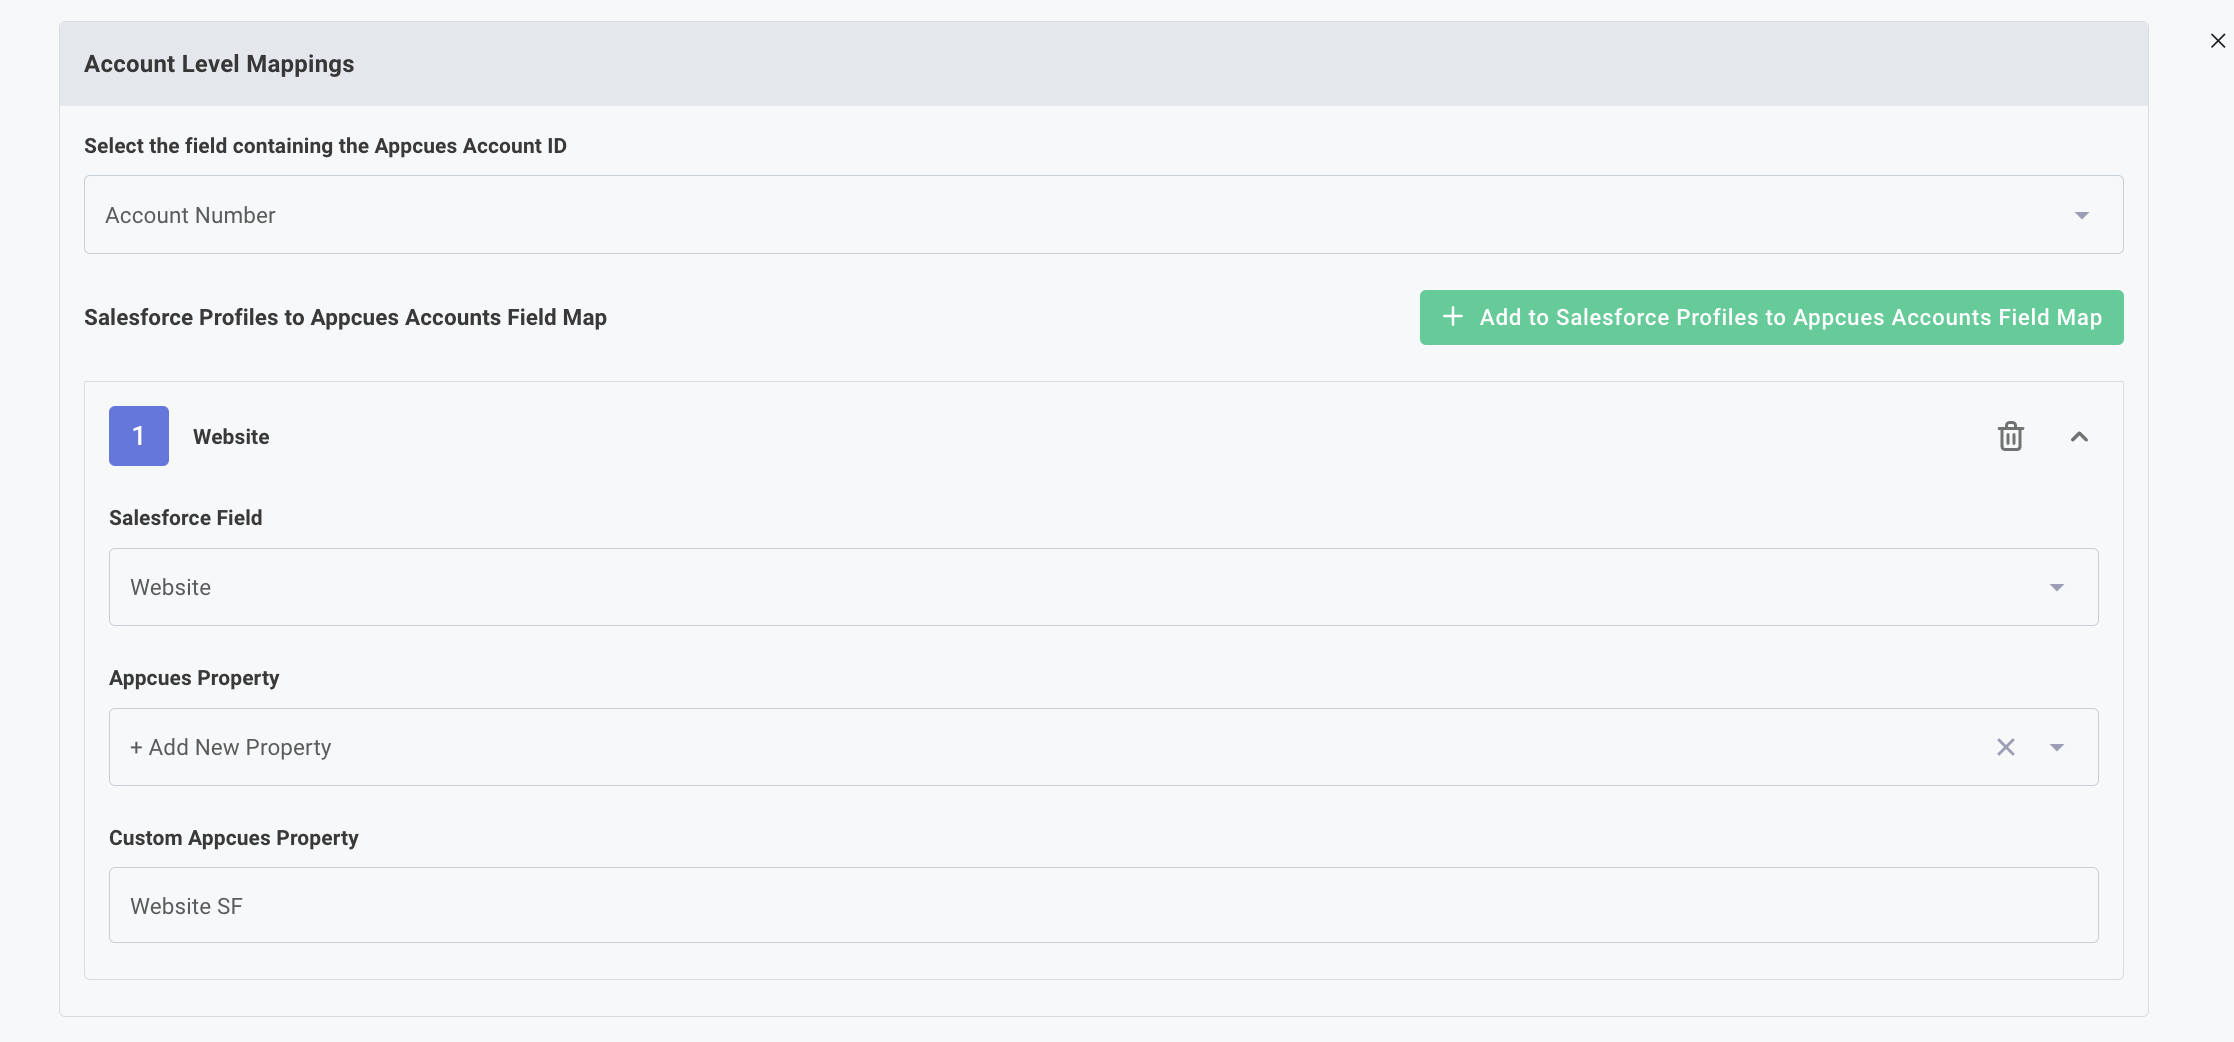
- Which property on the Account record in Salesforce will be used to associate with the account profile within Appcues.
NOTE: This NEEDS to be whatever value is being used in the Appcues 'group' call
- Which properties on the Salesforce Account record you want to send to Appcues account profiles for targeting and segmenting.
Once you click Finish on step 3, the setup wizard will close, and data will begin passing between the two systems.
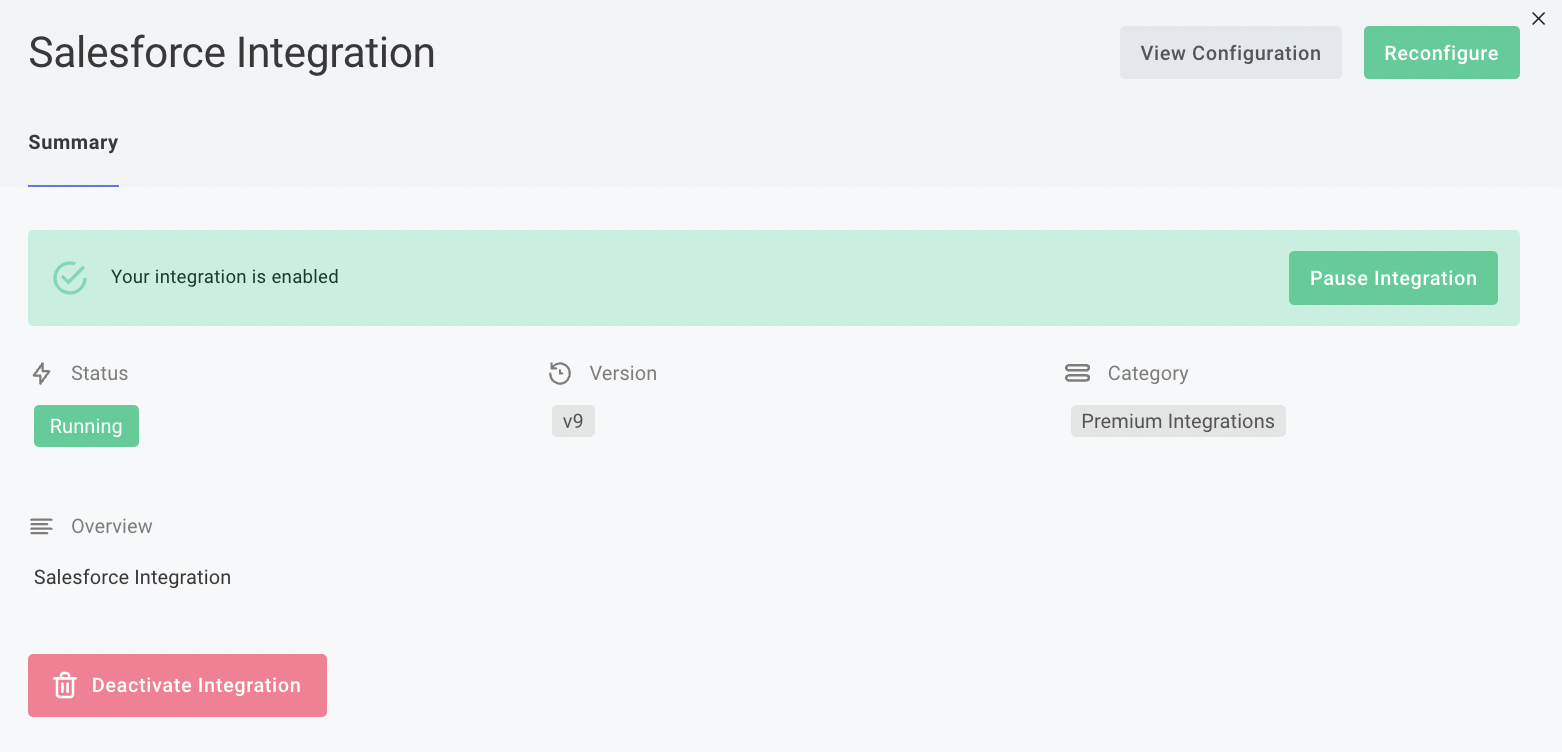
Need to make an adjustment?
Once the integration is enabled, you can click the card at any time and select Reconfigure to adjust any of your current settings, or click Deactivate Integration to disable the integration.
SFDC Permissions
| Permission | Fields | Uses | Object Level Permissions |
|---|---|---|---|
| Lead or Contact (Object) | Any fields you'd like to sync with Appcues | Used to sync fields between the two systems. Note: This can be any object type, including a Custom object. Only the synced record needs to be accessible. |
Create, Edit, Read |
| Event (Object) | Subject, Comment | Used to record Appcues events such as "flow completed". | Create, Edit, Read |
| Customize Application (Profile) | N/A | Sets up workflow rules and actions that send data from Salesforce to Appcues. |
SFDC Events & Activity Data
The Salesforce integration sends a subset of events to Salesforce. For the full list of Appcues events, see our Appcues Events Reference doc.
These will be sent automatically as long as the Appcues > Salesforce integration is complete and the USERID attributes match.
Events that update properties
| Event Name | Display Name | Attribute Name | Attribute Type |
|---|---|---|---|
| appcues:nps_score | Latest NPS Score | score | number |
| appcues:nps_feedback | Latest NPS Feedback | feedback | string |
Events that add events
| Event name | Subject value | Comment value |
|---|---|---|
| appcues:nps_score | Appcues NPS Score Submitted - {{ score }} | {{ score }} NPS score. Submission location: {{ currentPageUrl }} ({{ currentPageTitle }} |
| appcues:nps_feedback | Appcues NPS Feedback Submitted | {{ feedback }} Submission location: {{ currentPageUrl }} ({{ currentPageTitle }} |
| appcues:flow_completed | Appcues Flow Completed - {{ flowName }} | User completed your Appcues flow titled “{{ flowName }}”. |
| appcues:checklist_item_completed | Appcues Checklist Item #{{ itemIndex + 1 }} Completed - {{ checklistName }} | User has completed an item titled, “{{ itemIndex }}”. This is part of the “{{ itemIndex }}” checklist. |
| appcues:checklist_completed | Appcues Checklist Fully Completed - {{ checklistName }} | User has completed all items in the “{{ checklistName }}” checklist. |
| appcues:goal_reached | Appcues Goal Reached - {{ goalName }} | User has completed the goal titled, “{{ goalName }}” |
Configure the Integration with SFDC Integration User License
Want to use the Salesforce Integration user license to authenticate your Salesforce account in the integration setup? Great! The following steps will walk you through how to create a Salesforce Integration user, create a Permission Set, and enable the permissions that are required in Salesforce for the Appcues/Salesforce Integration to work properly.
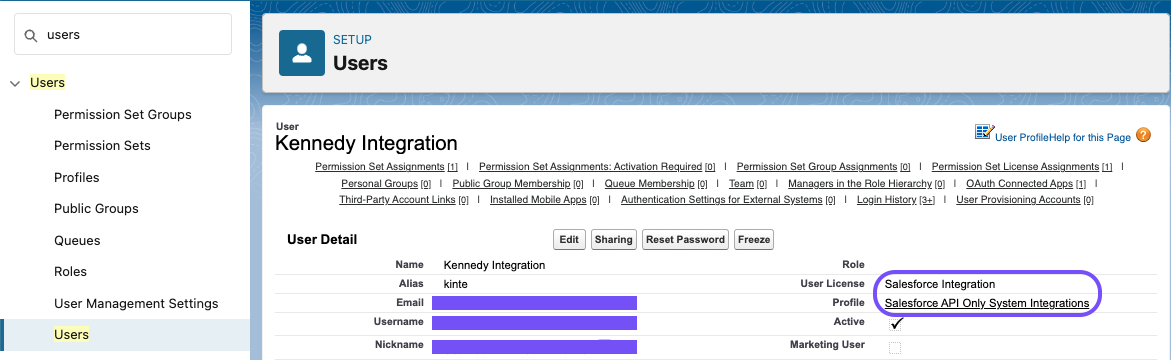
Create a New User
In Salesforce….
- Click Setup on the top right
- Search “users” in the Quick Find search bar
- Click Users
- Click New User
- Give your new user a name, email, username, and nickname
- Set the User License to “Salesforce Integration”
- Set the Profile to “Salesforce API Only System Integrations”
- Save the user
Create a New Permission Set
In Salesforce…
- Click Setup on the top right
- Search “Permission Sets” in the Quick Find search bar
- Click Permission Sets
- Click New
- Give the new permission set a label, API name, and description (optional)
- Leave the License set to —None—
- Save the permission set
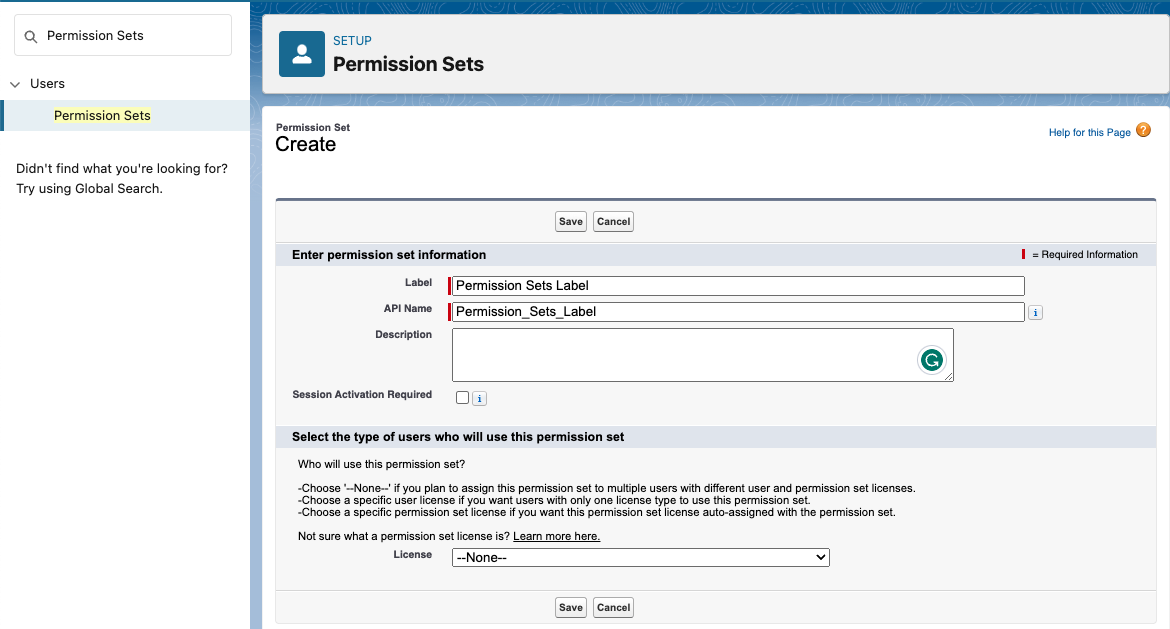
Note: setting the License at this point will not give access to the full list of Object Settings and System Permissions required in the next step.
Object Settings and System Permissions
In Salesforce…
- Navigate to Permission Sets
- Click on the Permission Set label created in the previous section (opens Permission Sets Overview)
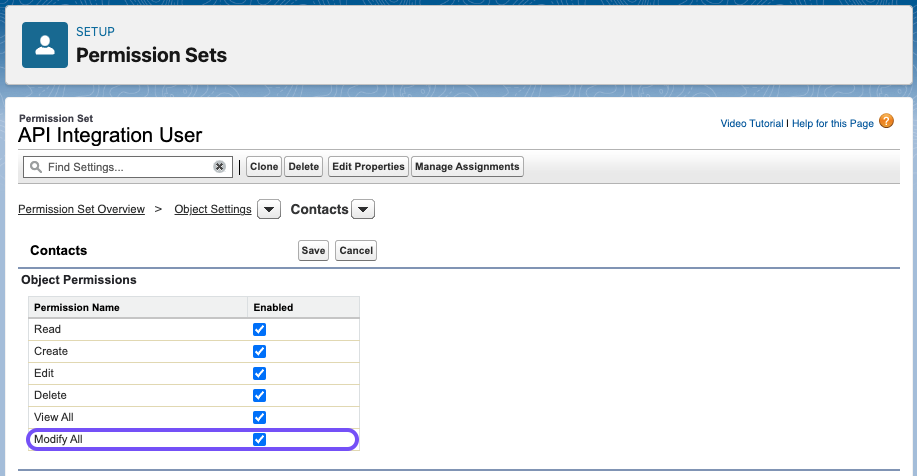
- Click Object Settings
- Click Contacts and/or Leads Object
- Modify permissions:
- Click Edit
- Check the Modify All box (automatically checks necessary boxes)
- Save
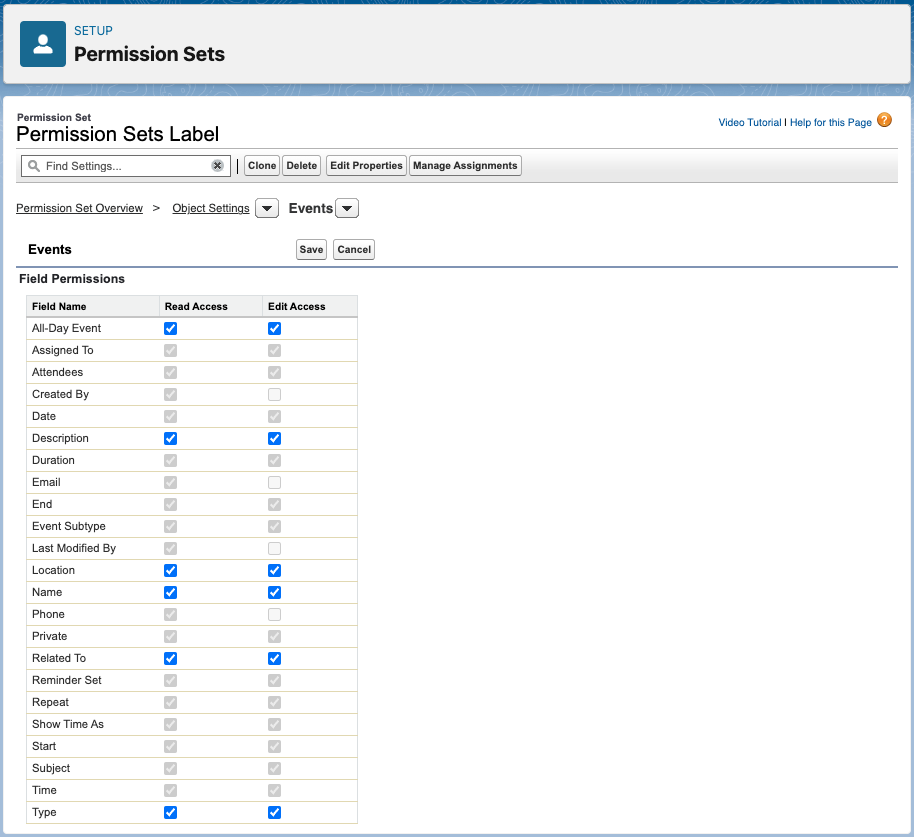
- Click Events Object
- Modify permissions:
- Click Edit
- Check all available Edit Access boxes
- Click Save
- Return to the Permission Set Overview of your new Permission Set
- Click System Permissions
- Modify permissions:
- Click Edit
- Check the API Enabled box
- Click Save

Assign Permission Set to Salesforce Integration User
- Return to the Permission Set Overview of your new Permission Set (see steps 1 & 2 in the section above)
- Click Manage Assignments
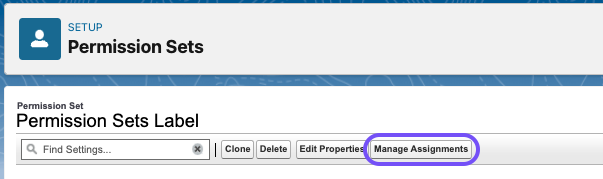
- Click Add Assignment
- Check the box next to the name of your Salesforce Integration user
- Click Next
- Click Assign
Authenticate Salesforce Integration in Appcues Studio with Salesforce Integration User
- Active Salesforce integration card in Appcues Studio
- On the Salesforce Authentication step, click the dropdown to authenticate your Salesforce account
- Click Add a new account
- Give the authentication a name and choose the instance type
- Click Create
- Log into Salesforce with your Salesforce Integration User’s email and password
- Proceed with the rest of the integration configuration settings