Track events without code using Click to track
Use Click to Track to define events by selecting elements directly in your application
Table of Contents
Track clicks, hovers, and text input in your application — no developer required. Click to Track lets you define events by selecting elements directly in the Appcues Builder, then use those events for targeting, triggering, segmentation, and Goals.
Also known as: Click-to-Track, CTT, builder events, tracked events
Prerequisites
- The Appcues snippet is installed on the page where you want to track events.
- The Appcues Chrome Extension is installed and up to date.
Open Click to Track
- Navigate to the page in your application that contains the element you want to track.
- Click the Appcues Chrome Extension icon in your browser toolbar.
- Select Create a Track Event. The Appcues Builder opens in event-track mode.

Define an event
- Click the element you want to track. A selection highlight appears around it.
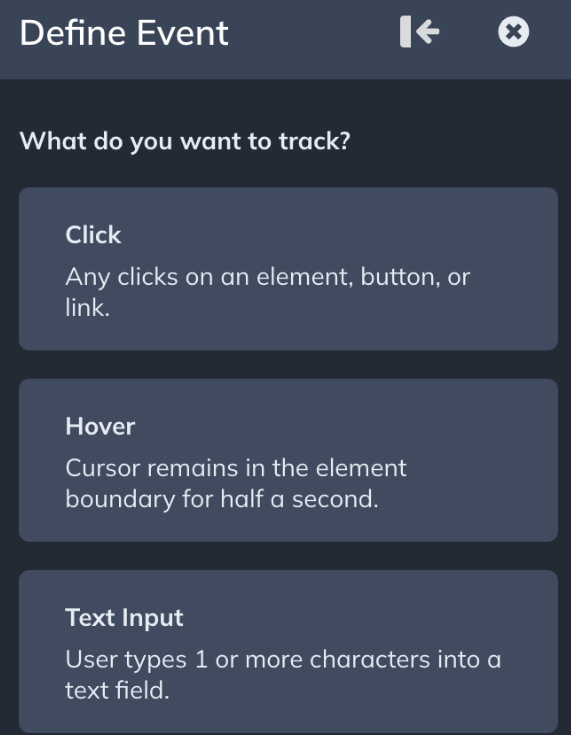
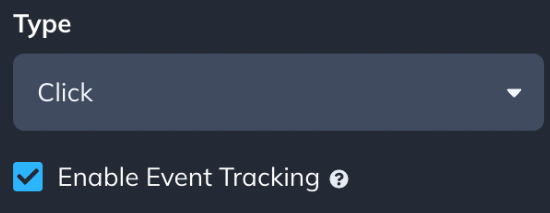
- Choose an event type:
- Click — fires when a user clicks the element.
- Hover — fires when a user holds their cursor over the element for half a second. Moving the cursor before that resets the timer.
- Text Input — fires when a user types one or more characters into a text field. The event fires once per focus session. If the user clicks away and returns to type again, it fires a second time.
- Enter a name for the event. Use a consistent naming convention your team can follow (for example,
Feature - Action - Location).
Event names cannot be changed after saving. Choose carefully.

- Refine the element selector if needed. Adjust the CSS selector to ensure it targets the correct element. See Troubleshoot element targeting to learn more.
For the best results, assign unique IDs to elements you intend to track. If a selector matches more than 10 elements on the page, Appcues blocks the save until you make it more specific.

- To track additional elements under the same event, click +Add target element. A new Element section appears with its own Refine Selection controls and selector field. Click the element on the page or manually enter its CSS selector. The event fires when a user interacts with any of the listed elements. This lets you group related interactions into one event — for example, tracking clicks on a button that appears in different locations with different selectors — instead of managing several separate events.
Repeat for as many elements as needed. Each element section shows whether the selector is unique and can be refined or deleted independently using the delete icon in its top-right corner.

- Configure the URL settings:
- Only on this URL — tracks the event on the specified URL only.
- On any Appcues installed URL — tracks the event on every page where the Appcues snippet is installed and the element exists. Use this for elements that appear across many pages, like navigation items.
-
On URLs that match… — tracks the event on a set of URLs or a wildcard pattern. Use this when the element appears on pages with dynamic URLs (for example,
website.com/profile/*matcheswebsite.com/profile/123,website.com/profile/456, etc.). If targeting multiple URLs, add them separated by commas.
URL targeting is shared across all selectors in an event. There is no per-selector URL configuration.

- Click Test, then interact with the element to confirm it fires correctly.
- Click Save.
Confirm it worked
- Open Settings > Data > Events in Appcues Studio. Your event appears labeled as "Track Event (Builder)."
- Event data may take up to 5 minutes to start populating after creation.
Manage events in the event list
After saving, the event appears in the event list sidebar in the Builder. From here you can:
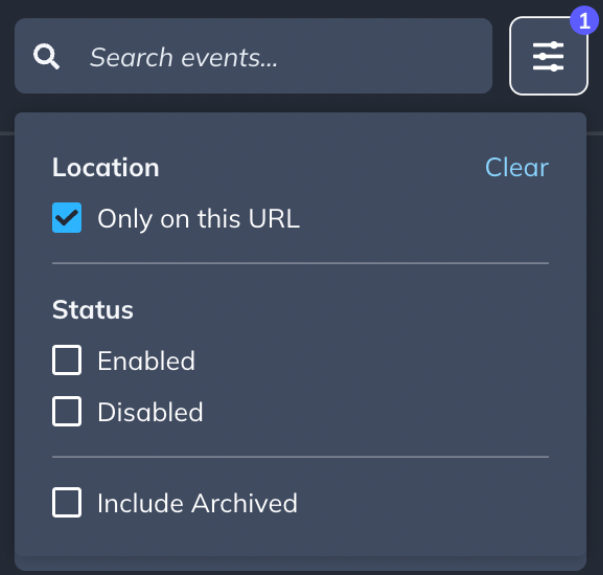
- Filter events by URL match, status (Enabled, Disabled, Archived), or search by name.
- Select an event to view its 7-day and 30-day counts, creation date, and last status change.
- Click Define New Event to create another event on the current page.
Enable or disable an event
Disabled events stay in your event list but stop firing. Use this to pause tracking temporarily without losing the event configuration.
- Open the event list sidebar in the Builder.
- Select the event you want to update.
- Toggle the Enabled/Disabled switch.
When an event is disabled, Appcues stops tracking interactions with that element. Re-enable it at any time to resume tracking — no need to recreate the event.
New events default to Enabled when you save them. If you want to set up an event for later use, toggle it to Disabled before saving.
Archive an event
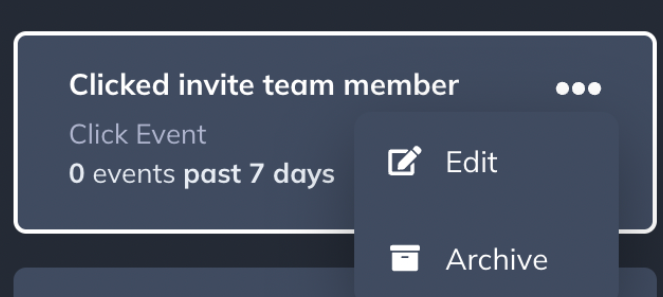
- Click the … menu next to the event in the event list.
- Select Archive. This disables tracking, removes the event from the event list, and removes it from the Events Explorer in Appcues Studio.
- To restore an archived event, open the … menu and select Restore.
Use Click-to-Track events
Once created, these events are available across Appcues:
- Target Experiences based on whether users have or haven't performed the event.
- Trigger Flows when the event fires.
- Build Segments around user behavior.
- Measure success with Goals.
- Analyze activity in the Events Explorer.
- Send events to third-party tools with the Events Broadcaster add-on.
Tips for element selection
- Select elements inside dropdowns: Hold Shift while in define mode to keep dropdown menus open so you can click elements within them. This is the same method used to place Tooltips on hidden elements.
- Keep selectors specific: If your selector matches more than 10 elements, Appcues requires you to refine it before saving. See Troubleshoot element targeting for more.
-
Assign unique IDs: Adding unique
idattributes to trackable elements eliminates most selector issues. See Prepare your Frontend for Appcues for more.
Decide which events to create
Define events you plan to actively use — don't create events speculatively. Good candidates are events you will use for:
Feature adoption
- User clicks "Try [Feature Name]" button
- User opens a settings page or tab for the first time
- User clicks "Upgrade" or "See Plans"
Onboarding milestones
- User clicks "Create first [project/workspace/report]"
- User clicks "Invite team member"
- User clicks "Complete profile" or "Upload avatar"
Navigation and engagement
- User clicks a main navigation menu item (e.g., "Dashboard", "Reports", "Integrations")
- User hovers over a help icon or info tooltip
- User clicks "Export" or "Download"
Conversion and expansion signals
- User clicks "Start free trial"
- User clicks "Contact sales" or "Book a demo"
- User clicks "Add payment method"
Search and input behavior
- User types in a search bar (Text Input event)
- User types in a filter or query field
If the event isn't firing
- Confirm the element still exists on the page and the CSS selector matches it.
- Check that the event status is Enabled (not Disabled or Archived).
- Verify the URL settings match the page where you're testing.
- Make sure the Appcues Chrome Extension is up to date.
- If the selector matches more than 10 elements, refine it to be more specific.
If the event still isn't working, collect the following and contact Appcues support:
- The event name and URL where it should fire
- The CSS selector shown in the event settings
- The user ID of the affected user
- A screenshot or screen recording showing the issue
- Steps to reproduce the problem