Create a Workflow
Set up start criteria, finish criteria, and advanced settings for a new Workflow
Table of Contents
From Studio, go to Workflows > Create a Workflow. Enter a name and you'll land on the Workflow canvas, where you configure who enters, what happens, and when they exit.
Workflows are limited to 75 total nodes.

Start criteria
The Start node controls who can enter the Workflow and what causes them to begin.
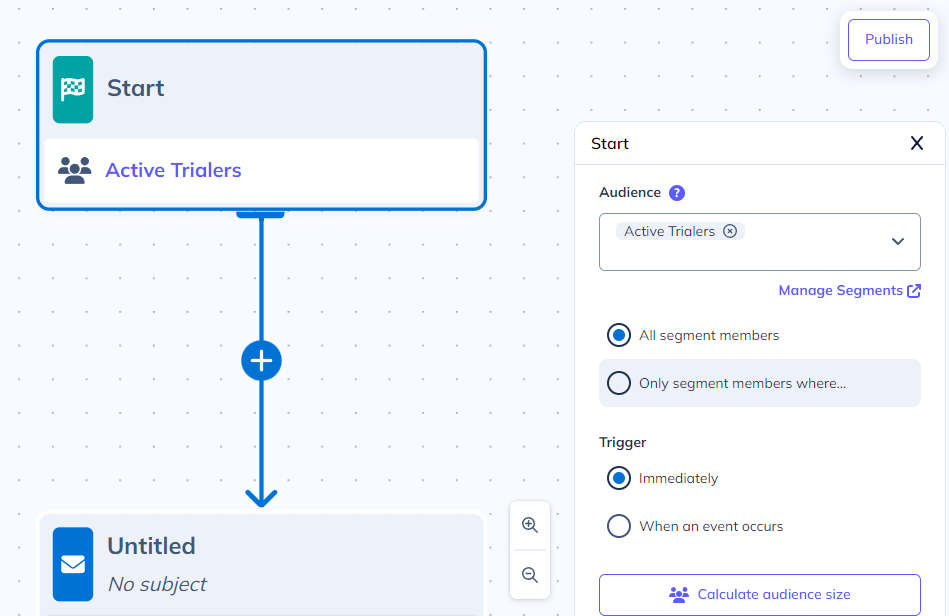
Audience
Select one or more segments. Users in any selected segment are eligible to enter the Workflow.
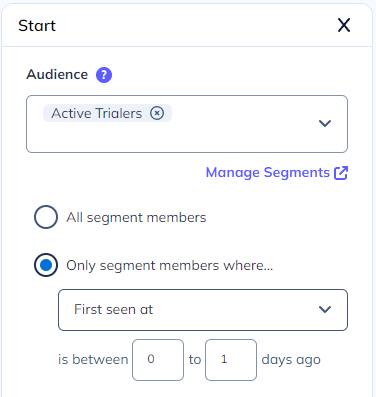
To narrow the audience further, select Only segment members where… and choose a time-based user property. For example, to target only brand-new trial users, select your "Active Trialers" segment, then set First seen at to between 0 and 1 days ago. Only users who match at the moment of evaluation will enroll.
Changes to the starting segment only affect new users going forward — users already in the Workflow are not removed.
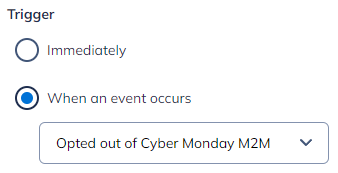
Trigger
Choose what causes an eligible user to start the Workflow:
- Immediately — Users enter as soon as they match the audience criteria. This includes users who already qualify at publish time and anyone who qualifies afterward.
- When an event occurs — Users enter when they perform a specific event. Users who triggered the event up to two hours before publish will also be enrolled.
Finish criteria
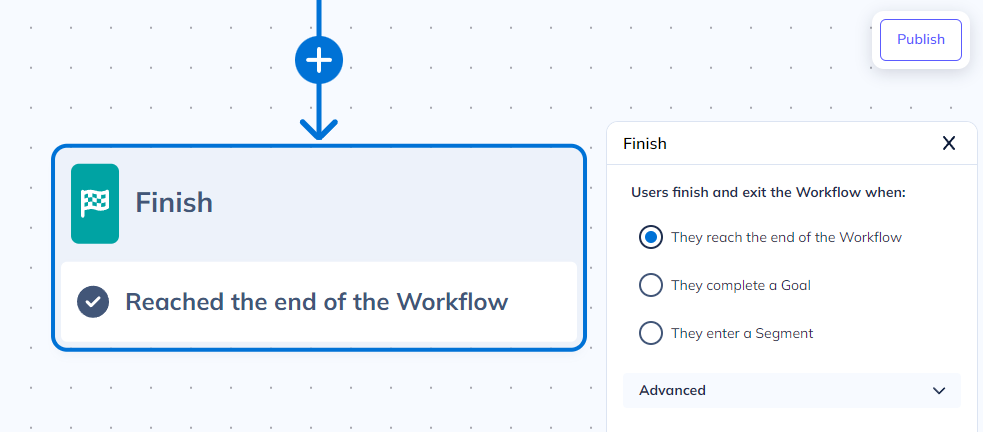
The Finish node controls when users exit the Workflow.
Exit conditions
Pick one:
- They reach the end of the Workflow — Users must pass through all required nodes. Only users who time out or no longer qualify (if applicable) exit early.
- They complete a goal — Users exit when they complete the selected goal, even if they haven't reached every node. Users who have already completed the goal are excluded from entering the Workflow entirely.
- They enter a segment — Users exit when they join the selected segment, even if they haven't reached every node. Users already in that segment are excluded from entering.
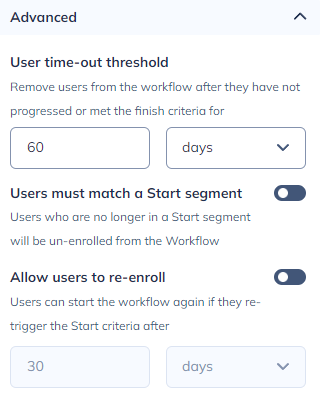
Advanced settings
These settings are on the Finish node's configuration panel.
- User time-out threshold — A mandatory ceiling on how long a user can remain in the Workflow without progressing or finishing. The default is 60 days; the maximum is 9,999 days. Users who exceed this threshold exit early without being marked as finished.
- Users must match a Start segment — Toggle this on to require that users remain in one of the audience segments from the Start node for the entire duration. If a user falls out of every Start segment, they exit early without being marked as finished. This check only considers segment membership, not any time-based refinements you added.
- Allow users to re-enroll — Enable this to let users who have finished the Workflow start it again after a waiting period you define. Note: re-enrollment is not available when goals are used as the trigger or finish criteria. If the trigger is "Immediately," users still in the Start segment will restart the Workflow as soon as the waiting period ends.
Publish
Click Publish when the Workflow is ready. The publish screen shows an estimate of how many users currently qualify. All content inside the Workflow (emails, push notifications, Flows) is published at the same time.
Before publishing, confirm that your account's physical address is set in email sender settings. Publishing will fail without it.
Modify a published Workflow
To edit any step in a live Workflow, unpublish it first. Users' progress is saved and resumes when you republish.
Use caution when removing steps from a Workflow that has already run. Deleting a node that users are currently waiting on can leave those users in an orphaned state where they can no longer progress.
What to read next
With the Workflow shell in place, add nodes to the canvas: