Add "Snooze" / "Show later" options in a Flow
Learn how to build a flow that includes an option to snooze and show later.
Table of Contents
This will cover how to create an option to snooze a flow through the use of custom buttons and tracked events. Following the steps in this article will allow you to add a button(s) in your flow that users can click on to have the flow shown to them at a future date dependent on your preference!
Build Guide
This use case will cover:
- Build the step
- Add custom buttons
- Disable the skippable option
- Activate the events
- Targeting / Settings
Step 1: Build the step
The main thing to set this up is creating a decision point for the user using buttons. This is accomplished with Modals, Slideouts, and Tooltips at the start of the flow that includes the flow options. From the flow patterns, you can then add the decision point for your users in the form of buttons. Example:
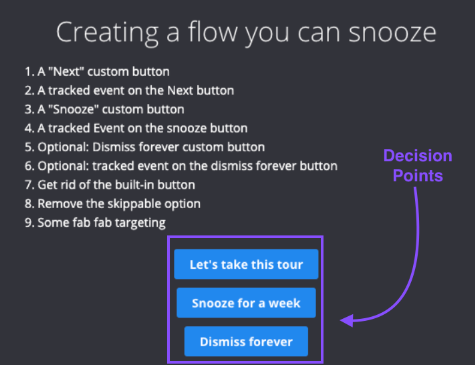
Step 2: Add custom buttons
Each button on the first modal, slideout, or tooltip is called a custom button that comes from selecting the 'Button' block in the Builder.
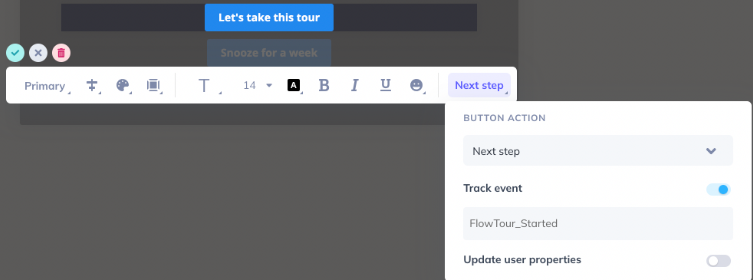
The "Let's take this tour" button is set up like so:
- Button action: Next step
- Track Event enabled - this will allow you to track and leverage this user action into the targeting criteria for your flow.
-
Event name: [UniqueIdentifier_completed] - the unique identifier should be related to the flow name so you can create a snooze button for multiple flows and be able to tell the events apart. We'll be adding a name convention like "_Started" indicating that they at least started the tour.
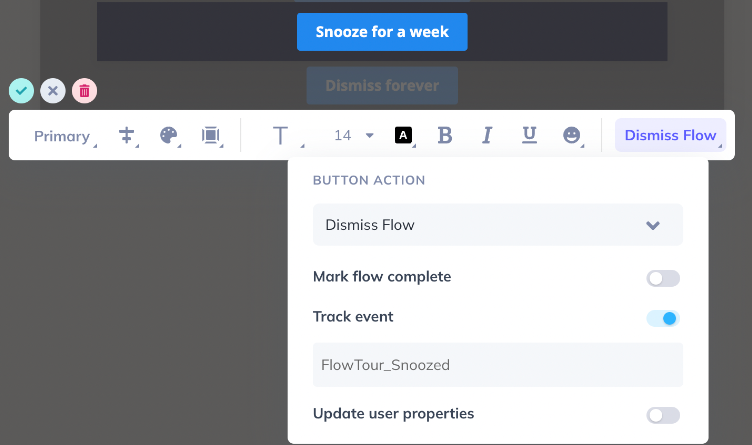
The "Snooze for a week" button is set up like so:
- Button action: Dismiss Flow
- Track Event enabled - this will allow you to track and leverage this user action into the targeting criteria for your flow.
- Event name: [UniqueIdentifier_Snoozed] - the unique identifier should be related to the flow name so you can create a snooze button for multiple flows and be able to tell the events apart. For the snooze button, we'll add a convention of "_Snoozed", indicating that they have chosen to snooze the flow.
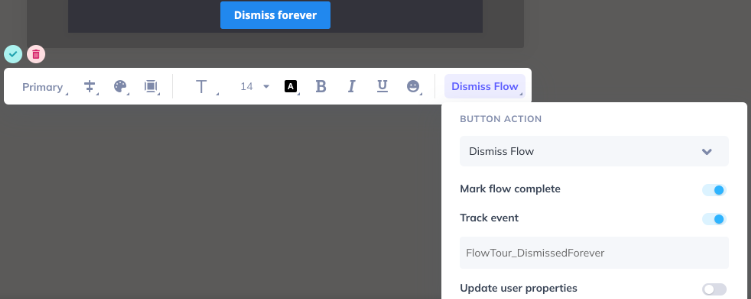
Optional: Adding a "Dismiss forever" button. This is helpful if you want to let a user never see the flow again.
The "Dismiss forever" button is set up like so:
- Button action: Dismiss Flow
- 'Track Event' option enabled - this will allow you to track and leverage this user action into the targeting criteria for your flow.
- 'Mark flow as complete' option enabled
- Event name: [UniqueIdentifier_DismissedForever] - the unique identifier should be related to the flow name so you can create a snooze button for multiple flows and be able to tell the events apart. For the dismiss button, we'll add a convention of "_DismissedForever", indicating that they have chosen to dismiss this flow permanently.
Step 3: Disabling the skippable option
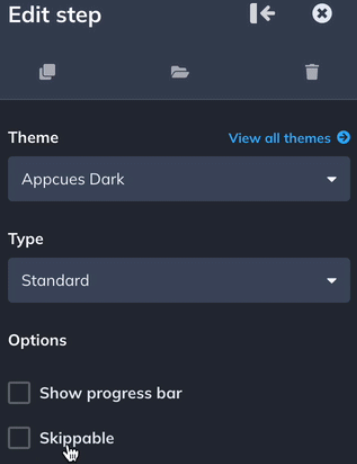
Disable the "Skippable" option. We need the user to be forced to use one of the custom buttons.
Step 4: Activate the Events
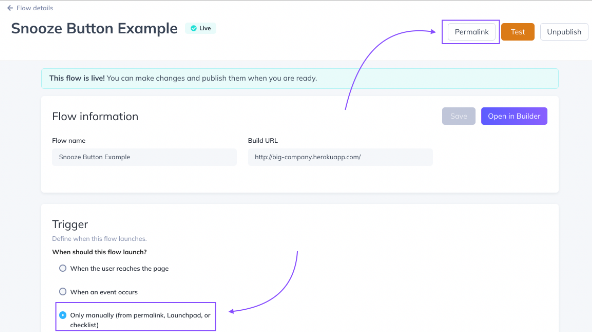
The events you set up won't show up for targeting until they have been done at least once. One way to activate this so we can select and see it in Studio is to set the 'Trigger' option in the flow's settings to show "Only manually" and publish the flow. Once Published, trigger the flow via permalink.
From there you need to activate the flow a few times, and each time select a different option. That will make each of the events trigger. (note: might take a few minutes to make the round trip and show in the targeting options... patience young Padawan.)
Alternatively, you can also use “Test” mode to trigger these buttons.
Step 5: Target the Flow
After activating the events and seeing them reflected in the Events Explorer (under Application Events), you can then unpublish the flow to leverage these events.
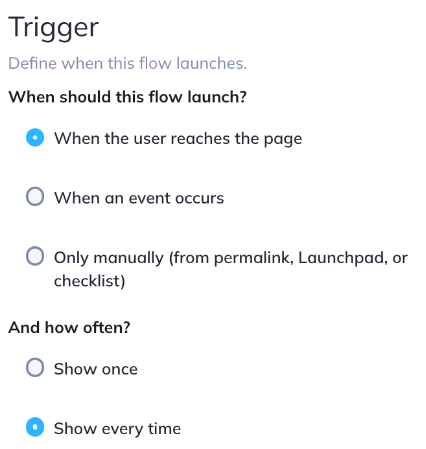
Change the Trigger option back to "When the user reaches page" and set it to "Show every time".
Then in 'Audience' Targeting, and here's the fun part, use the tracked events from the buttons to create these conditions/logic:
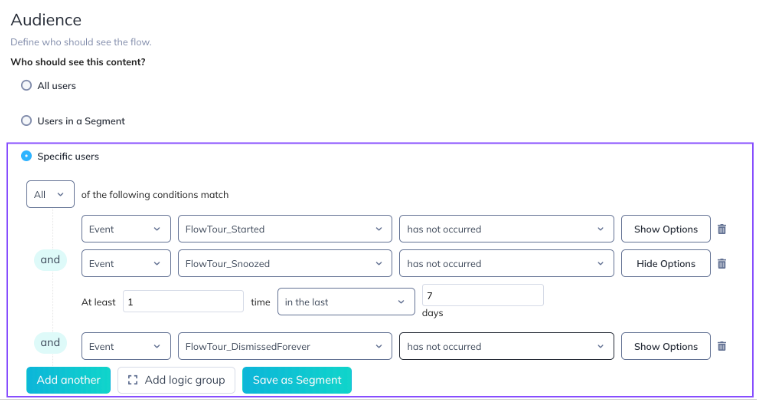
The flow will show until the user has clicked the "see tour" or "dismiss" button. Once the user clicks on any of those buttons, those will turn false when clicked and make the whole logic invalid, making the flow ineligible for the user.
If, instead, they click the "snooze" button, it turns that logic invalid too until enough time passes to be outside the "in the last X days" option, after which it turns true again and the flow will show again if they haven't clicked "see tour" or "dismiss".
"Dismiss forever" note: if you don't have a dismiss forever option then the targeting is the same, just without that event logic. The only way to get the flow to go away forever is to click the "see tour" option.