Mobile Debugger
Learn how to launch the mobile Debugger and how to use it to validate your installation and data available.
Table of Contents
Overview
Once the mobile SDK is installed on iOS, Android, or cross platform, your application can take advantage of the Appcues Mobile Debugger tool inside of your app. This tool is bundled as part of the SDK. Use cases for the debugger include:
- Validating the SDK is installed correctly and sending data to Appcues
- Inspecting the Screen names and Event names being sent to Appcues for usage in flow targeting
- Inspecting auto-properties being collected by the SDK for use in Audience segmentation or other flow targeting needs
- Viewing the fonts available in the application that can be used in the mobile builder when building flows
Launching the debugger
There are multiple options to open the debugger inside of your mobile application - any of the following can be used:
- Scan the QR code on your Studio Installation Settings page for each registered app
- Open the Debugger URL on the device you'd like to test
https://mobilebuilder.appcues.com/?type=debugger&appId=[AppID] - In your application code, call
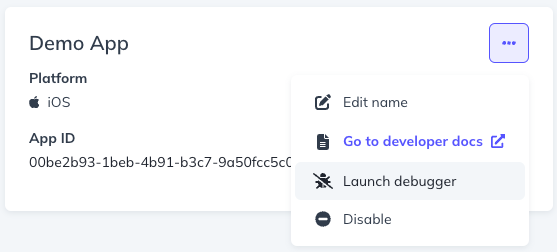
appcues.debug()directly, from a button or menu inside of the application. Note that this is not always feasible and is not something you want to make visible to the end-users of your application. - Execute a deeplink to the Appcues SDK that will launch the debugger. The link is of the form
appcues-{application_id}://sdk/debuggerThis link can be tapped on the device and it will open your app and open the debugger on top. Note that this requires the SDK to have been properly installed with the URL scheme for the Appcues SDK configured. Please refer mobile developers to the SDK installation docs for these details.
Interacting with the debugger
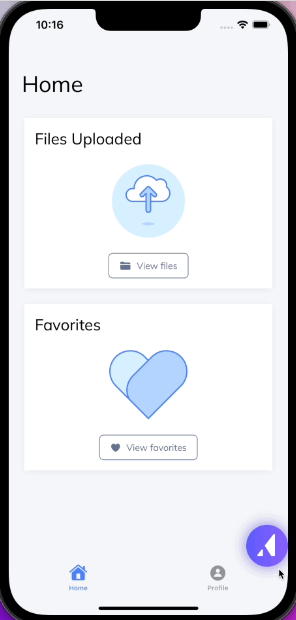
When the debugger launches, a small floating button with the Appcues logo will appear on top of your app's content. This button can be dragged around the screen to reposition and dragged to the bottom center of the screen to dismiss.
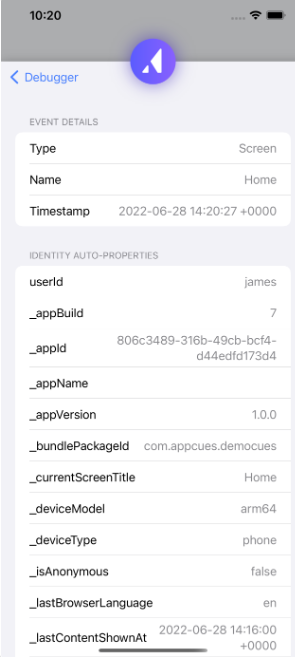
Tap on the button to open the expanded view of the debugger. This view allows you to confirm that your SDK is installed, connected to Appcues, a user has been identified and screens are being tracked. These are the basic diagnostics to use to confirm a successful SDK installation.
At the bottom of the page, there is a section titled "All Recent Events". This tracks recent analytics sent from the Appcues SDK, and you can tap on each line to inspect more details. These analytics will include: screens tracked, custom events, user identification, and flow events. Tapping on a screen tracking item will allow you to see the name of each screen, which can then be used in Studio when setting up targeting for specific screens by name. In the example below, the screen name is "Home" - this would be the exact text you would need to type into the flow targeting for this screen.
When the debugger is minimized, you can browse around the app and see the screen names in a small floating text bubble above the Appcues floating debugger button, for quick reference. Screen names being tracked are dependent on how the SDK was installed and configured by the mobile developer for your application. If screens are not being tracked as expected, please ask your mobile developer to consult the SDK installation documentation. Similarly, any custom events your application is tracking will be displayed on the floating text in the minimized debugger state, or in the "All Recent Events" section when the debugger is maximized.